Automotive / Parts & Accessories
Toyota RAV4 2006 Glove Box Lock Cylinder Replacement Guide
A detailed technical service bulletin providing step-by-step instructions for replacing the glove box lock cylinder on a 2006 Toyota RAV4. Includes procedures for removal, disassembly, and reinstallation.
Table of contents
Manual images
Click an image to enlargeQuick guide from the manual
This document provides the official procedure for replacing the glove box lock cylinder on 2006 model year Toyota RAV4 vehicles. It covers the complete process from removing the glove box assembly to reinstalling the new lock cylinder and latch.
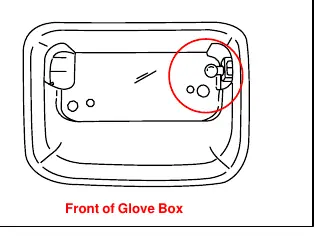
Removing the glove box
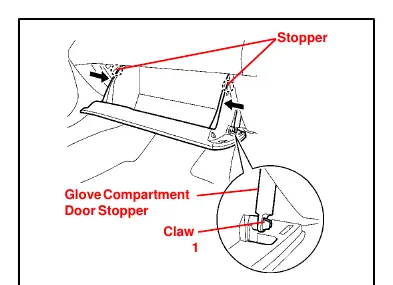
- Open the glove box and remove the door stopper from the outside panel by depressing the claw and sliding the stopper off.
- Press in on the glove box to release the stop tabs.
- Pull the glove box toward you to release it from the two hinge points.
Removing the latch and lock cylinder
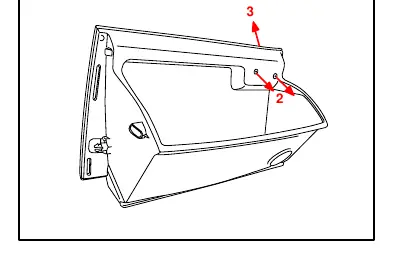
- Remove the two Phillips head screws from the inside panel of the glove box door.
- Pull the latch out toward the front. Note: Be careful, as it is connected to release arms on either end.
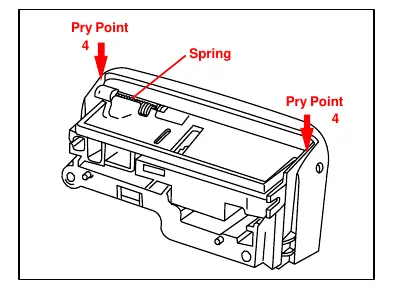
- Remove the latch cover on the front of the latch assembly by using a flathead screwdriver to pry the inside of either end.
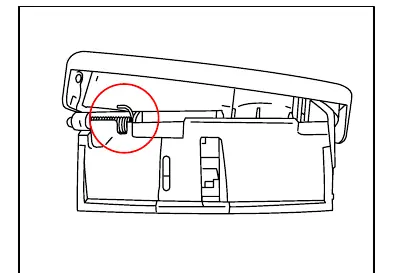
- Important: Take care not to lose the spring found behind the latch cover, as it is necessary for reassembly.
- Looking at the back of the lock cylinder, push out the three tabs.
- While pushing on the tabs, slide the gold tab up and push the lock cylinder out. Placing slight pressure on the key cylinder during this step helps keep the tabs spread apart.
- Lightly sand any burrs off the metal tab on the back of the lock cylinder after removal.
Reinstalling the lock cylinder and latch
- Insert the lock assembly into the new latch assembly cover with the gold tab facing down until it clicks.
- Reinstall the spring in the new latch assembly. Ensure the tip of the spring is pulled to its most downward point; otherwise, the latch will not operate properly.
- Ensure the slide portion of the back of the latch assembly is fully extended.
- Slide the latch cover over the new latch assembly until both pivot pins are seated.
- Press in on the glove box slide to make the ball end visible, then insert the latch assembly into the glove box until it clicks.
- Reinstall the two screws in the back of the glove box assembly.
- Reinstall the glove box into the vehicle and reattach the door stopper.
- Confirm the glove box operates smoothly and the key cylinder is functional.
Manufacturer information
Toyota Motor Corporation
Practical help
Common problems
Latch is difficult to remove
The latch is connected to release arms on either end; pull carefully to avoid damage.
Spring lost during disassembly
The spring behind the latch cover is essential for reassembly; ensure it is secured during the process.
Latch does not operate properly after reassembly
Ensure the tip of the spring is pulled to its most downward point when reinstalling the latch cover.
Before use
- Flathead screwdriver
- Phillips head screwdriver
- Sandpaper (for removing burrs)
- New lock cylinder and latch assembly
Images and diagrams
- Diagrams illustrate the specific pry points for the latch cover and the location of the spring.
- Visuals show the orientation of the gold tab and pivot pins during reassembly.
Model compatibility
- This procedure is specifically for 2006 model year RAV4 vehicles.

Manual page author
Michael Turner
Technical manual editor
Reviews PDF manuals for structure, safety notes, and practical product details so readers can find the right information quickly.