Tools / Measuring Tools
User Manual for Traceable 100-Hour Timer
Quick guide for the Traceable 100-Hour Timer. Learn how to set the clock, configure countdown and count-up timing for 1-4 channels, and replace batteries.
Table of contents
Quick guide from the manual
The Traceable 100-Hour Timer is a multi-channel device capable of tracking up to four independent timing events simultaneously. It features both countdown and count-up modes, a clock function, and unique alarm patterns for each channel. The device is powered by two AAA batteries and includes magnets and a hanging tab for easy mounting.
Clock setting
To set the time of day:
- Press and hold the CLOCK button for 3 seconds until the display flashes.
- Use the HR, MIN, or SEC buttons to set the desired time. Press and hold these buttons to advance rapidly.
- To toggle between 12-hour (AM/PM) and 24-hour format, press CLEAR while the display is flashing.
- Press CLOCK to save your settings.
Countdown alarm timing
Single Channel:
- Select a channel (T1–T4).
- Set the desired time using HR, MIN, and SEC buttons.
- Press START/STOP to begin.
- When the time expires, the alarm sounds for one minute, and the COUNT UP indicator appears. Press START/STOP to silence the alarm.
1-4 Channels:
- Press the desired channel button (T1, T2, T3, or T4).
- Set the time using HRS, MIN, or SEC.
- Press START/STOP to begin.
- Each channel has a unique alarm pattern (T1 beeps once, T2 twice, etc.).
- To stop the alarm, press START/STOP.
Count-up timing
Single Channel:
- Select a channel (T1–T4).
- Press START/STOP to begin counting up.
- Press START/STOP to stop, then CLEAR to reset to 00:00 00.
1-4 Channels:
- Select the channel (T1–T4).
- Press CLEAR to reset to 00:00 00.
- Press START/STOP to begin.
- To run all four channels simultaneously, clear each channel individually and start them one by one.
Battery replacement
If the display is incorrect, blank, or the timer is not functioning properly, replace the batteries:
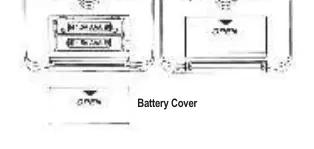
- Slide open the battery cover on the back of the timer.
- Insert two (2) new AAA batteries, ensuring correct polarity as indicated in the compartment.
- Replace the battery cover.
Troubleshooting
If the timer experiences operational difficulties, the most common cause is low battery power. Replacing the batteries with fresh ones typically resolves these issues.
Warranty and service
For warranty, service, or recalibration, contact Traceable Products:
12554 Old Galveston Rd. Suite B230, Webster, Texas 77598 USAPhone: 281 482-1714Fax: 281 482-9448Email: [email protected]: www.traceable.com
Official resources from the manual
Practical help
Common problems
Timer does not function properly or display is incorrect
Replace the two AAA batteries with fresh ones.
Alarm is sounding but I cannot hear it
If multiple channels reach zero, only the alarm for the channel currently shown on the display will be heard.
Before use
- Insert two new AAA batteries.
- Check battery polarity in the compartment.
- Select a timing channel (T1-T4) before setting time.
- Ensure the display is not flashing when attempting to start a timer.
Specs in practice
- Alarm Pattern
- Unique beep patterns for each channel: T1 beeps once, T2 twice, T3 three times, T4 four times.
- Battery Type
- Requires two (2) AAA batteries.
Images and diagrams
- Front panel includes HR, MIN, SEC buttons, CLOCK button, START/STOP button, and channel selectors (T1-T4).
- Back panel features a hanging tab, magnets for mounting, and the battery cover.
Model compatibility
- ISO 9001:2015 Quality Certified.
- ISO/IEC 17025:2017 accredited as a Calibration Laboratory by A2LA.

Manual page author
Emily Carter
User documentation editor
Prepares concise manual descriptions and highlights the most useful setup, operation, and maintenance information for readers.