Garden / Gazebos & Canopies
Assembly Instructions for Veikous 12x20 Hardtop Gazebo
A comprehensive assembly guide for the Veikous 12x20 Hardtop Gazebo. This manual provides step-by-step installation procedures, a list of required tools, safety warnings, and essential anchoring instructions for both cement and grassy...
Table of contents
Manual images
Click an image to enlargeQuick guide from the manual
This document provides assembly instructions for the Veikous 12x20 Hardtop Gazebo. Please read the entire manual before beginning assembly. Important: Three or more people are required for assembly. Do not fully tighten screws until the assembly is complete to ensure proper alignment.
Tools required
The following tools are required for assembly but are not included in the boxes:
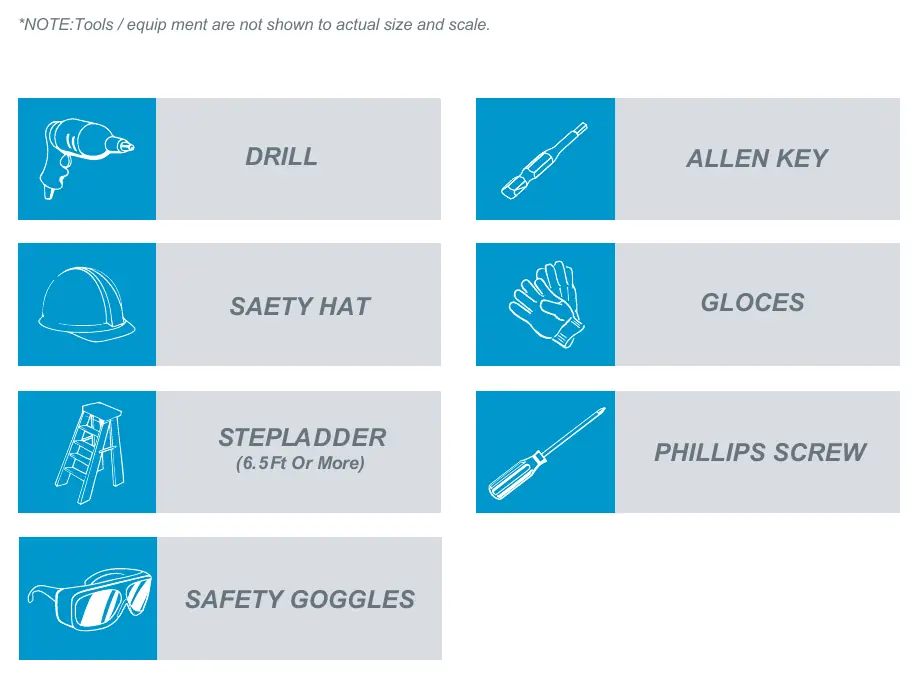
- Drill
- Allen Key
- Stepladder (6.5ft or more)
- Phillips screwdriver
- Safety hat
- Safety goggles
- Gloves
Safety and preparation
- Check all parts against the parts list before starting.
- Check packing material for small parts that may have fallen out during shipment.
- This structure is not intended for commercial use (e.g., Daycare, Preschool, Nursery School, Recreational Park).
- Always keep safety in mind during construction.
Assembly overview
The assembly process involves 28 main steps, including:

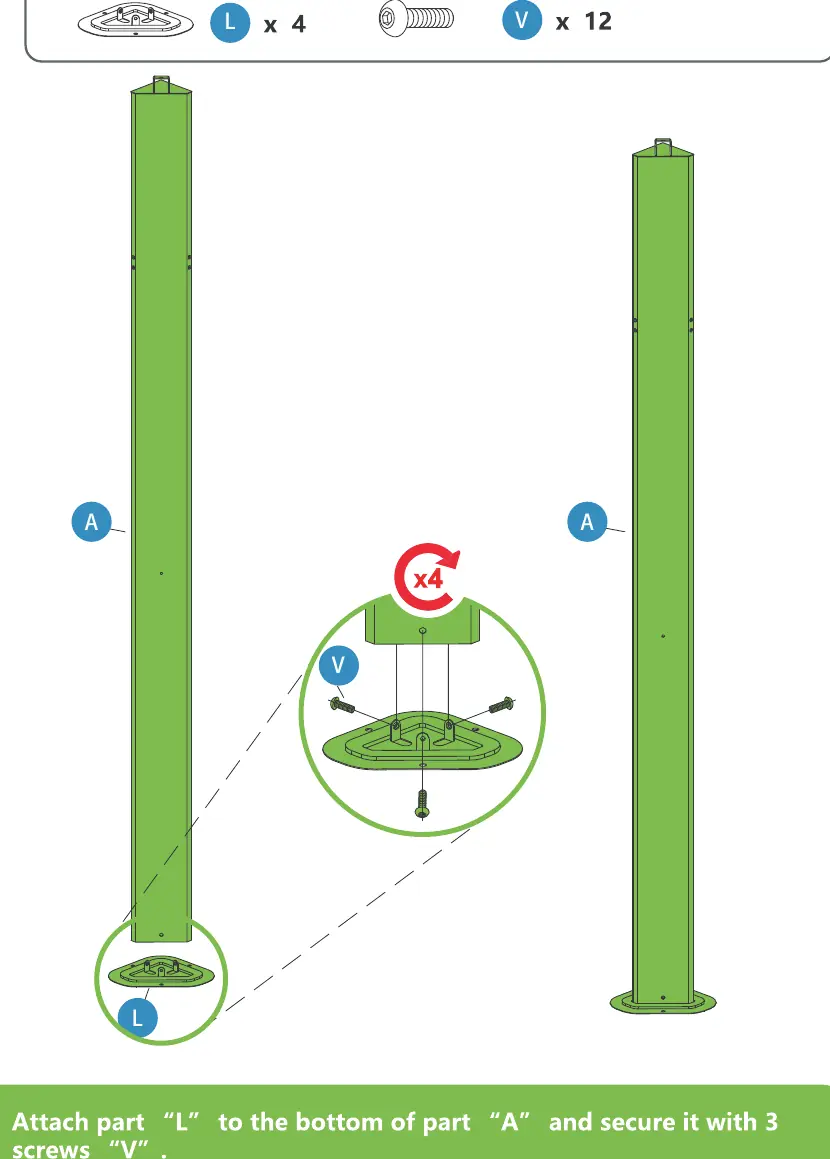
- Base Assembly: Attaching feet (L, M7) to posts (A, A1).
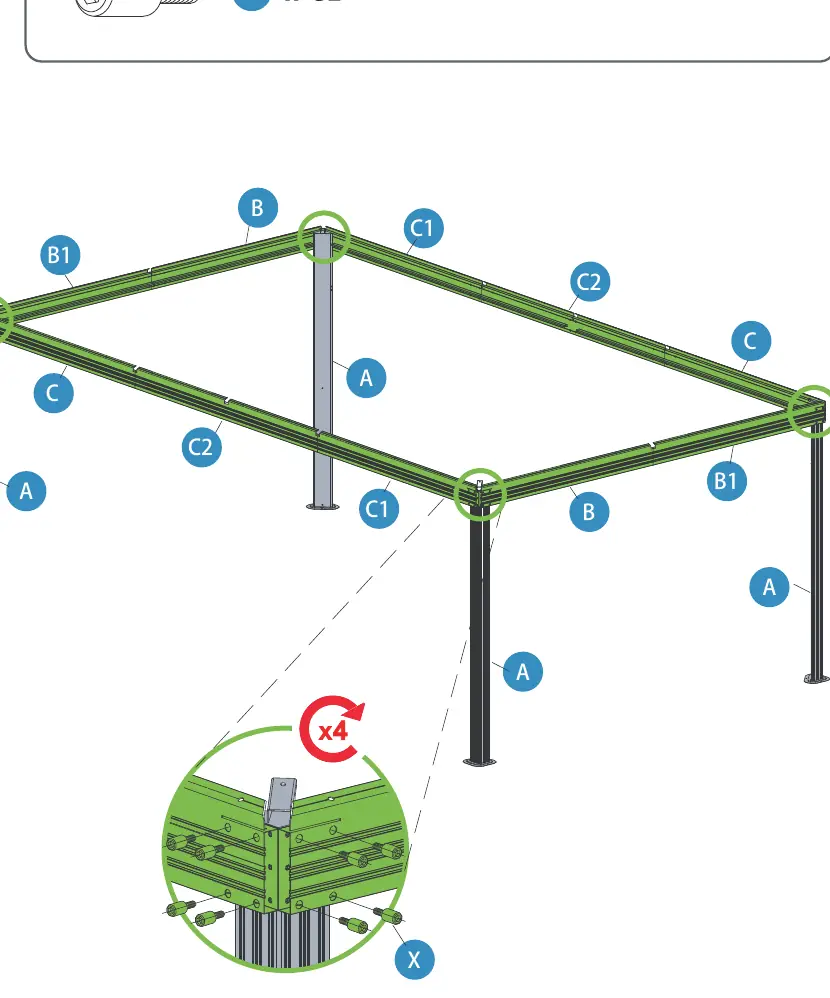
- Frame Assembly: Connecting beams (B, B1, C, C1, C2) and securing them to the posts.
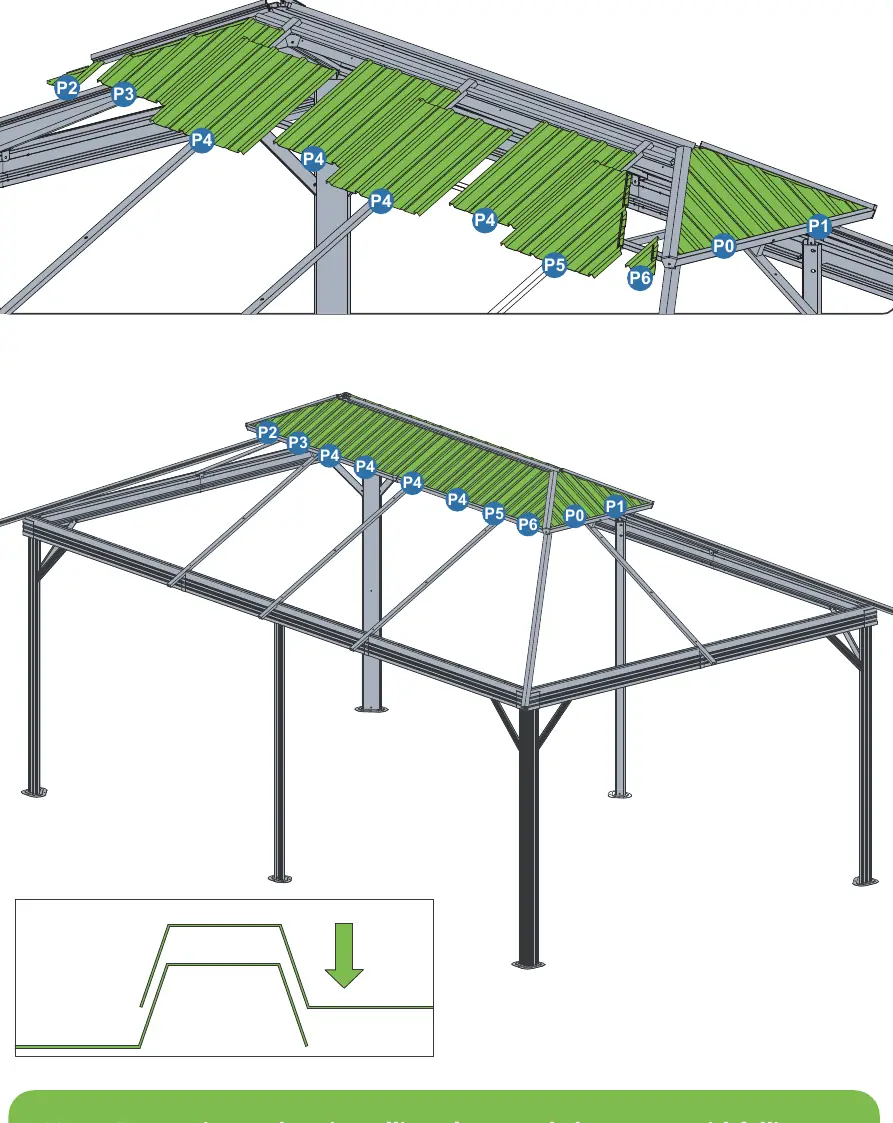
- Roof Structure: Installing roof supports (D, E, E1, E3, F, F1, G, G1-G5, H, I, J, J1-J4, K, K1) and panels (N1-N10, O1-O8, P0-P6).
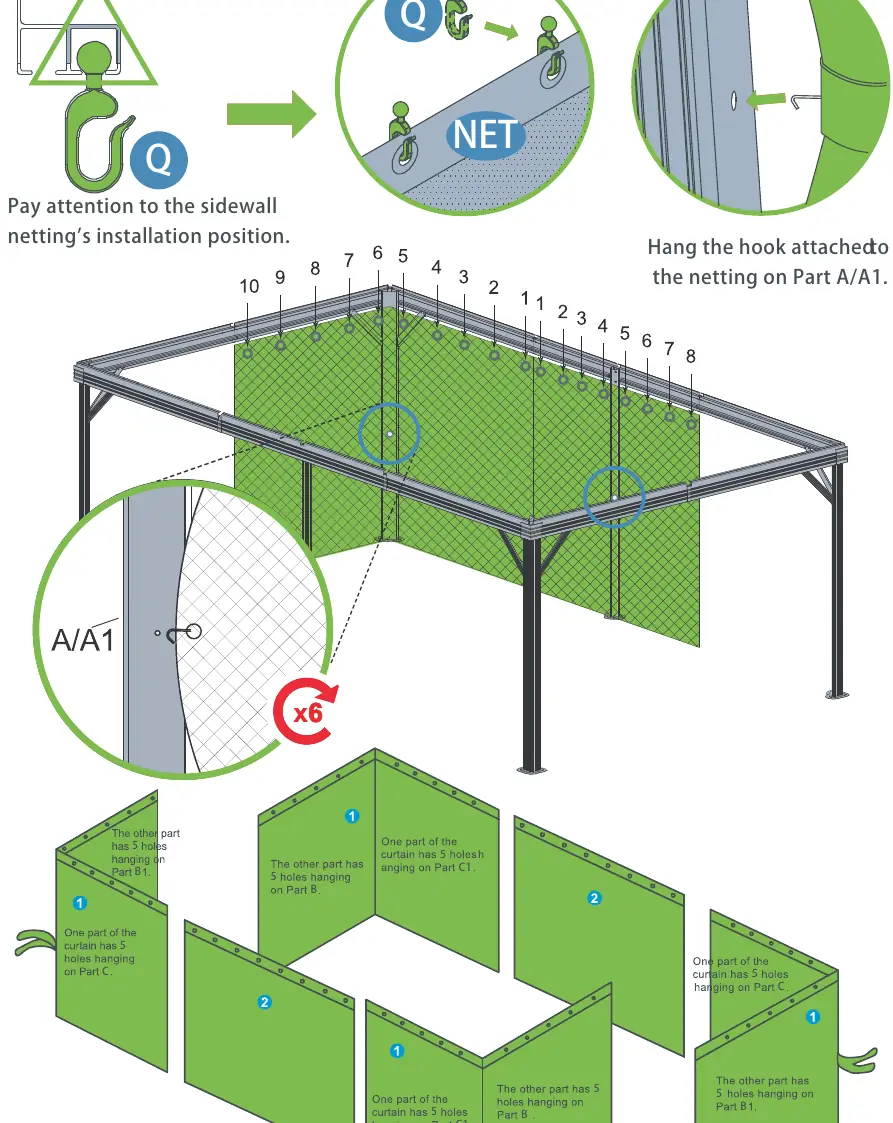
- Netting Installation: Attaching hooks (Q) and netting to the outer track.
Anchoring
To improve wind resistance, you must complete the anchoring step. If expansion screws or ground nails are not installed, strong winds may topple the gazebo.
- Cement surfaces: Use expansion screws (Z1).
- Grassy surfaces: Use ground nails (Z2).
Contact information
If you have assembly questions, are missing parts, or have damaged parts, please contact customer service before returning to the store.
Website: www.veikous.comEmail: [email protected]: 1-858-324-1911 (Mon - Sun, 10:00 am to 7:00 pm EST)
Official resources from the manual
Practical help
Common problems
Missing or damaged parts
Contact customer service at 1-858-324-1911 or email [email protected] before returning the product to the store.
Gazebo instability in wind
Ensure the gazebo is properly anchored. Use expansion screws for cement surfaces and ground nails for grassy surfaces.
Before use
- Verify all parts are present using the parts list.
- Ensure at least 3 people are available for assembly.
- Prepare required tools: Drill, Allen Key, Stepladder (6.5ft+), Phillips screwdriver, safety gear.
- Clear a large, flat area for assembly.
- Do not fully tighten screws until the entire structure is assembled.
Images and diagrams
- Steps 1-2: Base post assembly.
- Steps 4-5: Frame beam connection.
- Steps 16-22: Roof panel installation.
- Step 27: Netting installation.
- Step 28: Anchoring instructions for different surfaces.
Model compatibility
- Not intended for commercial use (e.g., Daycare, Preschool, Nursery School, Recreational Park).

Manual page author
David Miller
Documentation analyst
Organizes user manual content into clear summaries, with attention to model details, product context, and everyday usability.