HVAC / Ventilation Systems
Installation and User Manual for Vent-Axia PureAir Home Ventilation Unit
Comprehensive installation and user guide for the Vent-Axia PureAir Home positive input ventilation unit. Includes setup, wiring, commissioning, maintenance, and technical specifications.
Quick answers from the manual
Quick answer
- The Vent-Axia PureAir Home is a positive input ventilation unit. It requires professional installation, including wiring to a 220-240V supply via an isolator switch. It features adjustable speed settings and an optional heater. p. 3, 9
Key actions
- Install unit p. 4, 5
- Wire unit p. 9
- Commission unit p. 11
First start
- The unit runs system checks for 10 seconds upon power-up before becoming ready for commissioning. p. 11
Show 4 more answers Show less
Problems and fixes
Fan in standby (no airflow)
Check if ambient loft temperature is below -5°C or above 27°C.
p. 3Maintenance and reset
- Data logging is non-resettable. p. 3
Technical specifications
| Parameter | Value | Meaning | Pages |
|---|---|---|---|
| Voltage | 220-240V AC | Operating voltage | p. 9 |
| Max Power (Fan) | 14W | Power consumption | p. 15 |
| Max Power (Heater) | 464W | Power consumption with heater | p. 15 |
| Flow Rate | 19-49 L/s | Adjustable flow rate | p. 3, 12 |
Where to find it in the PDF
- Installation and Wiring p. 4, 5, 6, 7
- Commissioning p. 11, 12, 13
- Maintenance p. 14
Table of contents
Manual images
Click an image to enlargeQuick guide from the manual
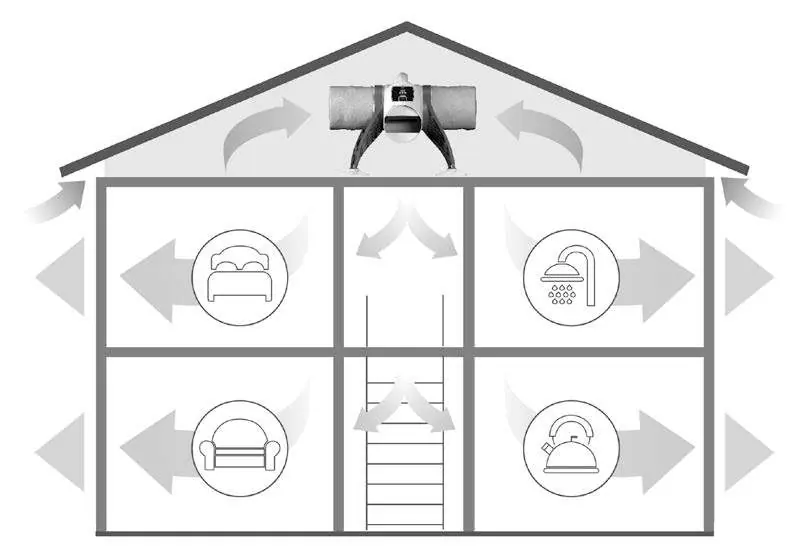
The Vent-Axia PureAir Home is a positive input ventilation unit designed for loft installation to supply filtered fresh air. The system features adjustable speed settings, an optional heater, and a data logging function. Installation must be performed by a qualified person in accordance with local wiring regulations.
Safety and guidance
- Do not install in areas with excessive oil, grease, corrosive/flammable gases, or where ambient temperature is above 40°C or below -5°C.
- Humidity: Do not install in areas with relative humidity above 90%.
- Electrical: Must be provided with an isolator switch with at least 3mm contact separation.
- Children: The appliance can be used by children aged 8 and above with supervision.
Installation
The unit can be floor-mounted or hung from a roof beam.
Hanging method
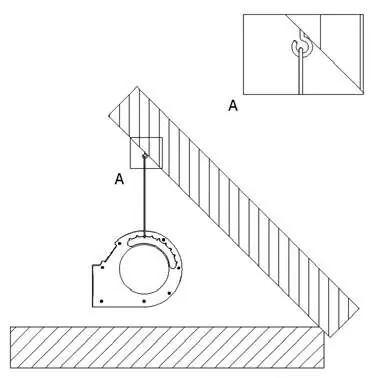
Fix a screw eye to a roof beam. Use the provided cord to loop through the eye and around the handle on the unit. Secure with a suitable knot.
Floor mounting
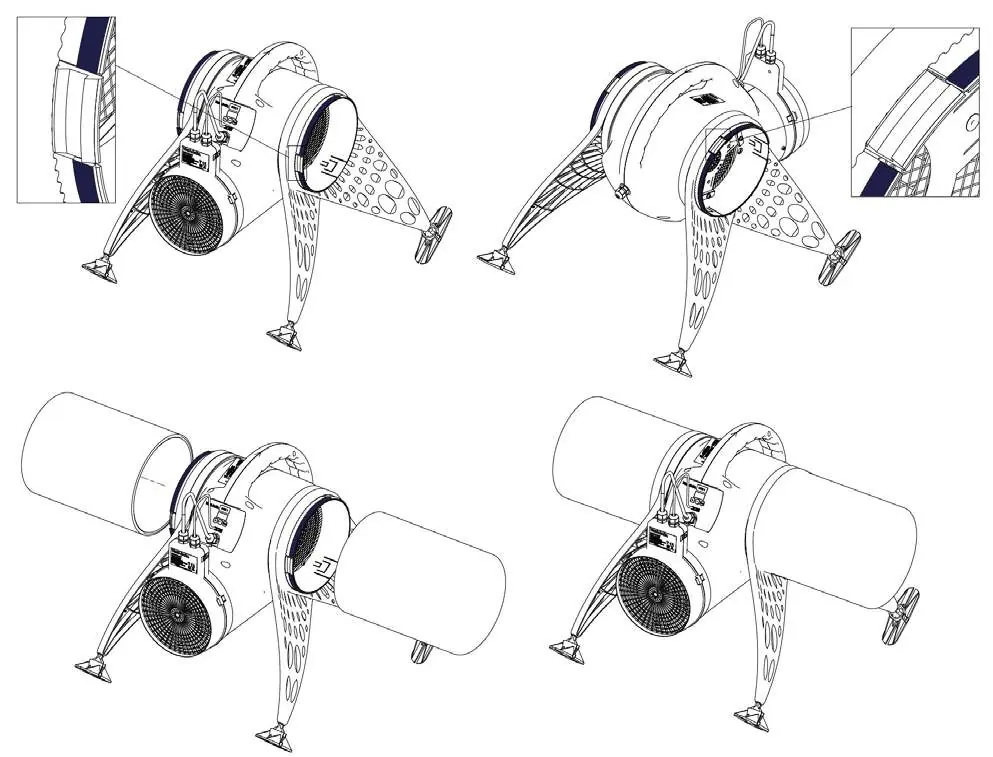
Attach mounting legs to the unit (two per side). Adjust legs and feet to span two ceiling joists and secure with screws. If necessary, affix to a wooden board or timber lengths screwed to the joists.
Diffuser grille fitment
Cut a 240-260mm diameter hole in the ceiling. Fold in the four locking tabs, push the spigot into the hole, and tighten the four screws until the diffuser is secure. Do not over-tighten. Connect the flexible ducting using the supplied worm drive clip.
Wiring
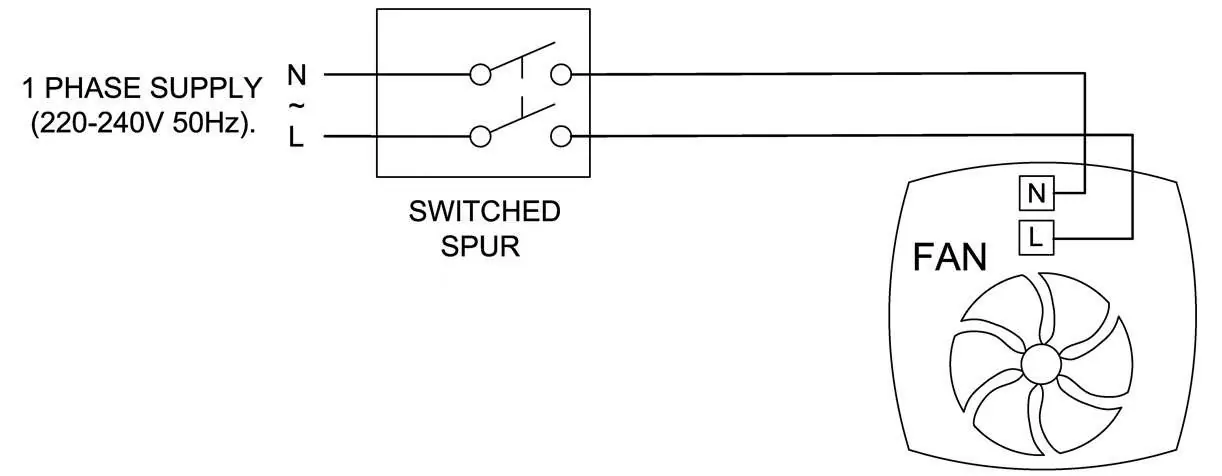
The unit operates on a single-phase 220-240V AC supply. It includes a 2m integral mains flying lead. Connect the brown core to Live and the blue core to Neutral. Fire Damper (FD) models must be wired with a smoke alarm and relay system to ensure the unit switches off during a fire.
Commissioning and setup
Press any button to access the menu. The unit has three buttons: +, -, and MODE.
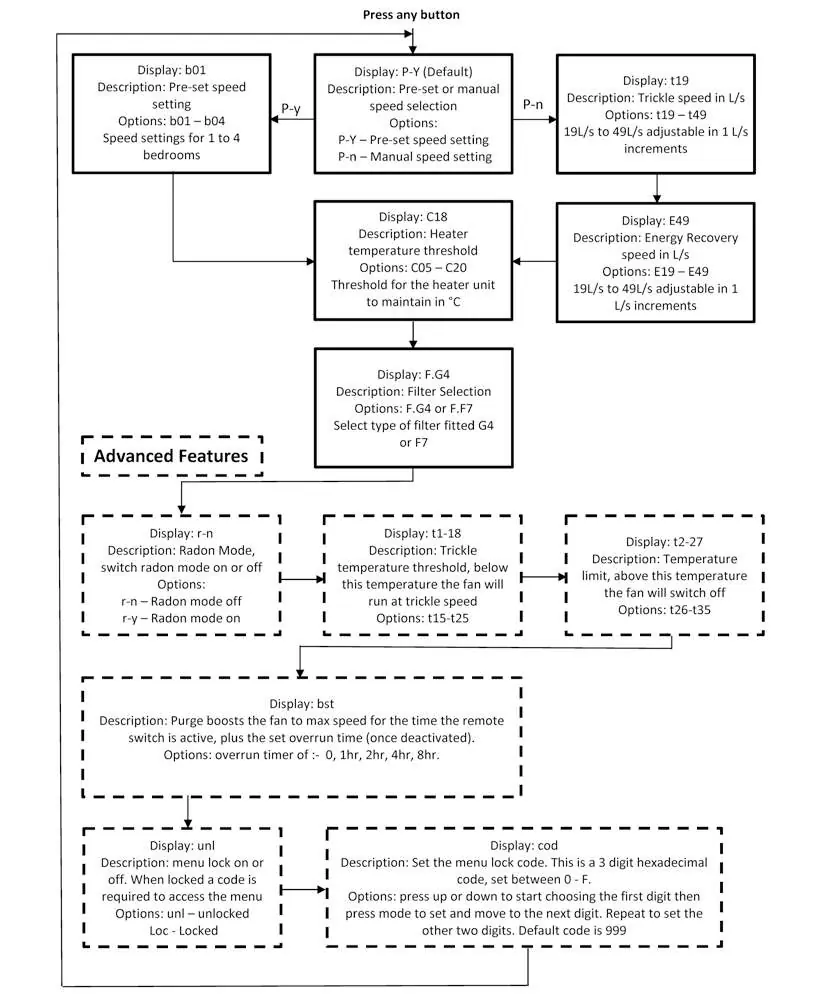
- Speed Settings: Features 'Trickle' and 'Energy Recovery' speeds. Pre-set speeds (b01-b04) are available based on the number of bedrooms, or manual adjustment (19L/s to 49L/s).
- Heater Threshold: Default is 10°C, adjustable between 5°C and 20°C.
- Radon Mode: Keeps the fan running at high temperatures to prevent radon gas build-up.
- Lock Feature: Prevents unauthorized adjustment using a 3-digit hexadecimal code.
Maintenance
The fan motor uses sealed ball bearings and requires no lubrication. Check and clean or replace filters annually (or as required). Filters can be vacuumed or washed in soapy water and air-dried. Ensure filters are fitted correctly to maintain air quality.
Practical help
Common problems
Fan not running
Check if ambient loft temperature is below -5°C or above 27°C (standby mode).
Heater not activating
Check if ambient loft temperature is above the Heater Threshold Temperature (default 10°C).
Airflow too low
Check if filters are clogged or if blanking plates are installed in the diffuser.
Before use
- Ensure loft is adequately ventilated.
- Check water tanks are covered and pipes lagged.
- Verify mains supply matches rating label.
- Ensure isolator switch is installed.
- Check that the loft hatch is tightly sealed.
Show more Show less
Specs in practice
- Trickle Speed
- Default speed when loft temp is < 18°C.
- Energy Recovery Speed
- Speed when loft temp is between 18°C and 27°C.
- Heater Threshold
- Temp at which heater activates (default 10°C).
Images and diagrams
- Fig 1: Typical installation showing airflow through the dwelling.
- Fig 2: Hanging method using a roof beam.
- Fig 3/4: Floor mounting method on joists.
- Fig 5/6: Diffuser installation and blanking plate usage.
- Fig 12: Wiring diagram for 1-phase supply.
Model compatibility
- FD models must be fitted with a smoke alarm with a relay.
- F7 filters are recommended for urban areas near main roads.
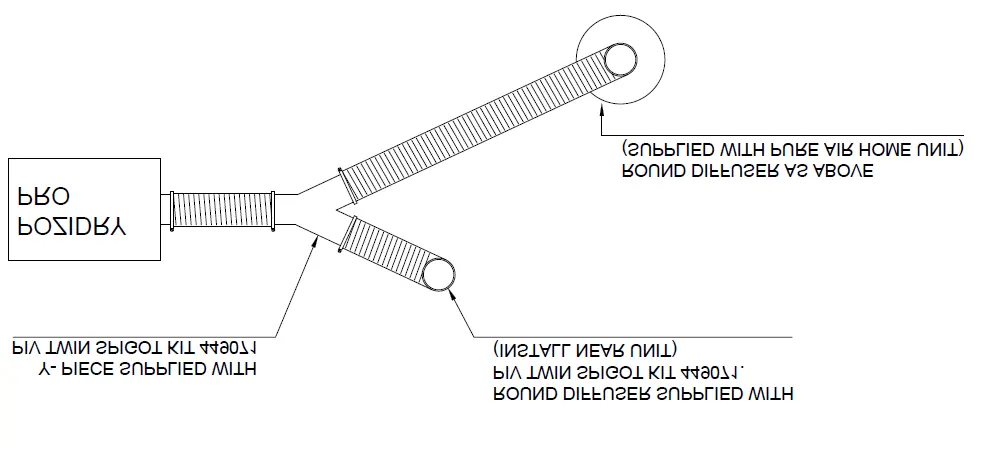
- Twin spigot kit (449071) is available for specific configurations.

Manual page author
Michael Turner
Technical manual editor