Home Appliances / Range Hoods
User Manual for Vesta Dover 30 Range Hood
Quick guide for the Vesta Dover 30 range hood. Includes installation steps for under-cabinet and wall mounting, operation instructions for the touch panel and gesture sensors, and maintenance tips.
Table of contents
Manual images
Click an image to enlargeQuick guide from the manual
The Vesta Dover 30 range hood is designed for residential use in kitchen cooking areas. This guide provides essential information for safe installation and operation. Always ensure the unit is installed by a qualified person and that all electrical wiring complies with local codes.
Safety Warnings
- Fire Hazard: Use only metal ductwork. Do not use solid-state speed control devices.
- Installation: The hood must be placed at a minimum distance of 65cm (26 inches) from the cooktop.
- Operation: Never leave surface units unattended at high settings. If a grease fire occurs, use a Class ABC extinguisher or smother flames with a lid or metal tray. Do not use water.
- Electrical: When cutting or drilling into walls or ceilings, be careful not to damage electrical wiring.
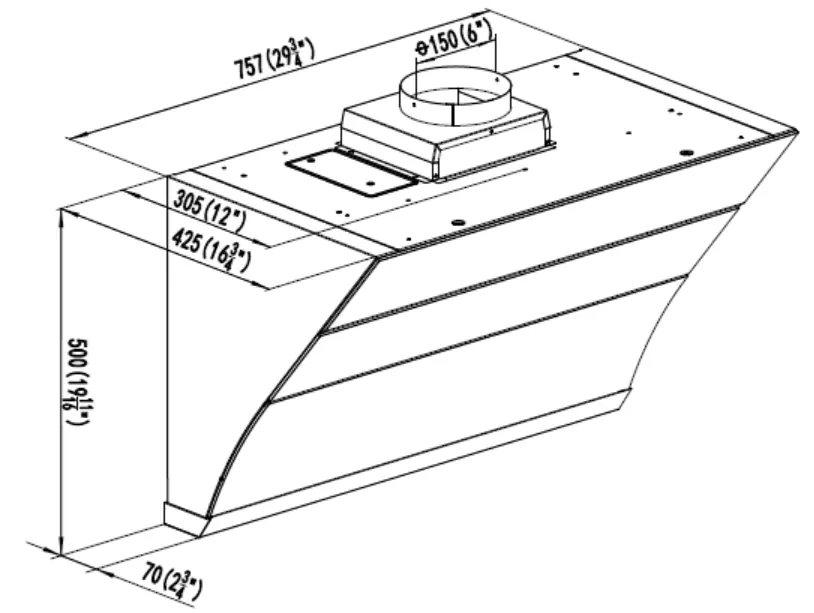
Installation
The hood can be installed under a cabinet or on a wall. Always locate wooden beams before drilling holes.
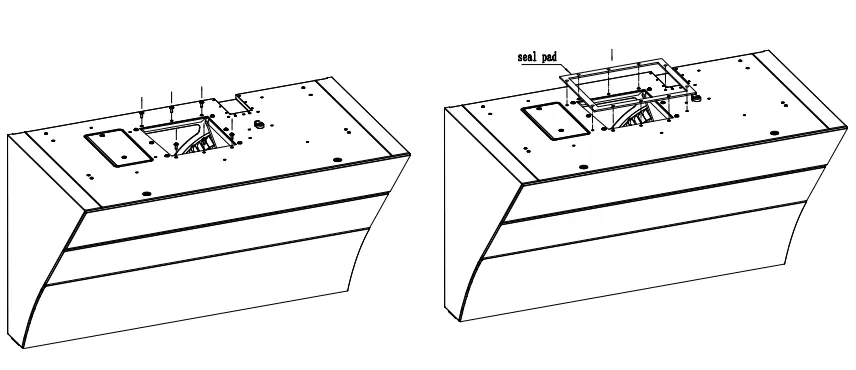
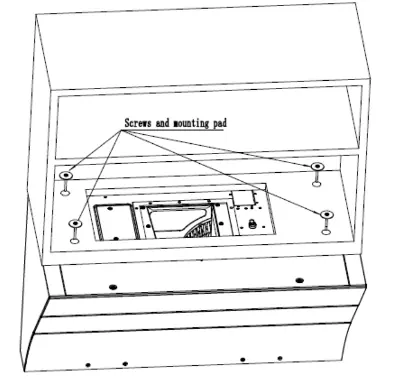
Under Cabinet Installation
- Attach the mounting board to the wall and bottom of the cabinet using the provided template.
- Drill the cabinet along the rectangle line.
- Fix the bracket to the wall using appropriate screws (ST4.8x10 for wood, ST5x80 for other materials).
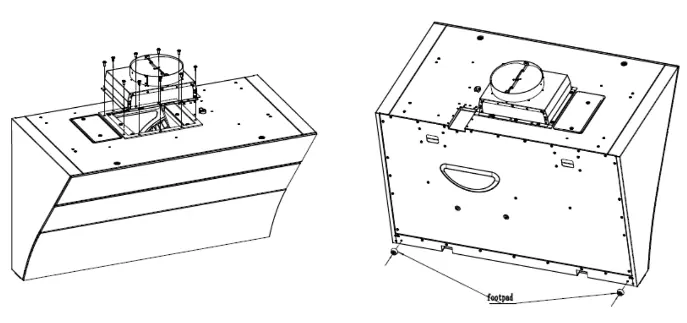
- Position the hood onto the brackets and secure it to the bottom of the cabinet using four M4x45 screws and mounting spacers.
- Connect the duct and air outlet, sealing with aluminum foil tape.
Wall Installation
- Attach the mounting board to the wall, ensuring the bottom is 450mm-500mm from the stove top.
- Fix the hanger into the rectangular hole.
- Lift and position the hood onto the hangers.
- Fix the safety block on the wall.
- Connect the duct and air outlet, sealing with aluminum foil tape.
Operation
The hood features a touch control panel and gesture sensors.

- Power: Touch to turn on the screen. If no operation occurs within 5 minutes, it enters standby mode.
- Lock: Hold for 2 seconds to lock the panel.
- Delay Off: Touch to turn off the hood after 3 minutes.
- Stir-Fried: Selects top speed.
- Gesture Sensor: In standby mode, wave your hand from left to right to turn on the hood and lights. Wave from right to left to turn off.
Maintenance and Cleaning
- Cleaning: Use hot water with soap or detergent. Rinse with clear water and wipe dry. For stubborn cases, use a non-scratching household cleanser or stainless steel polishing powder.
- Avoid: Do not use ordinary steel wool or steel brushes, as they may cause rust. Do not allow salt solutions, disinfectants, or bleaches to remain in contact with stainless steel.
- LED Light: The lamp must be replaced by a professional. Pry along the edge of the LED light with a tool to remove it.
Specifications
- Model: VRH-DOVER-30GS
- Power: 120V~60Hz, 2.3A
- Suction Power: 1000CFM
- LED Light: 12V, Max 40W
Contact Information
For customer service and support, contact Vesta:
Phone: 905-886-5858 (9:30am-5:00pm Eastern Time, Monday to Friday, except holidays)
Email: [email protected]
Online form: https://www.vesta.kitchen/service
Official resources from the manual
Practical help
Common problems
Hood does not turn on
Check power connection and ensure the unit is not in locked mode.
Gesture sensor not responding
Ensure the unit is in standby mode and wave your hand clearly from left to right.
Grease buildup on surface
Clean filters and fan frequently; do not allow grease to accumulate for long periods.
Before use
- Remove plastic protective film from stainless steel surfaces.
- Ensure the hood is installed at least 65cm (26 inches) above the cooktop.
- Verify that the ductwork is metal.
- Ensure the unit is properly leveled.
- Test the unit after installation.
Specs in practice
- Suction power
- 1000CFM
Images and diagrams
- Installation template: Use the provided paper template to mark drilling holes for cabinet or wall mounting.
- Control panel: Touch interface for light, lock, delay off, stir-fry mode, and speed control.
Model compatibility
- Suitable for household cooking areas only.
- Requires qualified person for installation.
- Do not use with solid-state speed control devices.

Manual page author
Emily Carter
User documentation editor
Prepares concise manual descriptions and highlights the most useful setup, operation, and maintenance information for readers.