Home Appliances / Range Hoods
User Manual for Vesta Hamburg Range Hood (VRH-HAMBURG-30SS/36SS)
Quick guide for the Vesta Hamburg range hood. Includes installation steps, operation instructions (gesture, voice, touch), maintenance, and troubleshooting.
Table of contents
Manual images
Click an image to enlargeQuick guide from the manual
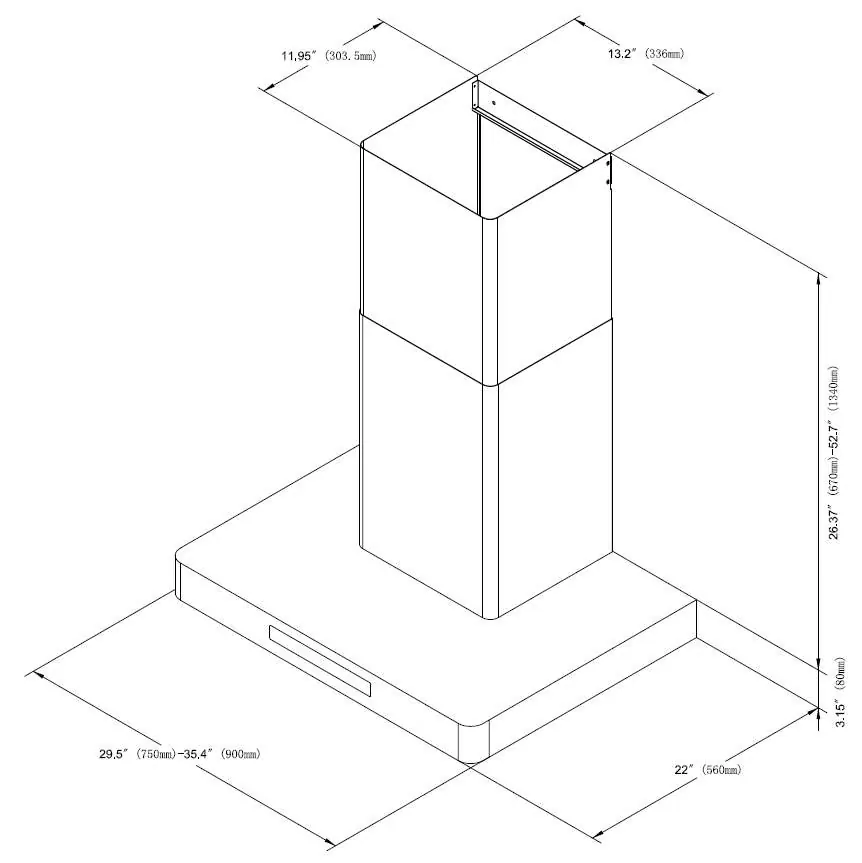
This document provides essential instructions for the installation, operation, and maintenance of the Vesta Hamburg range hood. The unit is designed for professional installation and requires a 120V, 60Hz, 15-amp circuit. Always ensure the hood is vented outdoors using metal ductwork. For safety, two-person installation is recommended due to the weight of the unit.
Installation
Installation must be performed by qualified professionals. Follow these steps:
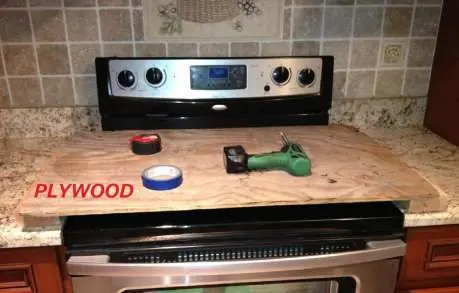
- Protect the cooktop: Use wood stubs and plywood to create a stable work surface over the stove.
- Mark the wall: Determine the center line, chimney width, and mounting screw locations.
- Prepare utilities: Ensure a 15amp, 120V outlet is available inside the chimney area and 6-inch diameter ductwork is ready.
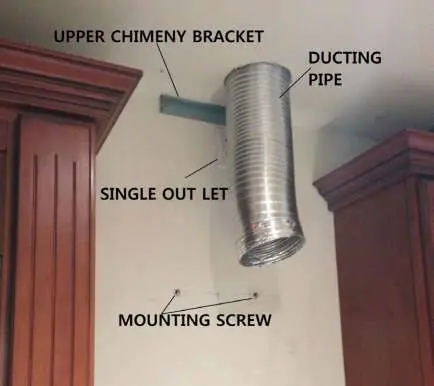
- Install brackets: Secure the upper chimney bracket to the wall and pre-drill holes for mounting screws.
- Hang the hood: Mount the hood body, level it, and connect the exhaust to the ductwork using aluminum tape.
- Install chimney: Remove protective laminate, place the chimney on the base, and secure it to the ceiling bracket.
Operations
The range hood features three control methods:
- Touch Control: Use the panel to adjust power, lights, fan speed (16 levels), and timer.
- Gesture Sensing: Wave your hand from left to right to increase speed (F2 to F16) and right to left to decrease speed.
- Voice Control: Activate by saying "Hi Vesta". Commands include "Power on", "Speed one" through "Speed sixteen", "Turn on/off the light", and "Delay shutdown".
Maintenance
Regular cleaning is required to prevent fire hazards:
- Exterior: Clean with hot soapy water and a soft cloth. Avoid abrasive cleaners or steel wool.
- Filters: Clean baffle filters after every 30 hours of use. They can be washed by hand or in a dishwasher.
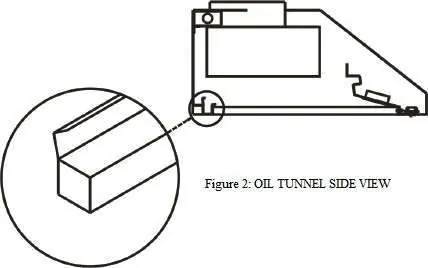
- Oil Tunnel: Ensure the oil tunnel is properly installed and drained regularly.
Troubleshooting
If the unit is not operating correctly, check the following:
- No power/lights: Ensure the unit is plugged in, the fuse is not blown, and wiring is connected.
- Vibration: Check if the hood is secured properly to the wall/ceiling and the motor is tight.
- Weak airflow: Verify the duct size is at least 6 inches and not clogged.
- Noisy operation: Ensure the duct is secure and the correct size is used.
Practical help
Common problems
Range hood vibrates when the blower is on
Check if the hood is secured properly to the ceiling or wall. Ensure the motor is tightened and the blower wheel is not damaged.
Blower or fan seems weak
Verify that the duct size is at least 6 inches. Check for clogs in the ductwork or if the damper unit is installed incorrectly.
Lights work but the blower is not spinning
The blower might be jammed or the motor may be defective. Contact support if the issue persists.
Hood is not venting properly
Ensure the distance between the stove top and the hood is within 24-31 inches. Reduce the number of elbows in the ductwork.
Before use
- Ensure a 120V, 60Hz, 15-amp fused electrical circuit is available.
- Verify that 6-inch round metal ductwork is used.
- Check that the mounting height is between 24 and 31 inches above the stove.
- Remove the protective laminate coating from the chimney.
- Ensure all duct joints are properly taped with aluminum tape.
Specs in practice
- Baffle Filter
- A metal filter designed to trap grease and residue.
Images and diagrams
- Venting Methods: Illustrates options for horizontal wall venting and vertical roof venting.
- Installation Steps: Shows the placement of the upper chimney bracket, ducting pipe, and mounting screws.
Model compatibility
- Requires 6-inch round metal ductwork.
- Do not use plastic vents or 4-inch laundry-type wall caps.
- Not for use with open flames under the hood.

Manual page author
David Miller
Documentation analyst
Organizes user manual content into clear summaries, with attention to model details, product context, and everyday usability.