HVAC / Air Purifiers
Installation Guide for VEVOR 2402-UV18 and 2402-UV25 HVAC Air Purifier
Quick installation and maintenance guide for VEVOR 2402-UV18 and 2402-UV25 HVAC Air Purifiers. Includes safety warnings, mounting steps, bulb replacement, and technical specifications.
Quick answers from the manual
Quick answer
- This guide covers the installation and maintenance of the VEVOR 2402-UV18 and 2402-UV25 HVAC Air Purifiers, including mounting, bulb replacement, and safety precautions. p. 1, 6, 10
Key actions
- Install unit on a flat surface of the duct work above the A-coil. p. 6
First start
- Ensure the unit is installed in a suitable location away from plastic/rubber components and connect to a grounded power outlet. p. 6, 11
Show 3 more answers Show less
Problems and fixes
UV bulb needs cleaning/replacement
Disconnect power, let cool for 15 minutes, remove screws, clean/replace bulb, re-install.
p. 10Technical specifications
| Parameter | Value | Meaning | Pages |
|---|---|---|---|
| Power (2402-UV18) | 18W | Power consumption | p. 4 |
| Power (2402-UV25) | 25W | Power consumption | p. 4 |
| UV Lifetime | 8000 hours | Expected bulb life | p. 4 |
Where to find it in the PDF
- Safety Instructions p. 2
- Installation p. 6, 7, 8, 9
Table of contents
Manual images
Click an image to enlargeQuick Guide from the Manual
This document provides installation and maintenance instructions for the VEVOR 2402-UV18 and 2402-UV25 HVAC Air Purifiers. These units are designed to be installed within HVAC ductwork to improve air quality. Important: UV light is harmful to skin and eyes; never look directly at the light. Installation should be performed by an adult, and the unit must not be installed where people can see the UV light.
Safety Instructions
- UV Hazard: UV light causes temporary or permanent blindness. Never look directly at the light.
- Installation Safety: Disconnect power before installing or replacing the bulb. Wear gloves to avoid cuts.
- Environment: Do not install in wet environments, humidifiers, kitchens (oily fumes), or areas with acidic/alkaline/organic gases.
- Handling: The lamp contains mercury; handle with care. Do not clean broken lamps with a vacuum cleaner.
- Modification: Do not modify the unit.
Kit Parts
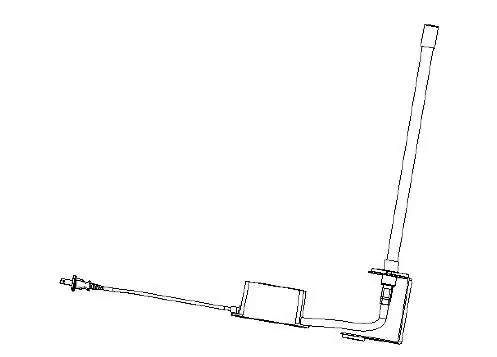
- UV Unit
- Magnetic bracket
- UV tube
- ST4*25 screws (4pcs)
- M5*12 bolts (2pcs)
- M5 nuts (2pcs)
Installation Instructions
Selecting Mounting Location: Install on a flat surface of the ductwork, preferably above the air conditioning cooling coil (A-coil). If no A-coil exists, install on the supply air duct. Ensure the unit is away from plastic or rubber components that could be damaged by UV light; use aluminum foil duct tape to protect such components if necessary.
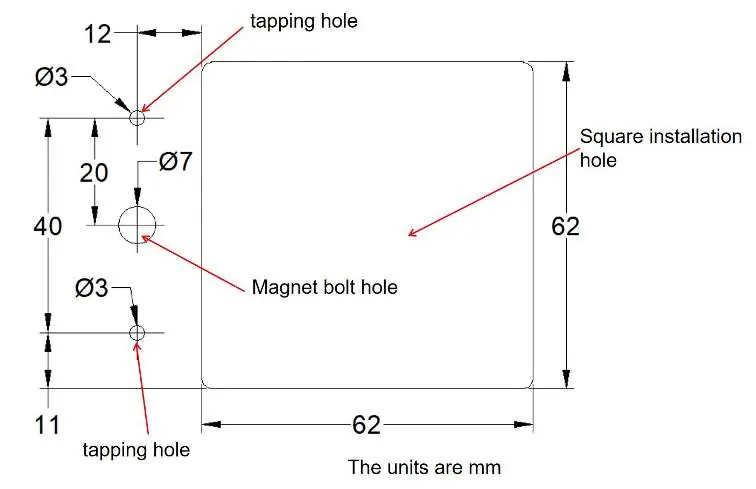
Installation Steps:
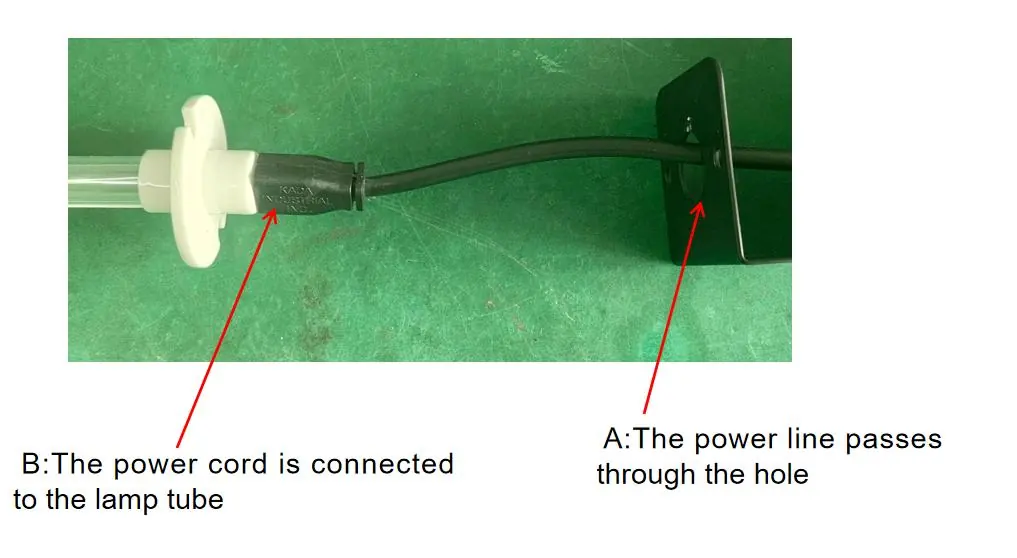
- Pass the power cord through the circular hole of the magnetic bracket and connect the coupler to the lamp base.
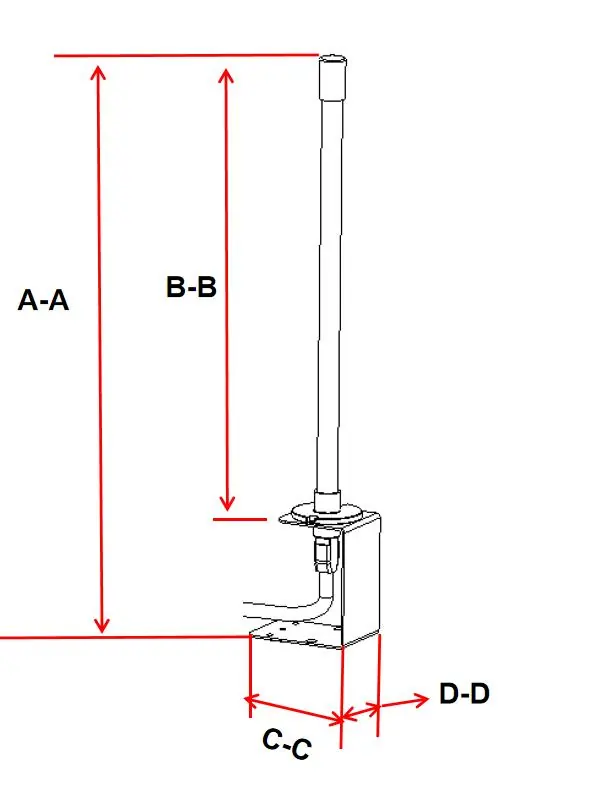
- Attach the lamp tube to the magnetic holder using the two M5 bolts and nuts.
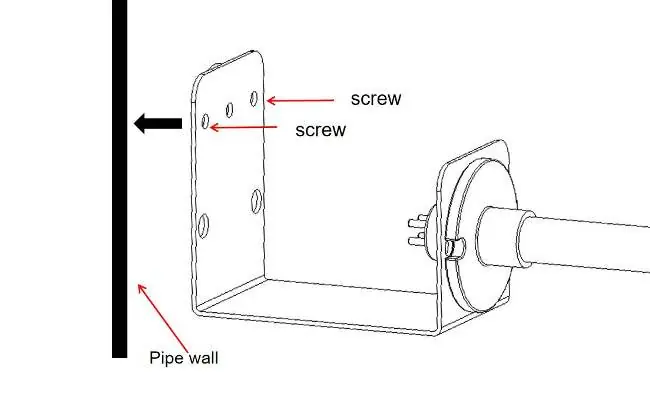
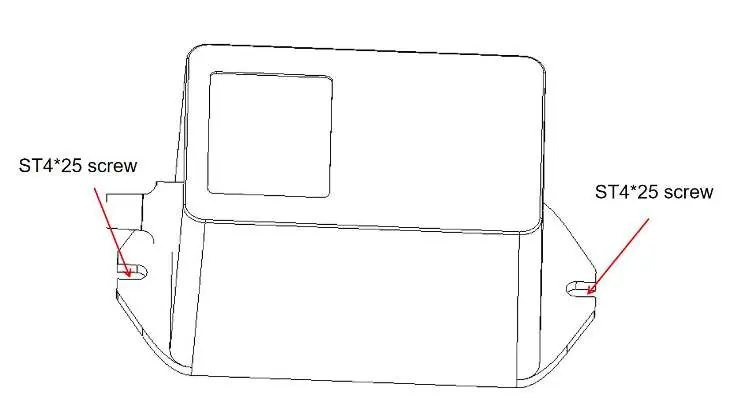
- Fixing the unit: The unit can be held by the magnet against the inner wall of the pipe, or secured using screws.
- If installing from the outside, cut an installation hole, align the magnetic support with drilled 3mm screw holes, and fix with screws.
- Seal any excess incision with aluminum foil tape or insulation material to prevent UV light leakage.
- Secure the ballast to the pipe wall using two ST4*25 screws.
- Reconnect power to the HVAC system.
Bulb Cleaning and Replacement
- Disconnect power and allow the bulb to cool for at least 15 minutes.
- Remove the 2 support screws and slide the unit out.
- To Clean: Wipe the bulb with a soft cloth dampened with glass cleaner. Ensure it is clean and dry before re-installation.
- To Replace: Press the bulb release button to remove the old bulb. Slide the new bulb in until it snaps into place.
Technical Specifications
The following specifications apply to the 2402-UV18 and 2402-UV25 models:
- Power: 18W (2402-UV18) / 25W (2402-UV25)
- UV Lifetime: 8000 hours
- Light Wavelength: 254nm
- Input Voltage: AC120V 60Hz (American-Standard) / AC230V 50Hz (European version)
- Effective Area: 700 ft² (2402-UV18) / 1100 ft² (2402-UV25)
Manufacturer information
VEVOR
Practical help
Common problems
UV light exposure
Do not install where people can see the UV light. Seal gaps with aluminum foil tape.
Bulb replacement
Disconnect power, let cool for 15 mins, press release button, slide in new bulb.
Before use
- Verify HVAC system compatibility
- Ensure power supply matches nameplate (120V/230V)
- Wear gloves during installation
- Check for plastic/rubber components near UV light
Show more Show less
Specs in practice
- UV Wavelength
- 254nm for effective air purification
Images and diagrams
- Magnetic bracket installation
- Power cord routing
- Bulb release button location
Model compatibility
- Not for use in kitchens (oily fumes)
- Not for use in wet environments/humidifiers
- Not for use in acidic/alkaline/organic gas areas

Manual page author
Michael Turner
Technical manual editor