Garden / Pool Equipment
Vevor HVAC Air Purifier 2112-UV36 Series
Comprehensive installation and maintenance guide for Vevor HVAC Air Purifier models 2112-UV36, 2006-UV9X2, and 2112-UV36X2. Includes safety warnings, mounting instructions, and bulb replacement steps.
Quick answers from the manual
Quick answer
- The Vevor HVAC Air Purifier is installed by mounting it on the HVAC ductwork, drilling holes according to the template, inserting the UV lamp, and securing it with screws. Maintenance requires disconnecting power, allowing the bulb to cool for 15 minutes, and cleaning or replacing the bulb as needed. p. 5, 6, 7, 8
Key actions
- Install UV bulb p. 8, 11
- Replace fuse p. 11
First start
- Connect to power and turn on the switch. p. 11
Show 3 more answers Show less
Problems and fixes
Fuse replacement
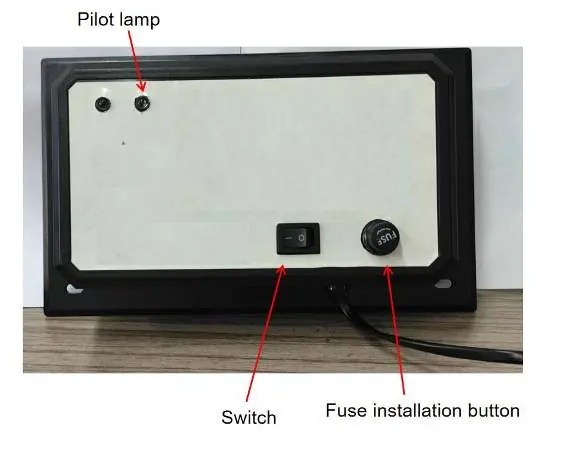
Unscrew the fuse knob to replace the 2A fuse (not applicable to 2006-UV9X2).
p. 11Technical specifications
| Parameter | Value | Meaning | Pages |
|---|---|---|---|
| UV Lifetime | 13000 hours | Expected operational life of the lamp | p. 5 |
Where to find it in the PDF
- Safety Instructions p. 4
- Installation Steps p. 8, 9, 10, 11
- Bulb Cleaning and Replacement p. 12
Table of contents
Manual images
Click an image to enlargeQuick guide from the manual
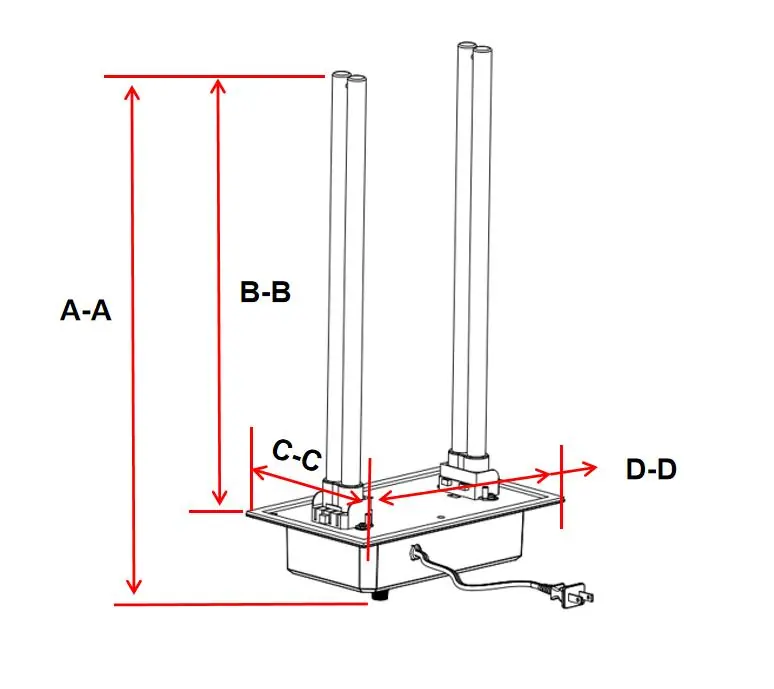
The Vevor HVAC Air Purifier is designed to be mounted in your HVAC ductwork to reduce micro-organisms. Before installation, ensure you have verified the duct space and have the necessary tools. Always disconnect power to the HVAC system before performing any installation or maintenance. The unit should be mounted in a location where the indicator light is visible and bulb access is easy.
Safety instructions
- UV light hazard: UV light is harmful to skin and eyes. Never look directly at the UV light.
- Electrical safety: Always disconnect power before installing or replacing the UV bulb to prevent shock.
- Handling: Wear gloves during installation to avoid cuts. The lamp tube contains mercury and must be handled properly.
- Environment: Do not install in kitchens (oily fumes), wet environments, or humidifiers.
- Modifications: Do not modify the unit.
Installation
1. Select a mounting location on a flat surface of the ductwork, preferably above the air conditioning cooling coil (A-coil). If no A/C is present, install on the supply air duct.
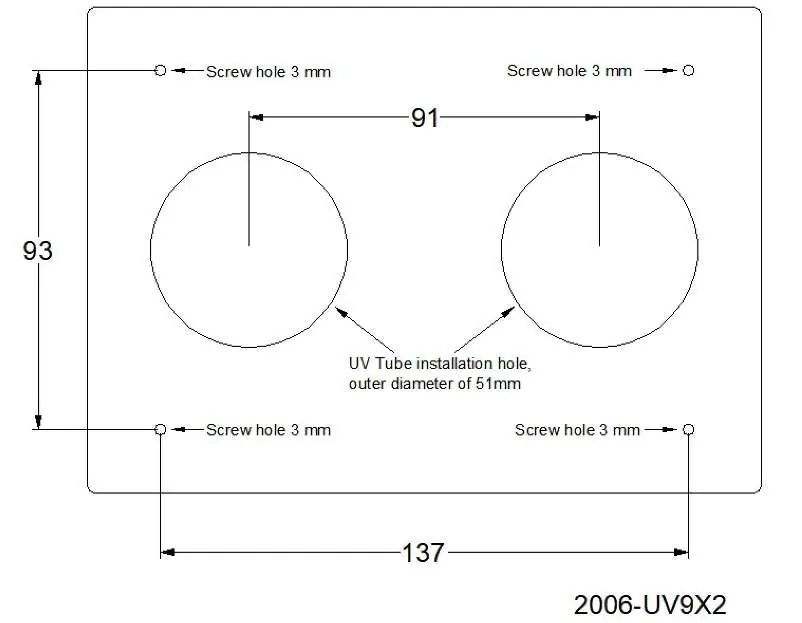
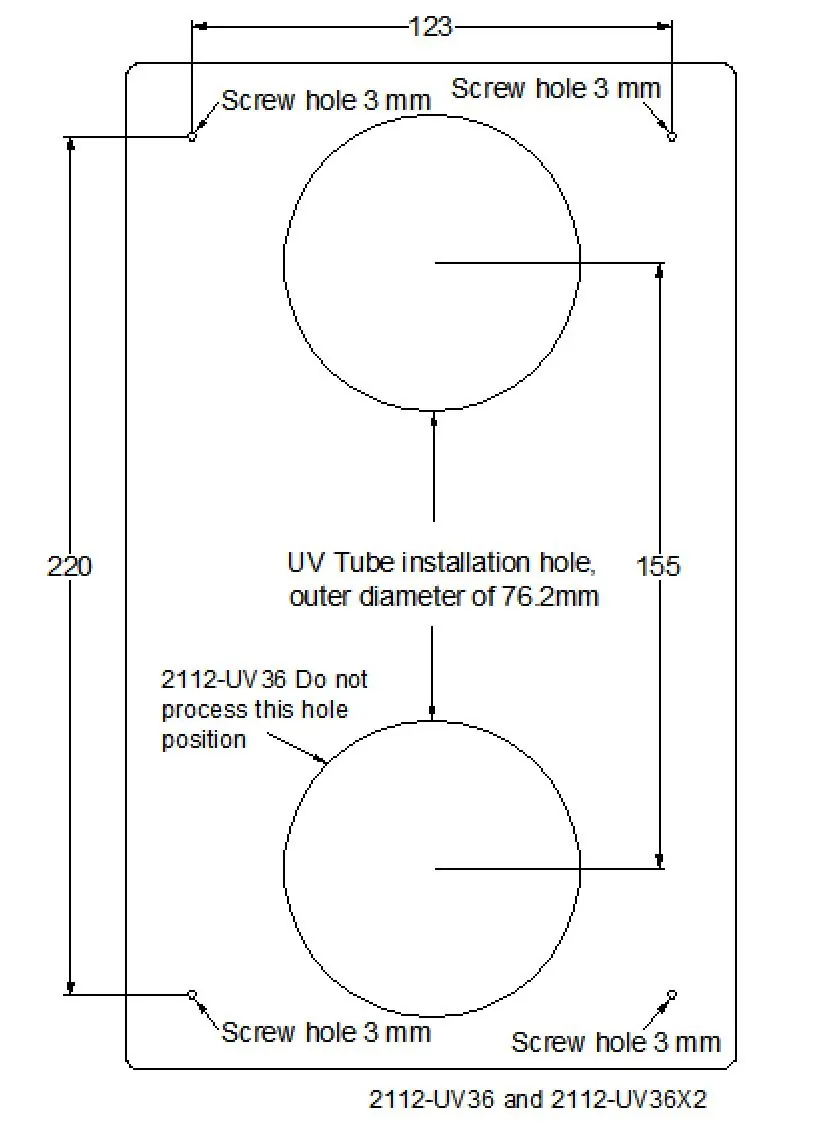
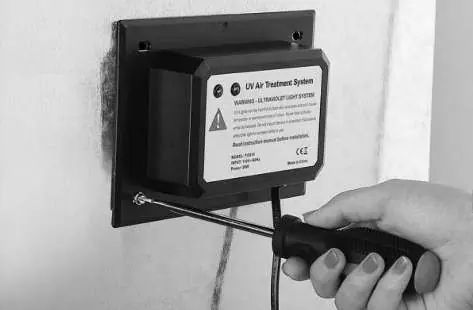
2. Use the provided positioning template to mark the installation holes on the outer wall of the duct. You will need to cut holes for the lamp tubes and drill holes for the screws.
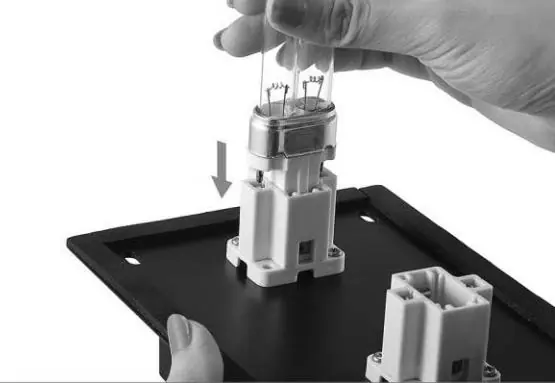
3. Insert the UV lamp into the unit by sliding it from the side until it snaps into place.
4. Secure the unit to the duct surface using the 4 provided screws. Do not overtighten.
5. Connect the power plug to a grounded outlet and turn on the switch (if applicable).
Bulb cleaning and replacement
1. Disconnect power and unplug the unit. Allow the UV bulb to cool for at least 15 minutes before removing the unit.
2. Remove the 4 sheet metal screws and slide the unit out of the duct.
3. To clean, wipe the bulb with a soft cloth dampened with glass cleaner. Ensure it is clean and dry before re-installing.
4. To replace, press the bulb release button to remove the old bulb. Slide the new, approved bulb into the unit until it snaps into place.
5. Re-install the unit into the duct and reconnect power.
Manufacturer information
VEVOR
Practical help
Common problems
UV bulb not working
Check power connection, ensure the switch is on (if applicable), and check the 2A fuse.
Unit does not fit in duct
Verify duct space and dimensions before cutting holes.
Before use
- Ensure HVAC system power is disconnected
- Wear gloves for installation
- Verify duct space is sufficient
- Check voltage requirements on the product nameplate
- Ensure the mounting location allows for bulb access
Show more Show less
Specs in practice
- UV Wavelength
- 254nm, optimized for air purification
- Effective Area
- Coverage area varies by model (1500-2400 sq ft)
Images and diagrams
- The drilling template indicates the exact placement for lamp holes (51mm or 76.2mm) and screw holes (3mm).
Model compatibility
- Not for use in kitchens due to oily fumes
- Not for use in humidifiers or wet environments
- Ensure compatibility with 120V or 230V power supply as per nameplate

Manual page author
Emily Carter
User documentation editor