Home Appliances / Food Processing Equipment
User Manual for Vevor Electric Meat Grinder 1A-EG808 Series
Comprehensive user guide for the Vevor Electric Meat Grinder (1A-EG808, 1A-EG812, 1A-EG822, 1A-EG832). Includes assembly, sausage stuffing, cleaning, maintenance, and food safety guidelines.
Quick answers from the manual
Quick answer
- This manual provides assembly, operation, cleaning, and maintenance instructions for the Vevor 1A-EG808 series meat grinders. Key safety rules include grounding the unit, never running it dry, and hand-washing all parts. p. 2, 3, 7, 8
Key actions
- Assemble the grinder head, auger, knife, and plate. p. 7, 32, 44, 56
- Clean all parts by hand in hot soapy water. p. 8, 21, 33, 45
First start
- Ensure the grinder is on a stable surface, properly grounded, and all parts are clean and lubricated. p. 2, 3, 7, 8
Problems and fixes
Grinder overheating or meat sticking
Never run dry; meat acts as a lubricant. Turn off immediately if out of meat.
p. 3, 4, 8Maintenance and reset
- Coat all metal parts with food-safe silicone spray after cleaning to prevent rusting. p. 8, 21, 33, 45
Technical specifications
| Parameter | Value | Meaning | Pages |
|---|---|---|---|
| Continuous working time | 4 hours | Maximum continuous operation time. | p. 4, 17, 29, 41 |
Where to find it in the PDF
- Warnings p. 2, 3
- Technical Parameters p. 4
- Parts List p. 5, 6, 7
- Assembly Instructions p. 7
- Cleaning and Maintenance p. 8
Table of contents
Manual images
Click an image to enlargeImportant Information from the Manual
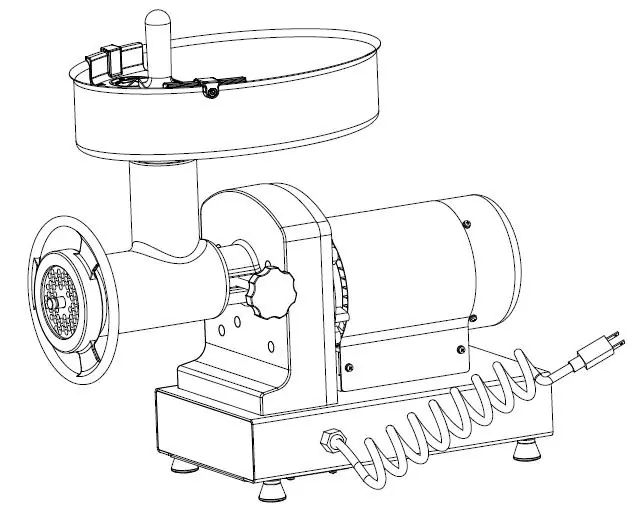
This manual provides essential instructions for the safe operation, assembly, and maintenance of the Vevor Electric Meat Grinder (Models 1A-EG808, 1A-EG812, 1A-EG822, and 1A-EG832). Always follow basic safety precautions when using electrical appliances.
Safety Precautions
- Grounding: This appliance must be grounded while in use. Connect directly to a grounded 120V (US) or 230V (EC) three-prong wall outlet.
- Dry Operation: Never run the grinder dry without meat. Meat acts as a lubricant; running dry can cause severe damage and void the warranty.
- Cleaning: Hand wash all parts in hot soapy water. Do not use a dishwasher.
- Supervision: Never leave the grinder unattended while running.
- Protective Gear: Wear safety glasses (ANSI Z87.1 compliant).
Assembly Instructions
- Ensure the grinder is unplugged.
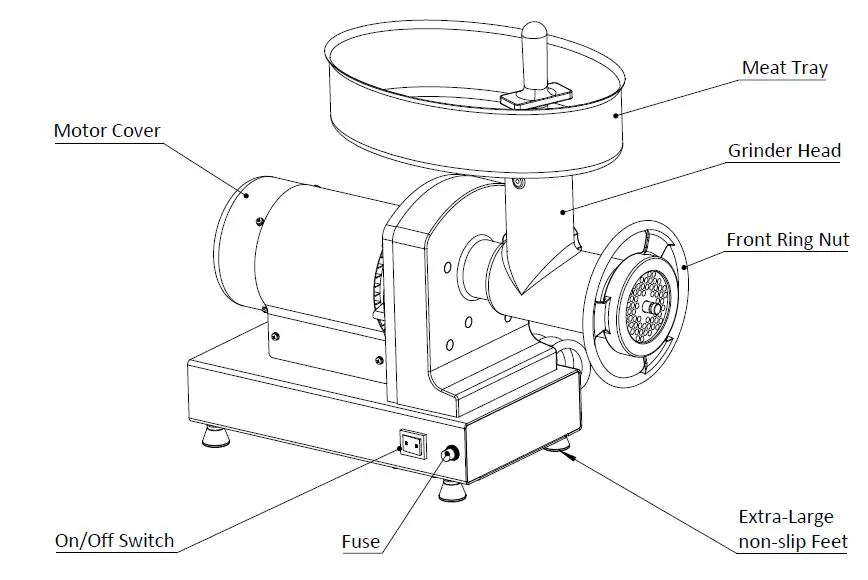
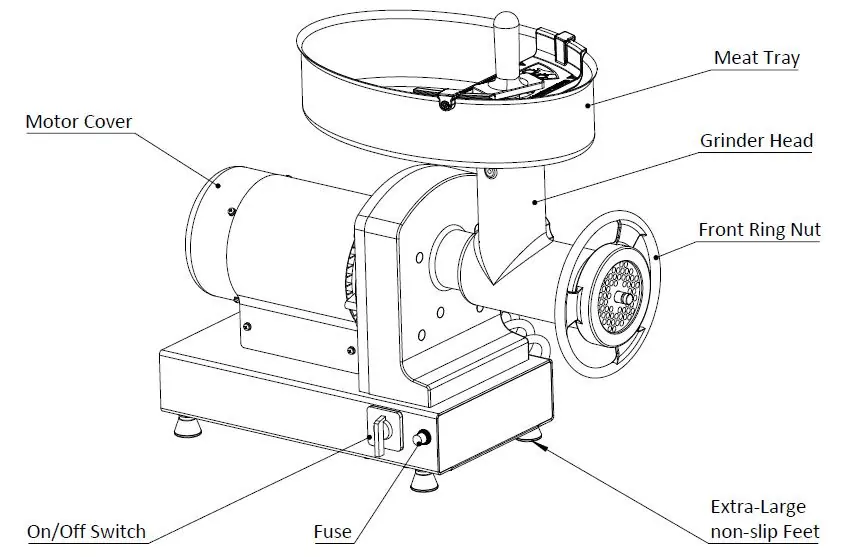
- Loosen the black locking knob and insert the grinder head into the motor housing with the feed chute facing up. Turn clockwise until the slot aligns with the pin inside the motor housing. Tighten the locking knob.
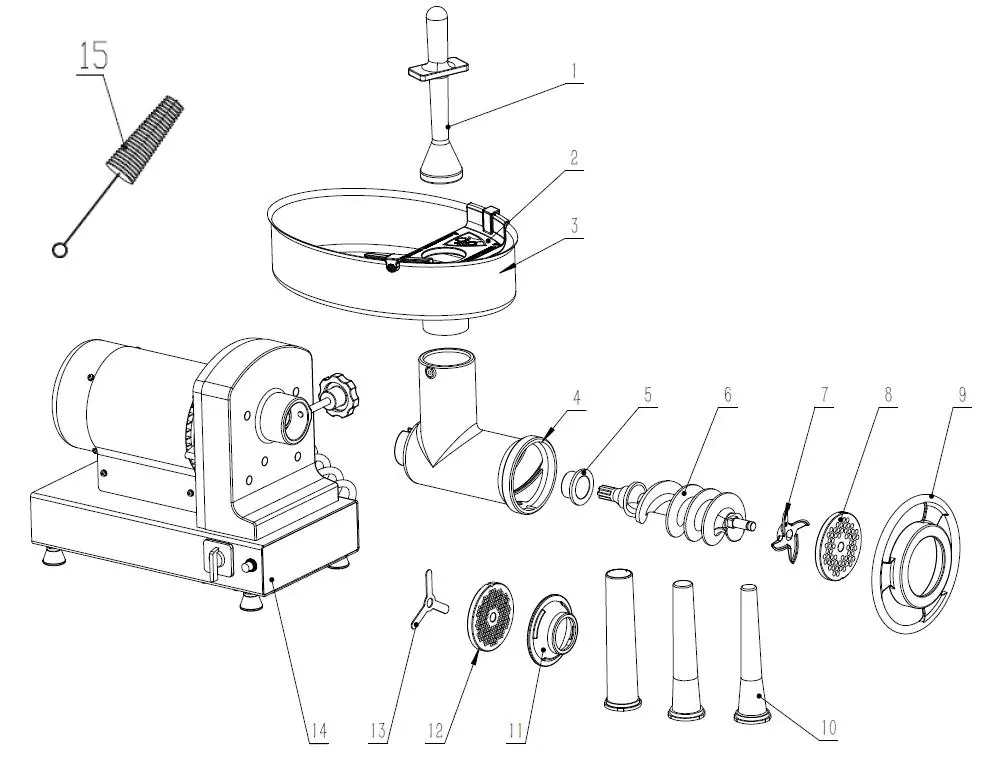
- Insert the auger, aligning the spline with the drive shaft. Turn clockwise until seated.
- Place the cutting knife onto the square portion of the auger pin (flat side of blade edges facing outward).
- Place the grinder plate onto the auger pin, aligning the notch with the grinder head opening.
- Attach the front ring nut and turn clockwise until snug.
- Place the meat tray neck into the feed chute opening and press down.
Sausage Stuffing
While one person can operate the grinder, two people are recommended: one to feed meat into the chute using the stomper, and one to manage the casing output.
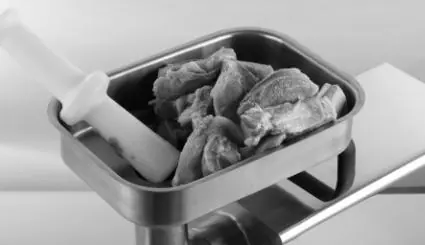
- Place seasoned ground meat into the tray.
- Slide a sausage casing over the stuffing funnel.
- Pull 4-6 inches of casing out and tie a knot at the end.
- Feed the mixture slowly to avoid air pockets. If air pockets appear, prick them with a pin.
Cleaning, Maintenance & Storage
Important: Always turn off and unplug the unit before cleaning.
- Wash all parts that contacted meat in hot soapy water immediately after use.
- Rinse with clear hot water and dry immediately.
- Lubricate the head, auger, plates, and knife with food-grade silicone spray before and after each use to prevent rusting.
- Clean the motor cover and gear housing with a damp towel only. Do not immerse the motor in water.
Food Safety
When handling ground meat, ensure it is cooked to an internal temperature of at least 160°F to 165°F (71°C to 74°C) to destroy bacteria. Always keep raw meats separate from ready-to-eat foods to prevent cross-contamination.
Manufacturer information
VEVOR
Practical help
Common problems
Grinder runs dry
Never run dry; meat acts as a lubricant. Turn off immediately if out of meat.
Parts rusting
Coat all metal parts with food-safe silicone spray after cleaning and drying.
Grinder won't start
Check the fuse and ensure the power cord is securely plugged into a grounded outlet.
Before use
- Ensure the grinder is unplugged before assembly.
- Check all parts for damage.
- Ensure the grinder is on a stable surface.
- Verify the grinder is grounded (3-prong plug).
- Lubricate parts with food-grade silicone.
Specs in practice
- Continuous working time
- Maximum time the motor can run continuously (4 hours).
Images and diagrams
- Exploded diagrams show the assembly order of the auger, knife, and plates.
- Diagrams illustrate the correct orientation of the cutting knife (flat side out).
Model compatibility
- Tray guard is only installed on #22 and #32 models.
- Use 10mm plate for the first grind.

Manual page author
Emily Carter
User documentation editor
Prepares concise manual descriptions and highlights the most useful setup, operation, and maintenance information for readers.