Automotive / Motorcycle Accessories
User Manual for VEVOR 206E RC Off-Road Truck
Quick guide for the VEVOR 206E RC off-road truck. Learn how to charge the battery, pair the remote, adjust speed, and troubleshoot common issues.
Quick answers from the manual
Quick answer
- The VEVOR 206E is an all-terrain RC truck. To start, charge the 7.4V battery using the provided USB cable (5V 0.5-2.0A). Install 3 AA batteries in the remote, turn on the car and remote, and they will pair automatically. p. 2, 5
Key actions
- Charging the battery p. 2
- Pairing the remote p. 5
First start
- Charge the battery, install AA batteries in the remote, turn on both devices, and wait for automatic pairing. p. 2, 5
Problems and fixes
No match or can't control
Replace battery or repair connection
p. 7Technical specifications
| Parameter | Value | Meaning | Pages |
|---|---|---|---|
| Motor | Brushless | Type of motor | p. 7 |
| Battery | 7.4V | Battery voltage | p. 7 |
Where to find it in the PDF
- Charging p. 2
- Troubleshooting p. 7
Table of contents
Manual images
Click an image to enlargeQuick guide from the manual
The VEVOR 206E is an all-terrain remote-controlled truck. This guide provides essential information for setup, operation, and maintenance. Always ensure the battery is charged before use and follow all safety warnings.
Package Contents
- RC Car
- Remote Control
- 7.4V USB Charging Cable
- 7.4V Li-Po Battery
- Product Manual
- Accessory Package
Charging the Battery
The battery is not fully charged when shipped. When the car battery is low, the car will trigger the Low Voltage Cutoff (LVC) function, allowing only turning and no forward/backward movement.
- Plug the USB charging cable into a computer USB port, power bank, or USB adapter (5V @ 0.5-2.0A).
- Connect the battery wire to the USB charging cable.
- Charging takes approximately 250 minutes.
- The green indicator light on the cable will flash while charging and turn solid once fully charged.
Attention: Keep the battery in sight while charging. Do not charge on flammable surfaces. If the battery or cable is damaged, stop using immediately.
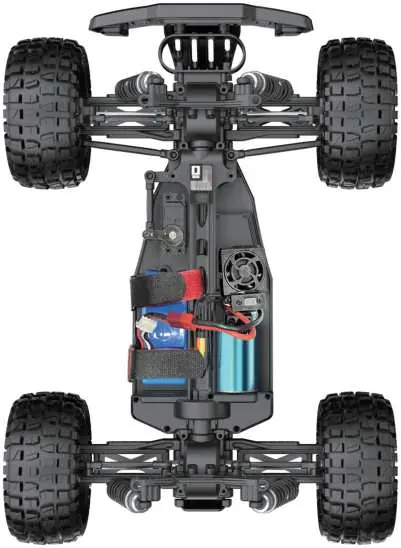
Battery Installation
RC Car: Open the battery compartment, connect the battery to the cable, insert it, and close the cover.
Remote Control: Push the battery cover out, insert 3 AA batteries (not included) in the correct direction, and push the cover back in.
Pairing
- Ensure the car battery is charged and installed.
- Insert batteries into the remote.
- Turn on the car power switch and the remote power switch. Do not pull the throttle trigger during pairing.
- The devices will pair automatically. The power indicators will flash while waiting and turn solid once successful.
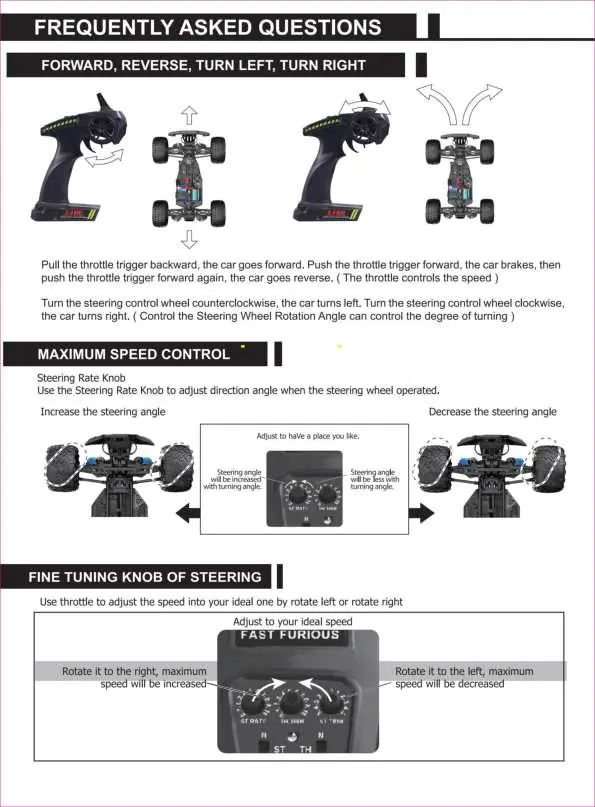
Operation and Speed Control
Use the throttle trigger to control movement: pull back to go forward, push forward to brake, and push forward again to reverse. Use the steering control wheel to turn left or right. The Steering Rate Knob on the remote adjusts the turning angle, and the Fine Tuning Knob helps adjust speed.
Troubleshooting
If you encounter issues, check the following:
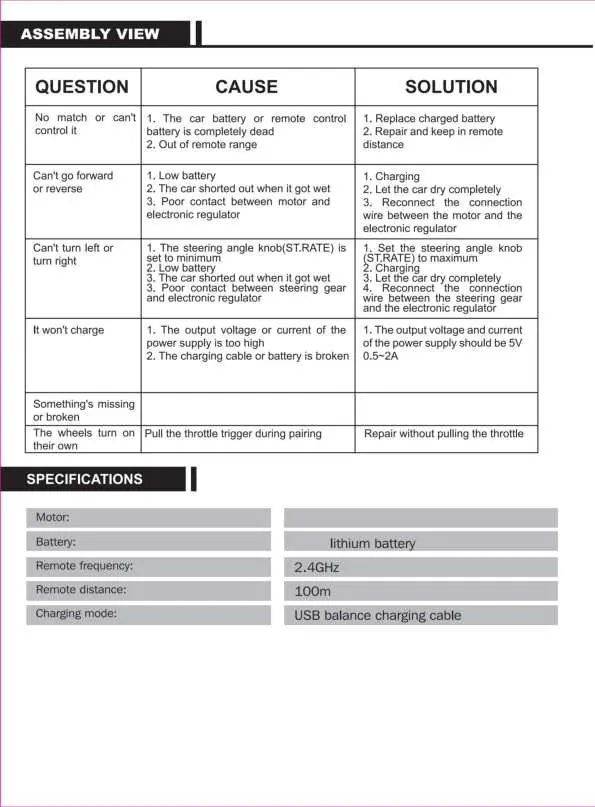
- No match/Can't control: Replace charged battery, repair connection, or move within range.
- Can't go forward/reverse: Charge battery, let the car dry if wet, or reconnect motor/ESC wires.
- Can't turn: Set steering angle knob to maximum, charge battery, or reconnect steering gear wires.
- Won't charge: Ensure power supply is 5V 0.5-2A, or check charging cable.
Specifications
- Motor: Brushless Motor
- Battery: 7.4V Lithium battery
- Remote Frequency: 2.4GHz
- Remote Distance: 100m
- Charging Mode: USB balance charging cable
Manufacturer information
VEVOR
Practical help
Common problems
No match or can't control it
Replace charged battery, repair and keep in remote distance.
Can't go forward or reverse
Charge battery, let the car dry completely, reconnect the connection wire between the motor and the electronic regulator.
Can't turn left or right
Set the steering angle knob (ST.RATE) to maximum, charge battery, or reconnect the connection wire between the steering gear and the electronic regulator.
It won't charge
Ensure the output voltage and current of the power supply is 5V 0.5-2A. Contact customer service if the cable or battery is broken.
Before use
- Ensure the car battery is fully charged.
- Install 3 AA batteries in the remote control.
- Check that all parts are securely attached.
- Ensure the environment is safe and free of water/rain.
Specs in practice
- Remote Frequency
- 2.4GHz for stable, interference-free control.
- Remote Distance
- Maximum operational range of 100 meters.
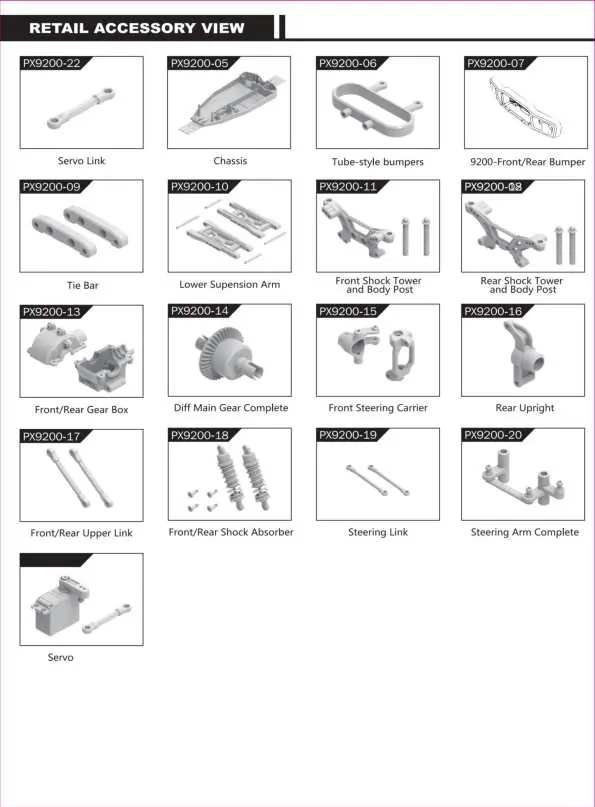
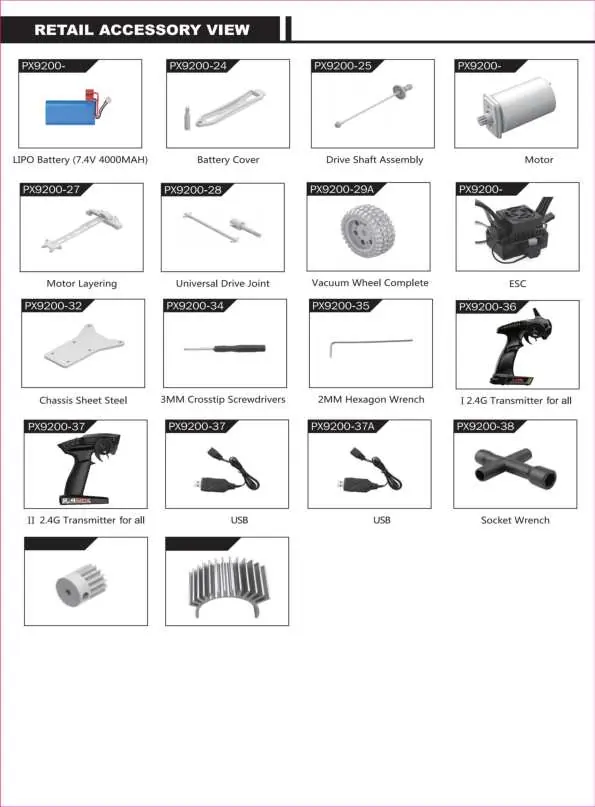
Images and diagrams
- Exploded views illustrate the assembly of the chassis, suspension, and drivetrain.
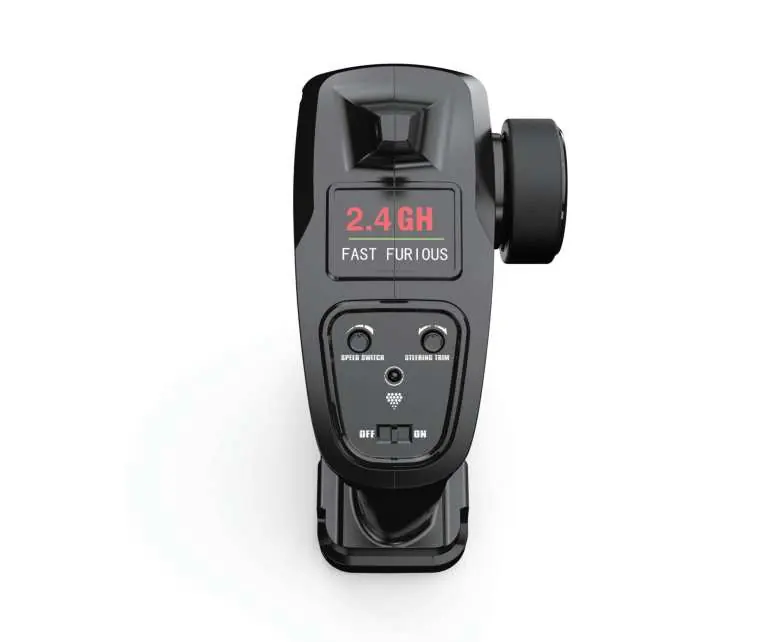
- Remote controller diagram identifies the steering trim, throttle trim, and speed switches.
Model compatibility
- Use only the factory-configured USB charging cable.
- Remote requires 3 AA batteries (not included).

Manual page author
Emily Carter
User documentation editor
Prepares concise manual descriptions and highlights the most useful setup, operation, and maintenance information for readers.