Power / Solar Panels
User Manual for VEVOR 100W Solar Panel
Quick guide for the VEVOR 100W Solar Panel. Includes installation, wiring diagrams for 12V systems, safety warnings, and technical specifications.
Table of contents
Manual images
Click an image to enlargeQuick guide from the manual
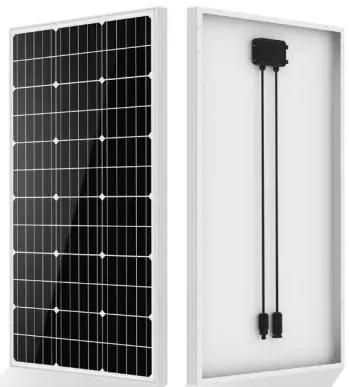
This solar panel is designed for outdoor use, including mounting on roofs, eaves, or balconies. It is a monocrystalline panel intended for 12V systems when used with a compatible charge controller. Before installation, ensure the panel is not damaged and that the installation area is well-ventilated. The panel is waterproof, but the USB charging port is not.
Safety Warnings
- Electrical Safety: High voltage is present inside. Disconnect all power sources before servicing. Do not touch live terminals.
- Handling: Do not stand on, step on, bend, pull, or place heavy objects on the solar panel.
- Environment: Do not use in cars, on car hoods, or in areas with high humidity, asphalt, or sand. Keep away from water and snow.
- Usage: Do not cover or shade the panel during operation as this may cause overheating and fire. Do not stick stickers on the panel.
- Children: Keep the product out of reach of children.
Technical Specifications
The VEVOR 100W solar panel features the following specifications:
- Rated power: 100W
- Solar Cell Type: Monocrystalline
- Open-circuit voltage (Voc): 21.3V DC
- Short circuit current (Isc): 6.1A
- Operating Voltage: 18V (compatible with 12V systems when using a controller)
- Working current: 5.8A
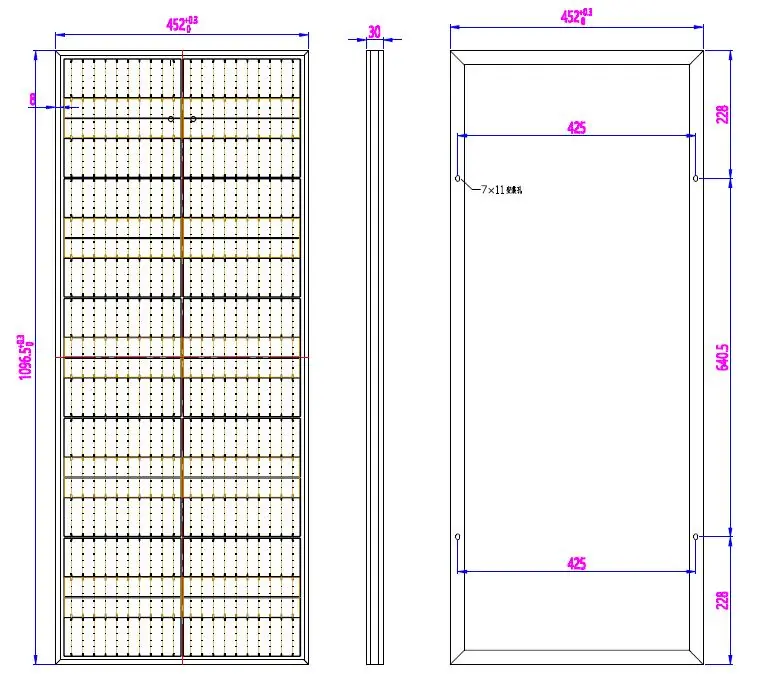
- Dimensions: 1095 x 450 x 29mm
Product Construction
The panel is built with high-quality materials for durability and efficiency:
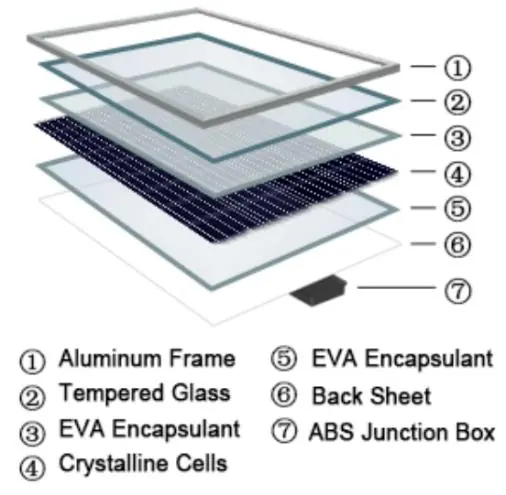
- Aluminum frame for structural strength.
- Tempered glass for high light transmittance.
- EVA encapsulant layers for protection.
- Crystalline cells for power generation.
- ABS junction box for electrical connections.
Operation and Wiring
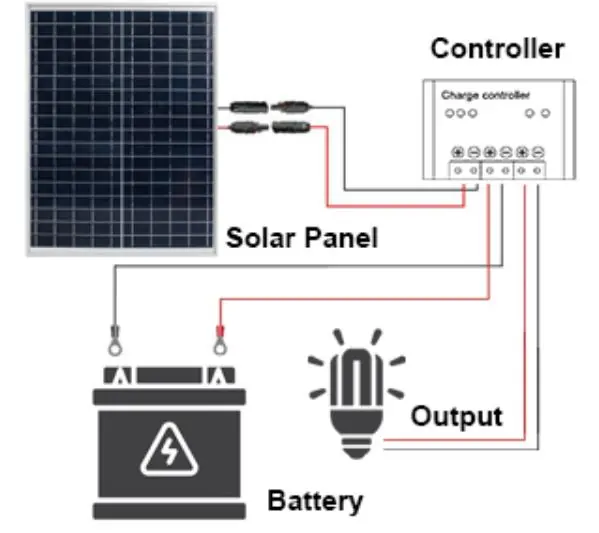
To set up a 12V solar kit, you will need a 12V charge controller, a 12V battery, and your DC load. Ensure the battery voltage is above 10.8V before connecting to the charge controller. The safe charging voltage for the battery should be below 13.86V.

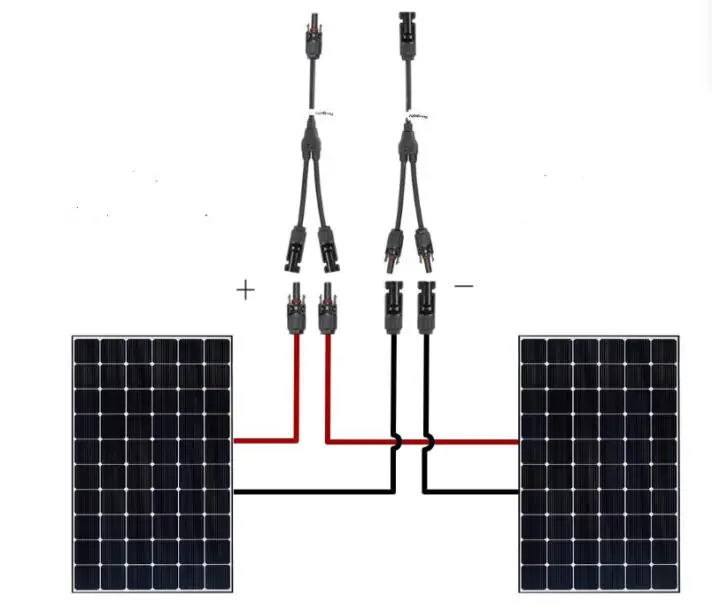
Parallel Connection
You can connect two 100W panels in parallel to achieve a 200W system. This requires appropriate Y-branch connectors to combine the positive and negative terminals of both panels before connecting them to the charge controller.
Correct Disposal
This product is subject to European Directive 2012/19/EU. Do not discard with normal domestic waste. It must be taken to a designated collection point for recycling electrical and electronic devices.
Manufacturer information
VEVOR
Practical help
Common problems
Low charging rate
Check the intensity and angle of sunlight. Ensure the panel is not covered, shaded, or dirty.
USB port issues
If liquid or foreign objects enter the USB port, disconnect the panel immediately to prevent electric shock or fire.
Panel damage
Do not stand on, bend, or pull the panel. If the unit is damaged or has exposed wiring, stop using it immediately.
Before use
- Inspect the panel for any physical damage or exposed wiring.
- Ensure the installation location is well-ventilated.
- Verify that the battery voltage is above 10.8V before connecting to the charge controller.
- Ensure all necessary accessories (charge controller, battery) are compatible with 12V systems.
- Confirm the installation surface is stable (e.g., roof, eaves, balcony).
Specs in practice
- Rated power: 100W
- The maximum power output the panel can generate under ideal sunlight conditions.
- Open-circuit voltage (Voc): 21.3V DC
- The voltage of the panel when no load is connected; important for sizing charge controllers.
- Operating Voltage: 18V
- The voltage output when the panel is connected to a load, suitable for 12V battery charging.
- Short circuit current (Isc): 6.1A
- The maximum current the panel can produce if the terminals are shorted.
Images and diagrams
- The wiring diagram shows the connection sequence: Solar Panel -> Charge Controller -> Battery -> DC Load.
- The parallel connection diagram illustrates how to use Y-connectors to combine two 100W panels.
Model compatibility
- Compatible with 12V systems when used with an appropriate charge controller.
- Not intended for use by children or persons with reduced capabilities without supervision.

Manual page author
Emily Carter
User documentation editor
Prepares concise manual descriptions and highlights the most useful setup, operation, and maintenance information for readers.