Sports / Sports Equipment
Virtufit Kids Trampoline with Safety Net 140cm
Quick guide for the Virtufit Kids Trampoline with Safety Net 140cm. Includes assembly steps, safety warnings, maintenance tips, and basic jumping techniques.
Table of contents
Manual images
Click an image to enlargeQuick guide from the manual
This trampoline is designed for outdoor use by children aged 6 and older. The maximum user weight is 50 kg. Assembly requires two adults in good physical condition. Always ensure the trampoline is placed on a level surface with at least 2 meters of clearance from structures like fences, garages, or electrical wires.
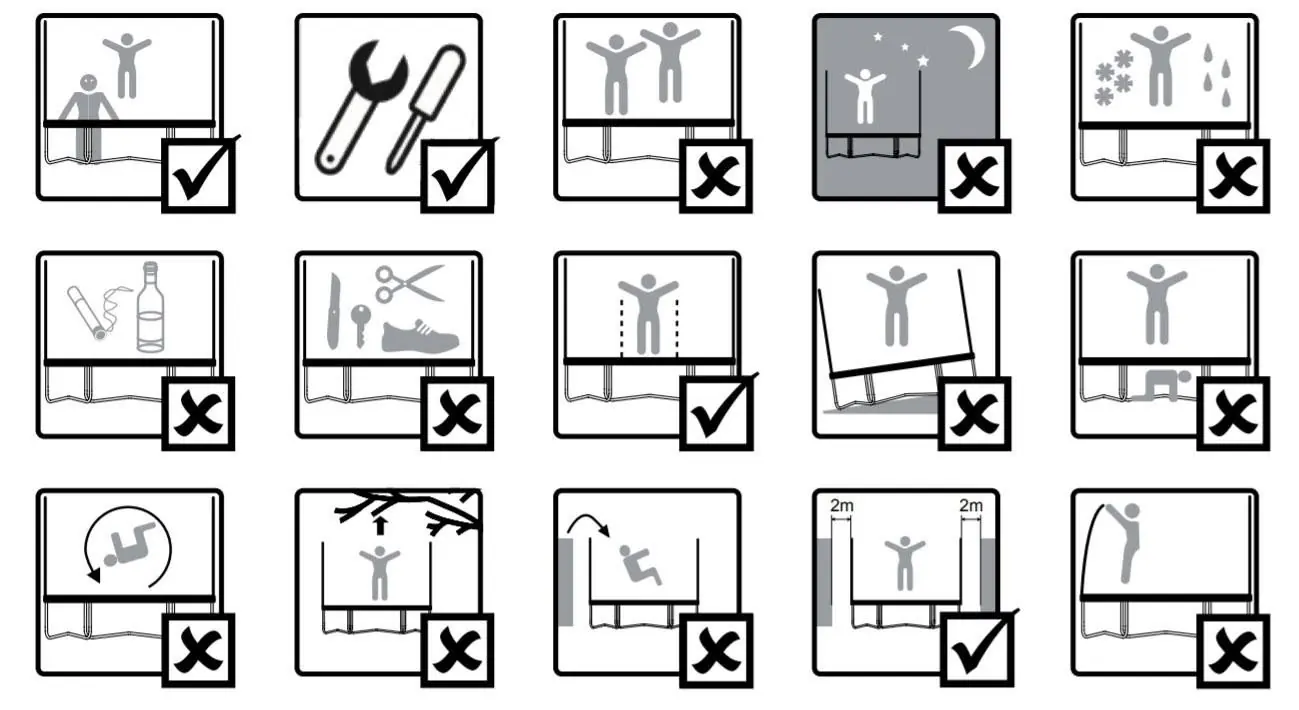
Safety instructions
- Age limit: Recommended for children 6+ years. Not suitable for children under 36 months due to small parts.
- Usage: Only one user at a time to prevent collisions. Always close the net opening before jumping.
- Technique: Jump in the middle of the mat. Do not perform somersaults or flips. Do not exit by jumping.
- Environment: Do not use in strong wind conditions. Do not use the mat when wet.
- Supervision: Adult supervision is required at all times.
Parts checklist
Before starting assembly, ensure you have all parts:
- Frame Cover (A), Jumping Mat (B), Top Rails (C), Springs (D), W-Shaped Legs (E), Spring Tool (F).
- Fork Screws (G), Spanner (H), Tube Caps (I), Upper Pole Tubes (J), Bottom Pole Tubes (K), Enclosure Net (L), 9-Shaped Screws (M), Screws (O), Screwdriver (P).
Assembly instructions
Step 1: Frame AssemblyAttach Top Rails (C) together to form a circle. With two people, lift the frame and insert the welded tubes into the U-shaped leg tubes. Ensure locking holes are aligned.
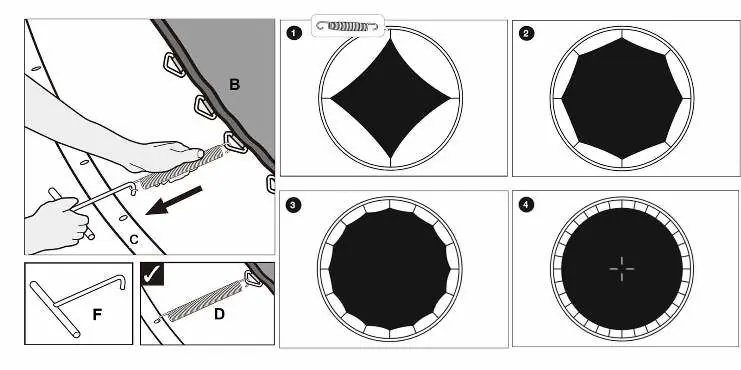
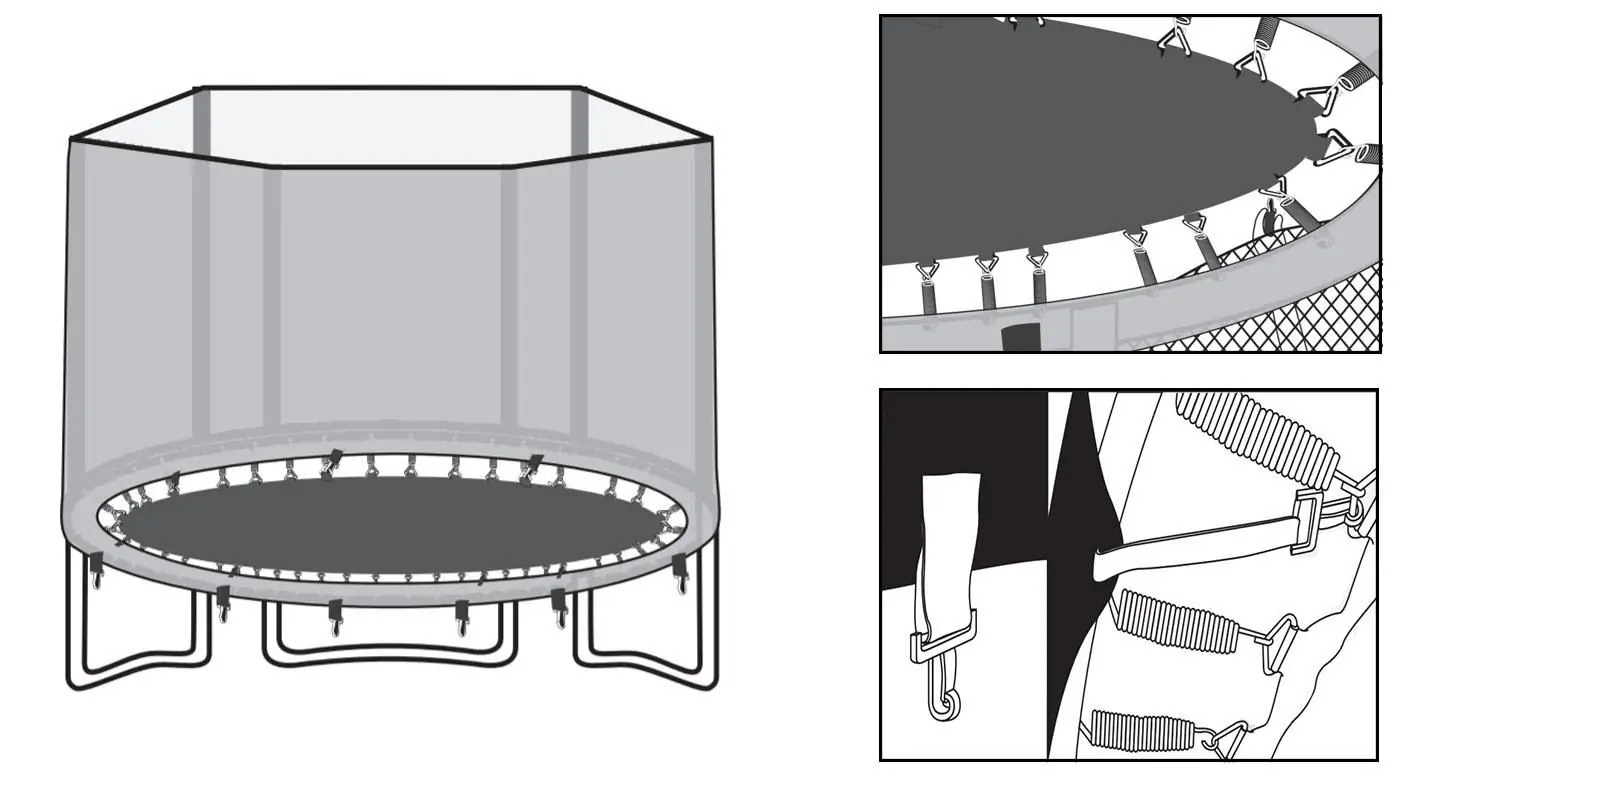
Step 2: Spring InstallationLay the Jumping Mat (B) inside the frame. Use the Spring Tool (F) to attach springs (D) from the mat D-rings to the frame. Attach springs on opposite sides first to balance tension.
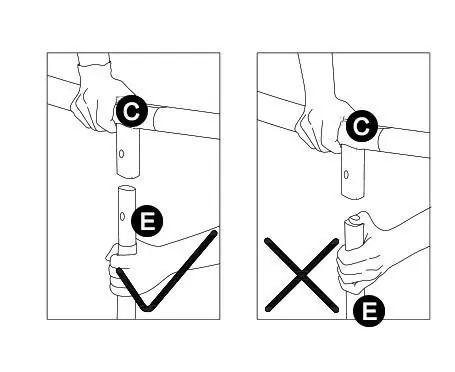
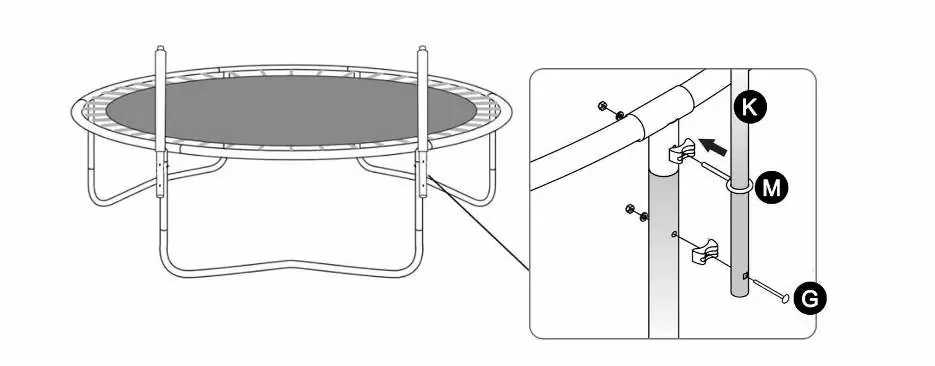
Step 3: Pole AssemblyAttach Bottom Pole Tubes (K) to the leg frame using Fork Screws (G) and 9-Shaped Screws (M). Secure with the Spanner (H). Attach Upper Pole Tubes (J) to the bottom tubes.
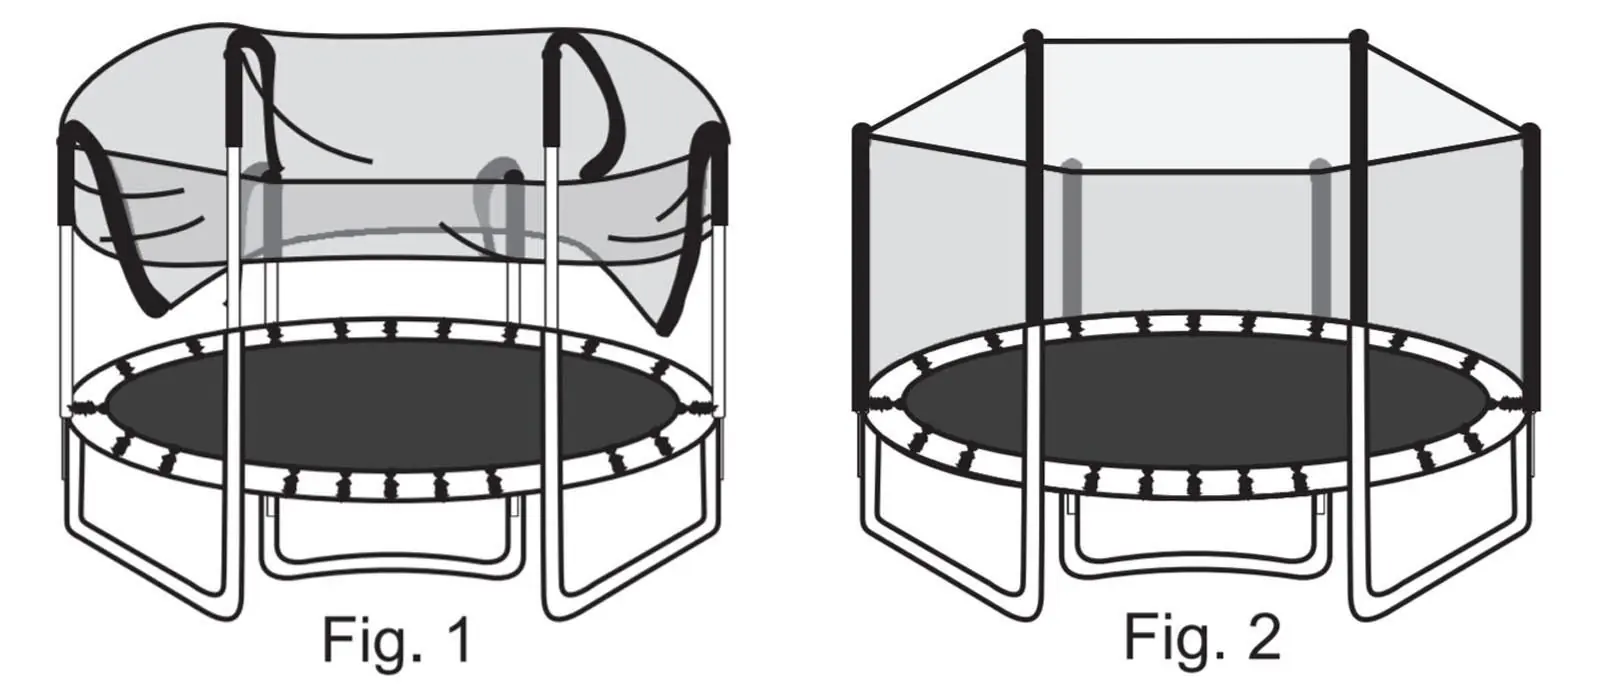
Step 4: Net InstallationSlide the Enclosure Net (L) sleeves over the poles, starting a few inches at a time until they reach the bottom.
Step 5: Final ChecksConnect bottom straps/clips to the mat V-rings under the safety pad. Ensure all bolts are tight and the spring cover is securely tied.
Moving the trampoline
If the trampoline needs to be moved, it should be lifted slightly by at least two people and kept horizontal. For any other type of move, disassemble the unit by following assembly steps in reverse.
Maintenance
- Daily: Clean and remove sweat/moisture after use. Ensure the mat is free from dust and dirt.
- Semi-annual: Inspect all bolts and nuts and tighten as required. Check the frame, mat, and enclosure for defects.
Basic trampoline skills
The manual outlines four basic skills: Base Jump, Knee Jump, Belly Jump, and Sit Jump. Always start from a standing position and maintain control. A certified instructor should be contacted to further develop skills.
Manufacturer information
VirtuFit
Practical help
Common problems
Frame warping during assembly
Ensure the trampoline is on level ground. Tighten all frame joint bolts before installing springs. Do not use your leg to push against the frame while loading springs.
Missing parts
Check the packaging and styrofoam carefully. Some parts (bolts, screws) may be pre-attached to the trampoline frame.
Uneven spring tension
Always attach springs on opposite sides of the frame first, then move to adjacent springs to distribute tension equally.
Before use
- Check all nuts and bolts for tightness.
- Ensure all spring-loaded joints are intact.
- Verify the mat, padding, and enclosure are free of defects.
- Ensure the net opening is securely closed.
- Check that there are no children, animals, or obstructions underneath the trampoline.
Specs in practice
- Max user weight
- 50 kg (110 lbs)
- Recommended age
- 6+ years
- Clearance required
- At least 2 meters from structures or obstructions
Images and diagrams
- Spring installation: Use the provided tool to hook the spring into the frame hole.
- Frame leveling: If the frame warps, push down on the warped section with two people to level it out.
- Net installation: Pull sleeves down a few inches at a time until they reach the bottom.
Model compatibility
- Outdoor use only.
- Not suitable for children under 36 months.
- Do not install over concrete, asphalt, or other hard surfaces.

Manual page author
Michael Turner
Technical manual editor
Reviews PDF manuals for structure, safety notes, and practical product details so readers can find the right information quickly.