Toys / Pretend Play
Vtech My 1st Record Player Instruction Manual
Quick guide for the Vtech My 1st Record Player. Learn how to install batteries, remove packaging locks, operate the turntable, use the kitty and next buttons, and troubleshoot common issues.
Quick answers from the manual
Quick answer
- The Vtech My 1st Record Player is a toy that requires 3 AA batteries. To start, remove the packaging locks, install batteries, and toggle the power switch. It features a turntable, volume control, and interactive buttons. p. 4, 5, 7
Key actions
- Battery Installation p. 5
- Exiting Try-Me Mode p. 4
First start
- Remove packaging locks, install 3 AA batteries, and turn the unit on. p. 4, 5, 7
Problems and fixes
Unit malfunctions or stops working
Turn off, remove batteries, wait, replace batteries, and turn on. If it persists, install new batteries.
p. 12Maintenance and reset
- Turn the unit off, remove batteries, wait, and replace batteries. p. 12
Technical specifications
| Parameter | Value | Meaning | Pages |
|---|---|---|---|
| Batteries | 3 x AA (AM-3/LR6) | Required power source | p. 5 |
| Auto Shut-Off | 70 seconds | Time until automatic power down | p. 8 |
Where to find it in the PDF
- Getting Started p. 5
- Product Features p. 7, 8
Table of contents
Manual images
Click an image to enlargeQuick guide from the manual
The Vtech My 1st Record Player is a retro-inspired toy featuring five double-sided records with various music styles. Before first use, ensure you remove the packaging locks and install fresh batteries. The unit includes an automatic shut-off feature to preserve battery life.
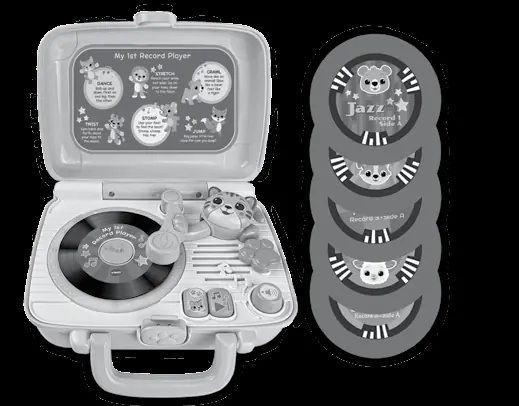
Included in the package
- My 1st Record Player
- 5 Double-Sided Records
- Quick Start Guide
Warning: All packing materials such as tape, plastic sheets, packaging locks, removable tags, cable ties, cords, and packaging screws are not part of this toy and should be discarded for your child’s safety.
Getting started
This product is in Try-Me mode in the packaging. After opening the package, please turn the unit off then on again to proceed with normal play.

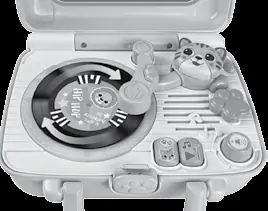
Unlock the packaging locks
- Rotate the packaging lock 90 degrees anticlockwise.
- Pull out the packaging locks and discard.
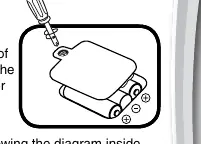
Battery removal and installation
- Make sure the unit is turned Off.
- Locate the battery cover on the back of the unit, use a screwdriver to loosen the screw and then open the battery cover.
- Remove old batteries by pulling up on one end of each battery.
- Install 3 AA (AM-3/LR6) batteries following the diagram inside the battery box. For best performance, alkaline batteries or fully charged Ni-MH rechargeable batteries are recommended.
- Replace the battery cover and tighten the screw to secure.
Product features
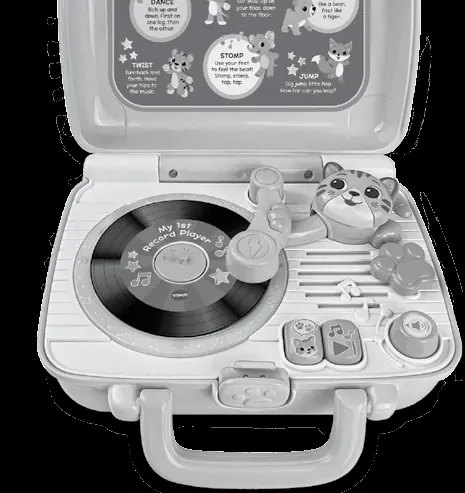
- On/Off Switch: Located on the back of the unit. Slide to the On position to hear a short tune and phrases.
- Volume Dial: Turn to adjust the volume to the desired level.
- Storage Compartment: Located on the back of the record player; recommended for storing records when not in use.
- Automatic Shut-Off: The unit will automatically power down after approximately 70 seconds without input. Press any button, open the lid, or move the player arm to turn it on again.
Activities
- Turntable: Place a record on the turntable and slide the player arm over the record to activate it. Side A plays a sung song or phrase and melody. Side B plays animal sounds, a phrase, and melodies.
- Kitty Button: Press when a record is activated to hear the pictured animal identified. If no record is activated, the kitty will say fun phrases.
- Next Button: Press when a record is activated to play the next phrase, song, short tune, or melody.
- Record Player Lid: Open the lid to hear a song, phrase, and sound. Close the lid to hear a short tune.
Care and maintenance
- Keep the unit clean by wiping it with a slightly damp cloth.
- Keep the unit out of direct sunlight and away from any direct heat sources.
- Remove the batteries if the unit will not be in use for an extended period of time.
- Do not drop the unit on hard surfaces and do not expose the unit to moisture or water.
Troubleshooting
If the program or activity stops working or malfunctions, follow these steps:
- Turn the unit Off.
- Interrupt the power supply by removing the batteries.
- Let the unit stand for a few minutes, then replace the batteries.
- Turn the unit On.
- If the unit still does not work, install a new set of batteries.
Practical help
Common problems
Unit stops working or malfunctions
Turn off, remove batteries, wait a few minutes, replace batteries, and turn back on. If it still fails, install a new set of batteries.
Unit powers down, light fades, or turntable slows
Install a new set of batteries.
Before use
- Remove packaging locks by rotating 90 degrees anticlockwise.
- Install 3 AA (AM-3/LR6) batteries.
- Turn the unit off and on again to exit Try-Me mode.
Specs in practice
- Auto Shut-Off
- Powers down after approximately 70 seconds of inactivity.
Images and diagrams
- Packaging locks: Rotate 90 degrees anticlockwise to unlock.
- Battery compartment: Located on the back, requires a screwdriver to open.
Model compatibility
- Use alkaline or fully charged Ni-MH rechargeable batteries.
- Do not mix old and new batteries or different battery types.

Manual page author
David Miller
Documentation analyst
Organizes user manual content into clear summaries, with attention to model details, product context, and everyday usability.