Accessories / Mounts & Stands
WALI 1343LKS Full-Motion TV Wall Mount Installation Guide
Installation guide for the WALI 1343LKS full-motion TV wall mount. Includes mounting instructions for wood studs and concrete walls, VESA plate attachment, and adjustment steps.
Table of contents
Manual images
Click an image to enlargeImportant Information
This guide provides instructions for installing the WALI 1343LKS full-motion TV wall mount. Before beginning, ensure your wall type is compatible (wood stud or solid concrete/brick) and that your TV meets the weight and VESA requirements. Do not mount this product on drywall alone.
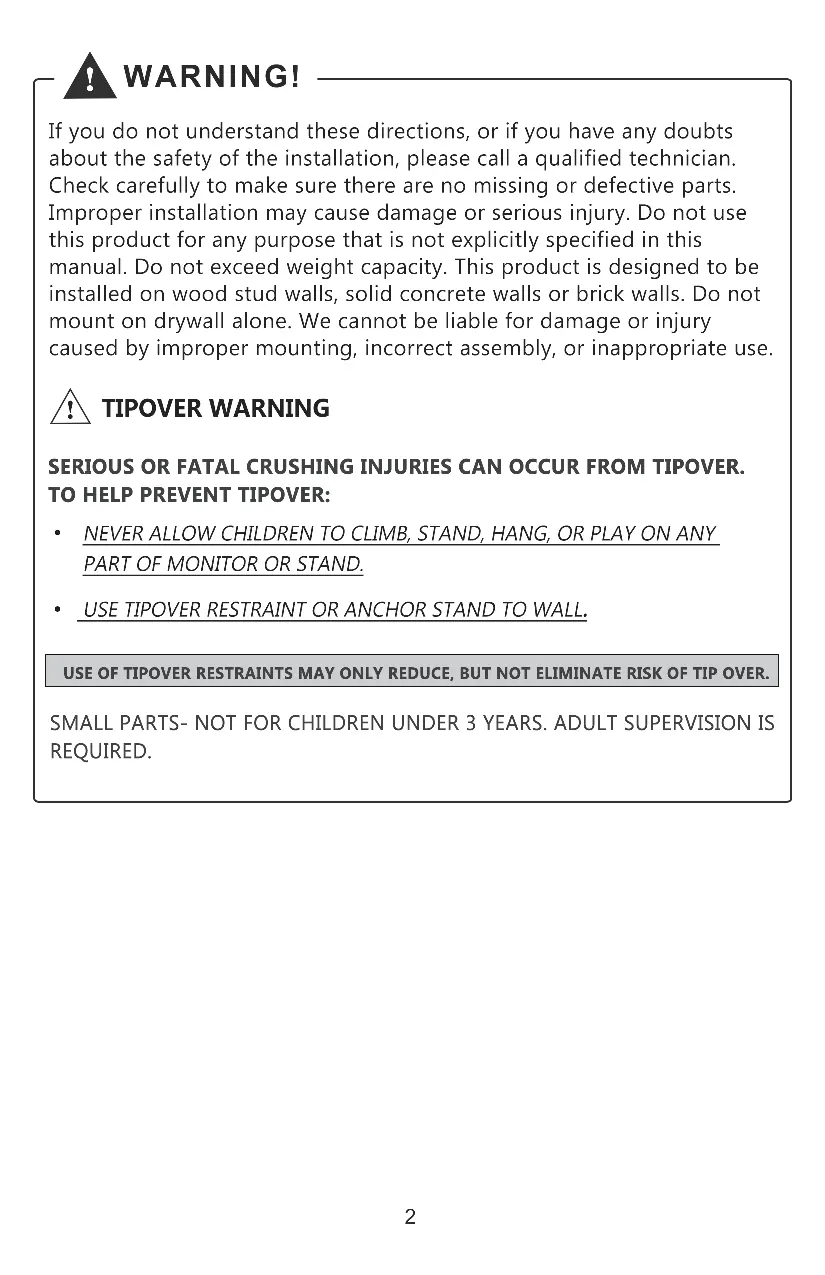
Safety Warnings
- Weight Capacity: Do not exceed the maximum weight capacity of 15kg (33lbs).
- Wall Type: Designed for wood stud walls, solid concrete walls, or brick walls. Do not mount on drywall alone.
- Tip-over Prevention: Never allow children to climb, stand, hang, or play on any part of the monitor or stand.
- Small Parts: Keep small parts away from children under 3 years. Adult supervision is required.
Supplied Parts
Ensure all parts are present before starting installation:
- Arm (A), VESA Plate (B), Decor Covers (C)
- Adapters (D, E), Bolts (F), Nuts (G), Bubble Level (H), Allen Key (I)
- Various TV bolts (M-A, M-B, M-C, M-D), Washers (M-E, M-F), Spacers (M-G)
- Wall mounting hardware: Bolts (W-A), Concrete Anchors (W-B)
Wall Installation
Option A: Wood Stud
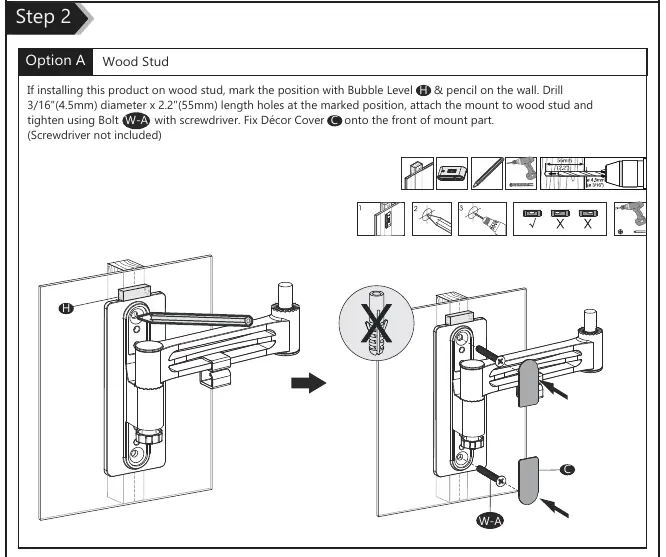

- Use the Bubble Level (H) and a pencil to mark the position on the wall.
- Drill 3/16" (4.5mm) diameter holes, 2.2" (55mm) deep at the marked positions.
- Attach the mount to the wood stud using Bolts (W-A) and a screwdriver.
- Fix the Decor Covers (C) onto the front of the mount.
Option B: Concrete Wall
- Use the Bubble Level (H) and a pencil to mark the position on the concrete wall.
- Drill 3/8" (10mm) diameter holes, 2.4" (60mm) deep at the marked positions.
- Insert Concrete Anchors (W-B) into the holes.
- Attach the mount using Bolts (W-A) and the anchors.
- Fix the Decor Covers (C) onto the front of the mount.
Attaching the VESA Plate to the TV
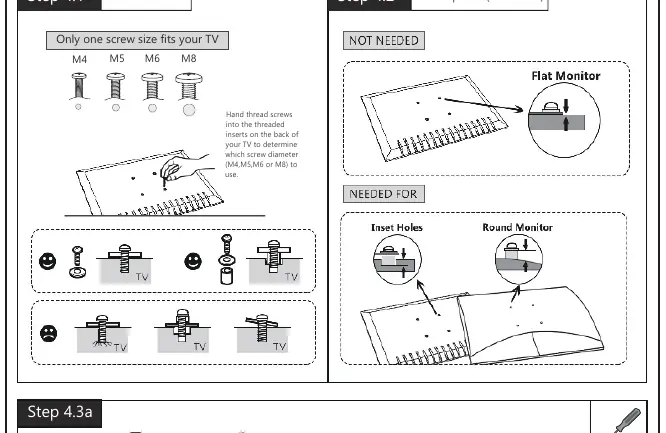
- Select Screws: Hand-thread screws into the back of your TV to determine the correct diameter (M4, M5, M6, or M8).
- Select Spacers: Use spacers (M-G) if your TV has inset holes or a round back.
- Connect Plate: Attach the VESA Plate (B) to the back of the TV using the appropriate bolts and washers. Ensure the arrow on the plate is pointing up.
- VESA Adapters: If required for larger VESA patterns, attach Adapters (D) and (E) to the VESA Plate (B) using Bolts (F) and Nuts (G).
Final Assembly and Adjustments
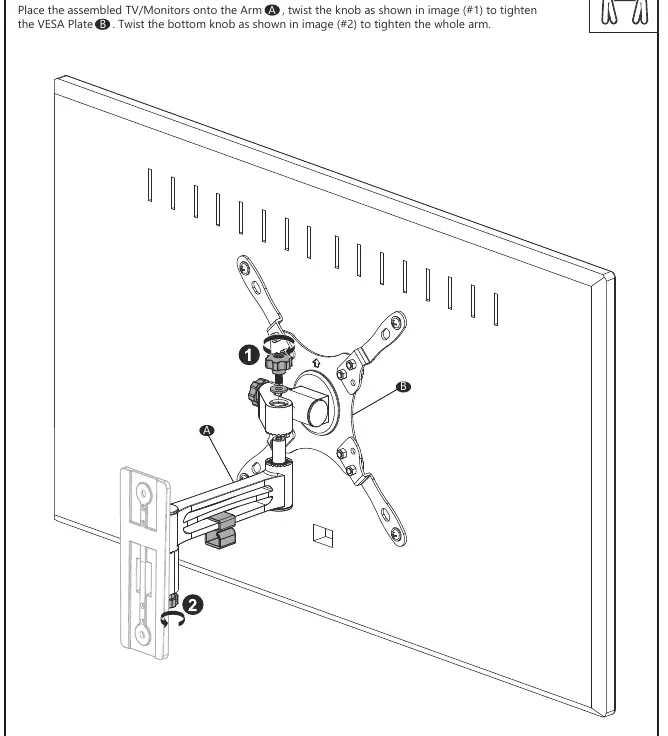
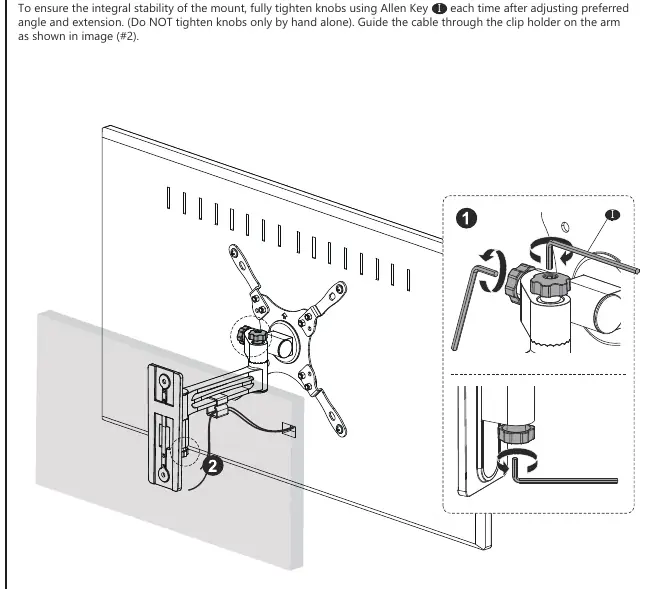
- Mounting: Place the assembled TV onto the Arm (A).
- Securing: Twist the knob on the VESA Plate (B) to tighten it to the arm. Twist the bottom knob on the arm to secure the assembly.
- Stability: Use the Allen Key (I) to fully tighten all knobs after adjusting the angle and extension. Do not rely on hand-tightening alone.
- Cable Management: Guide the cable through the clip holder on the arm.
- Adjustments: The mount allows for angle adjustments as needed.
Practical help
Common problems
TV does not fit the mount
Verify your TV's VESA pattern matches the supported sizes (75x75, 100x100, 200x100, 200x200 mm).
Mounting on drywall
Do not mount on drywall alone. The product must be installed on wood studs or solid concrete/brick walls.
Knobs feel loose
Use the provided Allen Key (I) to fully tighten all adjustment knobs after setting the desired angle and extension.
Before use
- Verify wall type (wood stud or solid concrete/brick).
- Check TV weight (max 15kg / 33lbs).
- Check TV size (max 43 inches).
- Ensure all parts from the supplied parts list are present.
- Have a screwdriver and drill ready (not included).
Specs in practice
- VESA Compatibility
- Supports 75x75, 100x100, 200x100, and 200x200 mm mounting patterns.
- Weight Capacity
- Maximum load is 15kg (33lbs).
Images and diagrams
- Step 2 illustrates the drilling requirements for wood studs versus concrete walls.
- Step 4.1 shows how to test screw sizes (M4, M5, M6, M8) in your TV's threaded inserts.
- Step 4.2 demonstrates when to use spacers for flat, inset, or round monitor backs.
Model compatibility
- Not for use on drywall alone.
- Requires wood stud or solid concrete/brick wall.
- Supports VESA patterns up to 200x200mm.

Manual page author
Emily Carter
User documentation editor
Prepares concise manual descriptions and highlights the most useful setup, operation, and maintenance information for readers.