Furniture / Chairs & Seating
Assembly Instructions for Wayfair Ottoman
Complete assembly guide for the Wayfair Ottoman. Includes hardware lists, step-by-step installation instructions, and cushion care tips.
Quick answers from the manual
Quick answer
- This document provides assembly instructions for the Wayfair Ottoman. It requires two people to assemble and includes a hardware list and cushion care instructions. p. 1, 2, 3, 4
Key actions
- Do not fully tighten screws until all are aligned. p. 2
- Use two people for assembly. p. 2
Problems and fixes
Missing or damaged parts
Contact after-sales team with pictures.
p. 2Maintenance and reset
- Restore cushion thickness by rubbing and flapping it after opening the vacuum seal. p. 2
Technical specifications
| Parameter | Value | Meaning | Pages |
|---|---|---|---|
| Screw size | M6*35 | Standard screw size for assembly | p. 3 |
Where to find it in the PDF
- Title Page p. 1
- Installation Warnings p. 2
- Parts List p. 3
- Assembly Steps p. 4, 5
Table of contents
Manual images
Click an image to enlargeImportant Information
Before beginning the assembly, please note the following requirements to ensure a smooth process:
- Two people are required for the assembly process.
- If using an electric drill, ensure it is set to slow mode.
- Do not fully tighten any screws until all screws have been aligned with their respective holes.
- If you encounter any missing accessories or damaged parts, please contact customer support with photos for assistance.
Parts and Hardware
Ensure you have all the necessary components before starting:
- Hardware: M6*35 screws (#F), Washers (#W), Allen key (#H), and Sofa legs (#G).
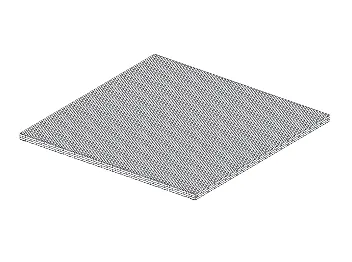
- Components: Base (#L), Side panels (#M), and Side panels (#K).
- Spare parts: Screwdriver and Wicker repair material.
Assembly Instructions
Follow these steps to assemble your ottoman:
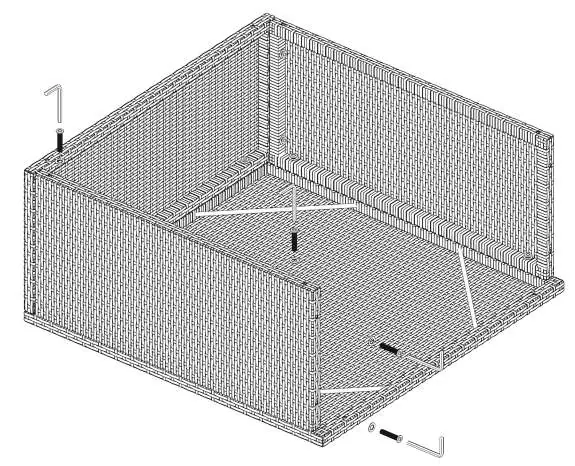
- Step 1: Attach the side panel (K) to the base (L) using screws (F), washers (W), and the Allen key (H).
- Step 2: Attach the second side panel (K) and the first side panel (M) to the base (L) using the provided hardware.
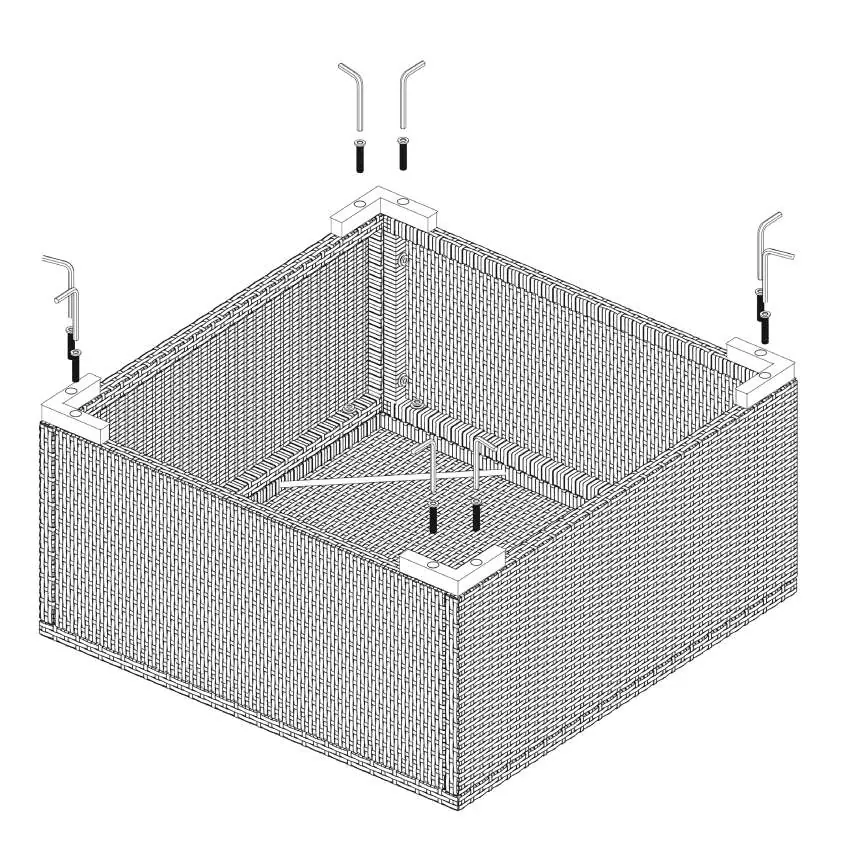
- Step 3: Continue attaching the remaining side panels (M) to the base (L) to form the frame.
- Step 4: Secure all side panels together using the remaining screws, washers, and Allen key.
- Step 5: Attach the four sofa legs (G) to the bottom corners of the ottoman frame using screws (F) and the Allen key (H).
Cushion Care
The back cushion is vacuum-sealed for shipping. Upon opening the package:
- Allow time for the cushion to return to its original thickness.
- Rub and flap the cushion to help it regain its shape before use.
Manufacturer information
Wayfair LLC
Practical help
Common problems
Missing or damaged parts
Contact the after-sales team and provide pictures of the issue.
Cushion is flat
The cushion is vacuum-sealed; allow time for it to fluff up and manually rub/flap it to restore thickness.
Before use
- Ensure 2 people are available for assembly.
- Verify all hardware (screws, washers, legs) is present.
- Set electric drill to slow mode if using one.
- Do not tighten screws completely until all are aligned.
Images and diagrams
- The assembly diagrams illustrate the sequence of attaching side panels to the base and finally attaching the legs.
- Hardware labels (F, W, H, G) correspond to the parts list.

Manual page author
Michael Turner
Technical manual editor
Reviews PDF manuals for structure, safety notes, and practical product details so readers can find the right information quickly.