Home Appliances / Cooktops Hobs
Whirlpool 15.7-cu ft Upright Freezer Owner's Manual
Comprehensive owner's manual for the Whirlpool 15.7-cu ft Upright Freezer. Includes detailed instructions for installation, water supply connection, door reversal, leveling, cleaning, and maintenance.
Table of contents
Manual images
Click an image to enlargeImportant Safety Information
Your safety and the safety of others are very important. Always read and obey all safety messages provided in this manual. Key safety precautions include:
- Child Entrapment: Before discarding your old freezer, remove the doors to prevent children from becoming trapped inside.
- Electrical Safety: Plug into a grounded 3-prong outlet. Do not use an extension cord or adapter.
- Flammable Materials: Keep flammable materials and vapors, such as gasoline, away from the appliance.
- Ventilation: Keep ventilation openings clear of obstruction to ensure proper airflow.
- Defrosting: Do not use mechanical devices to accelerate the defrosting process.
Installation Instructions
Before moving the freezer to its final location, ensure you have the proper electrical connection. A 115 V, 60 Hz, 15 A or 20 A fused, grounded electrical supply is required. It is recommended to use a separate circuit serving only your freezer.
Location Requirements
- Allow at least 3 inches (7.5 cm) of clearance on both sides of the freezer.
- Allow 2 inches (5 cm) of clearance between the back of the freezer and the wall.
- The freezer operates most efficiently in an area where the temperature does not fall below 40°F (5°C).
Water Supply Connection
If your model includes an ice maker or water dispenser, follow these steps to connect the water supply:
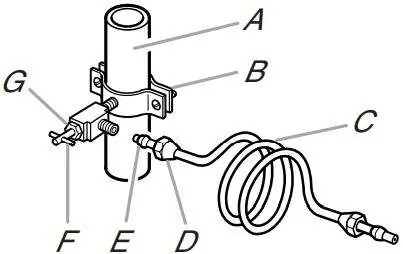
- Turn off the main water supply and locate a 1/2 inch to 1 1/4 inch vertical cold water pipe near the freezer.
- Drill a 1/4 inch hole in the cold water pipe using a cordless drill.
- Fasten the shutoff valve to the cold water pipe with the pipe clamp, ensuring a watertight seal.
- Connect the copper or PEX tubing to the shutoff valve using a compression nut and sleeve.
- Flush the tubing until the water runs clear before connecting it to the freezer valve inlet.
- Check all connections for leaks after installation.
Door Reversal
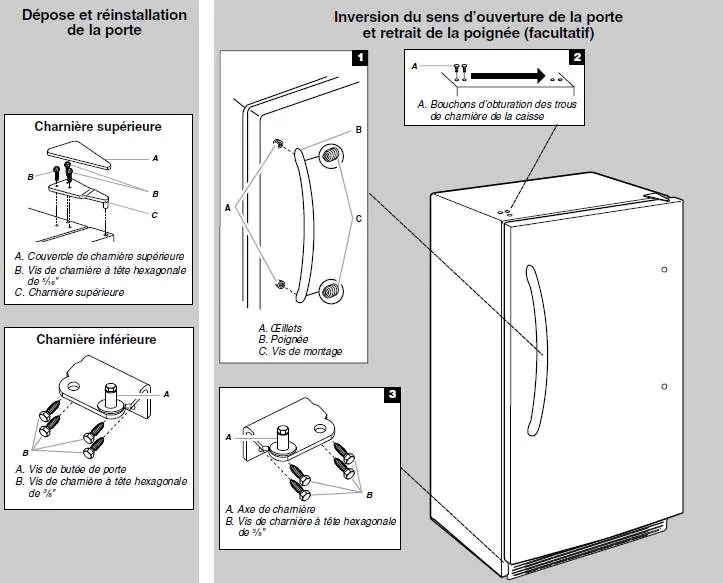
If you need to reverse the door swing, follow these general steps:
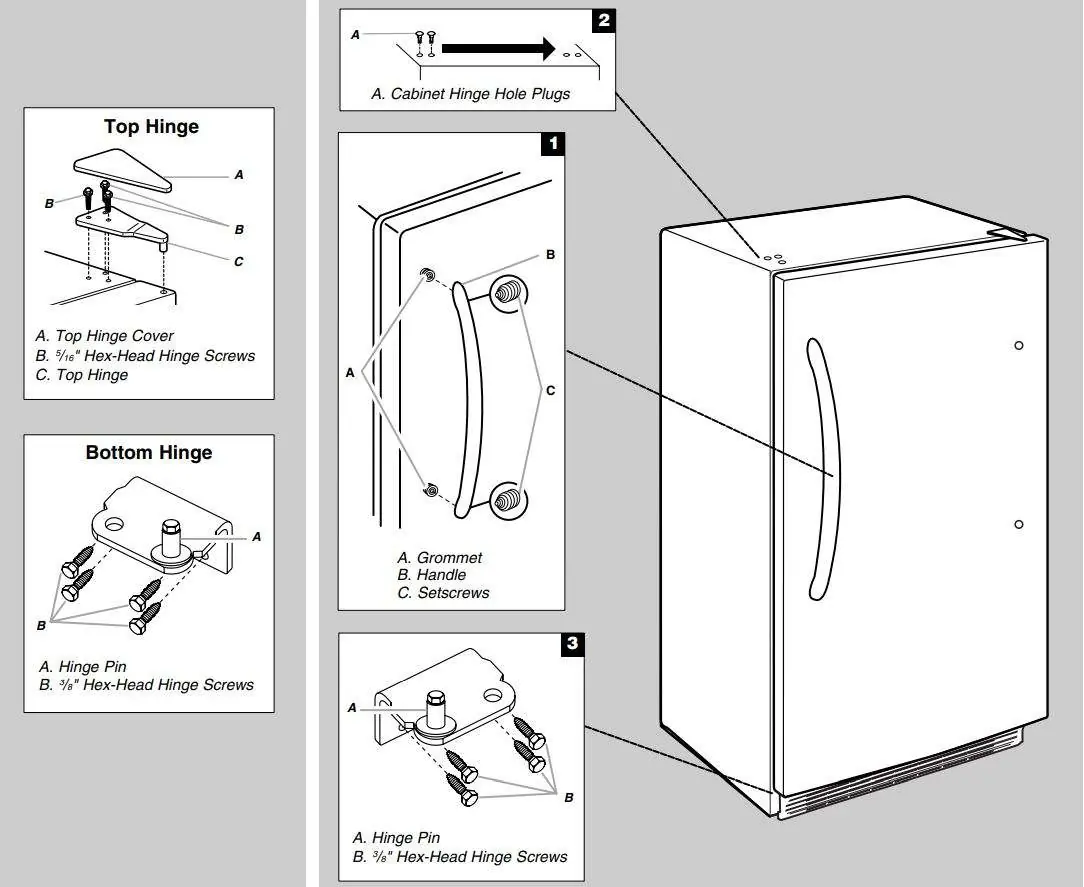
- Unplug the freezer and remove all food and door bins.
- Remove the top hinge cover and top hinge assembly.
- Lift the freezer door free from the lower hinge.
- Remove the bottom hinge assembly and move it to the opposite side.
- Transfer the cabinet hinge hole plugs to the opposite side.
- Reinstall the door, ensuring the door stop is moved to the opposite side and aligned with the hinge pin.
Freezer Leveling
Proper leveling is essential for the door to close easily and to prevent the freezer from rolling forward.
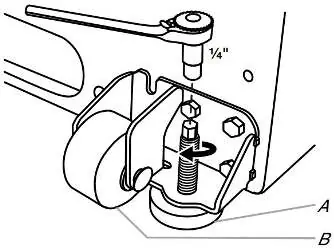
- Style 1 (Without Grille): Use the front leveling legs to lift the cabinet off the floor and adjust until level.
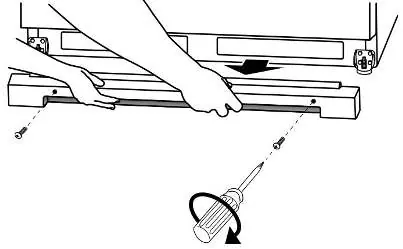
- Style 2 (With Grille): Remove the base grille to access the brake feet. Turn the brake feet clockwise to raise the front of the freezer until the rollers are off the floor and the unit is steady.
Maintenance and Care
Complete cleaning should be done at least once a year.
- Cleaning: Use a clean sponge or soft cloth with a mild detergent in warm water. Do not use abrasive or harsh cleaners, window sprays, or flammable fluids on plastic parts.
- Odors: Wash interior walls with a mixture of warm water and baking soda (2 tablespoons to 1 quart of water).
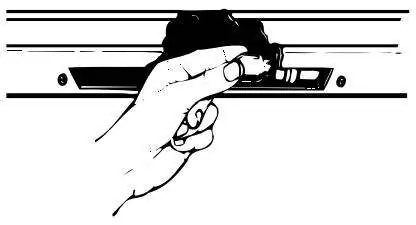
- Light Bulb Replacement: Unplug the freezer. For manual defrost models, reach behind the lens to remove the bulb. For automatic defrost models, squeeze the lens from the sides to remove the shield. Replace with a 40 W maximum appliance bulb.
- Manual Defrosting: If your model requires manual defrosting, do so when frost reaches 1/4 inch thickness. Use a plastic scraper; never use sharp tools like knives or ice picks.
Manufacturer information
Whirlpool Corporation
Practical help
Common problems
Freezer rolls forward when opening the door
Adjust the brake feet clockwise until they are snug against the floor and the rollers are off the floor.
Door does not close easily
Adjust the cabinet tilt by raising the front of the freezer using the brake feet.
Water dispenser not working
Check if the sediment filter in the reverse osmosis system is blocked or if water pressure is below 30-120 psi.
Before use
- Remove all tape and glue residue from surfaces.
- Clean the interior of the freezer.
- Ensure a grounded 3-prong outlet is available.
- Verify water supply pressure (if applicable).
- Ensure the freezer is level and steady.
Show more Show less
Specs in practice
- Electrical Requirements
- 115 V, 60 Hz, 15 A or 20 A fused, grounded circuit.
- Water Pressure
- 30 to 120 psi (207 to 827 kPa) required for water dispenser/ice maker.
Images and diagrams
- Water supply connection: Shows the shutoff valve, pipe clamp, and tubing connection to the cold water pipe.
- Door hinges: Illustrates the top and bottom hinge assemblies for door removal and reversal.
- Leveling: Shows the brake feet and roller assembly at the bottom of the freezer.
Model compatibility
- Ice maker kit can be added to some models; check serial tag inside the food compartment.
- Reverse osmosis water filtration systems require a minimum of 40-60 psi water pressure.

Manual page author
Michael Turner
Technical manual editor