Power / Batteries & Chargers
User Manual for Williams AV CHG 003 2-Bay Drop-In Battery Charger
Comprehensive user guide for the Williams AV CHG 003 2-Bay Drop-In Battery Charger. Includes setup instructions, troubleshooting steps, battery safety guidelines, and technical specifications.
Quick answers from the manual
Quick answer
- The CHG 003 is a 2-bay drop-in charger. To use, connect the power supply to the charger and wall outlet, then insert the receiver facing forward into the slot. p. 1
Key actions
- Insert receiver facing forward to make contact. p. 1
- Disconnect receivers once fully charged. p. 1
First start
- Connect power supply to charger and wall outlet, then insert receiver. p. 1
Show 4 more answers Show less
Problems and fixes
Charger LED not illuminated
Check power supply connection to wall and charger, and verify wall outlet power.
p. 1
Receiver LED Blue or Off
Check receiver orientation, placement, and clean contacts.
p. 1Maintenance and reset
- Keep charging contacts clean. p. 1
Technical specifications
| Parameter | Value | Meaning | Pages |
|---|---|---|---|
| Charging Time | 4 hours | Nominal time for full charge | p. 2 |
| Compatibility | BA R1 | Compatible receiver model | p. 2 |
Where to find it in the PDF
- Setup and Troubleshooting p. 1
- Specifications and Warranty p. 2
Table of contents
Quick guide from the manual
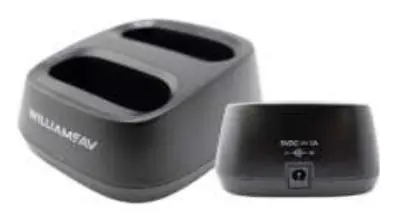
The CHG 003 is a 2-bay drop-in charger designed for Williams AV receivers. To begin, connect the power supply to the rear of the unit and plug it into an AC wall outlet. Insert the receiver into the charging slot, ensuring it is facing forward to make contact with the charging pins. The LED indicator on the receiver will turn red while charging and green when complete.
Setup Instructions
Follow these steps to set up your charger:
- Plug the DC power connector into the rear of the CHG 003.
- Plug the TFP power supply into an AC wall outlet. The red LED on the front of the charger should illuminate.
- Insert the Receiver into the charging slot. The receivers must be facing forward to make contact with the charging contacts.
- The LED indicator on the top of the receiver will illuminate red when charging and will change to green when charging is complete.
Note: It is safe to leave the receivers in the charger after the batteries are fully charged, but it is not recommended to leave them in for a prolonged period.
Battery Safety
Observe the following safety precautions:
- Do not attempt to open, disassemble, or service the battery pack.
- Do not crush, puncture, short contacts, or dispose of in fire or water.
- Do not incinerate or expose to temperatures above 140°F (60°C).
- Do not charge in temperatures above 114°F (40°C) or below 41°F (5°C).
- If the receiver or battery swells, discontinue use immediately.
- Replace only with the battery pack designated for this product.
Troubleshooting
If you encounter issues, check the following:
If the Charger LED is not illuminated:
- Verify that the power supply is plugged into a wall outlet.
- Verify the wall outlet has power (check circuit breakers).
- Verify the power supply cord is fully plugged into the back of the charger.
If the Receiver LED is Blue or Off:
- Verify that the receiver is facing forward in the charger.
- Verify the receiver is properly placed in the charging slot.
- Verify that the charge contacts at the bottom of the receiver are clean and free from any debris.
Specifications
Key technical parameters for the CHG 003:
- Dimensions: 4.18” x 3.55” x 1.9” (106 x 90.2 x 48 mm)
- Charging Time: 4 hours nominal
- Unit Capacity: 2 Units
- Compatibility: BA R1
- Power Input: 100-240 VAC, 50-60Hz, 0.4 A
- Charger Power Output: 5VDC, 0.5A per bay
Warranty and Recycling
The CHG 003 is covered by a 2-Year factory warranty (excluding accessory items like power supply and cord, which have a 90-day warranty). Damage due to battery corrosion or charging non-rechargeable batteries will void the warranty. For service, contact Williams AV at 1-800-843-3544 (U.S.A.) or +1-952-943-2252 (International). Please recycle the product according to local regulations.
Practical help
Common problems
Charger LED not illuminated
Verify power supply is plugged into a wall outlet, the outlet has power, and the cord is fully inserted into the charger.
Receiver LED is Blue or Off
Ensure the receiver is facing forward, properly seated in the slot, and the charging contacts are clean.
Before use
- Ensure you are using an approved Williams AV charger (CHG 003 or CHG 004).
- Verify the power supply is connected to an AC wall outlet.
- Check that the receiver is facing forward in the charging slot.
- Ensure charging contacts are clean and free of debris.
Show more Show less
Specs in practice
- Charging Time
- 4 hours nominal for a full charge.
- Unit Capacity
- The charger can hold and charge 2 units simultaneously.
- Compatibility
- Designed for use with BA R1 receivers.
Model compatibility
- Compatible with BA R1 receivers.
- Use only Williams AV approved chargers (CHG 003 or CHG 004).

Manual page author
Emily Carter
User documentation editor