Power / Solar Systems
User Manual for ECO-WORTHY 1200W Complete Off-Grid Solar Panel Kit
Quick guide for the ECO-WORTHY 1200W Complete Off-Grid Solar Panel Kit. Includes installation steps for solar panels, charge controller, inverter, and battery wiring, plus maintenance tips.
Table of contents
Manual images
Click an image to enlargeQuick guide from the manual
This manual provides instructions for installing and maintaining the ECO-WORTHY 1200W Off-Grid Solar Panel Kit. The system is designed for RVs, trailers, sheds, and houses. Key steps include mounting the solar panels, installing the charge controller, wiring the battery bank, and connecting the inverter. Always ensure all connections are tight and secure to prevent electrical issues.
Safety precautions
- Disconnect all power sources before starting the installation.
- Ensure correct polarity when connecting solar panels, charge controllers, and batteries. Reverse polarity can cause damage not covered by warranty.
- Wear appropriate clothing and safety gear, including protective eyewear.
- Work in a well-ventilated area.
- Do not perform installation near flammable materials.
- Use properly insulated tools and remove metal items like rings, bracelets, and watches.
- Solar panels produce voltage in sunlight; keep them covered with dark material during installation.
Package contents
The kit includes:
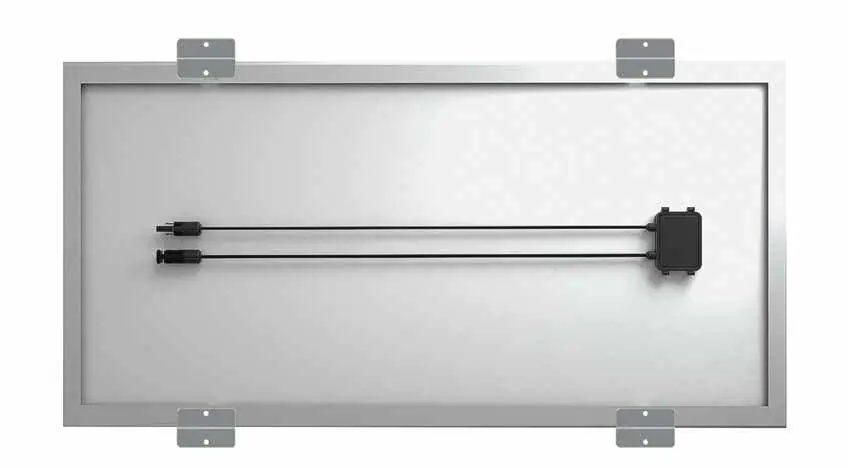
- 6 pcs 195W 18V Monocrystalline Solar Panels
- 6 sets Solar Panel Mounting Brackets
- 1 pc 60A 12V/24V PWM Charge Controller
- 1 pc 3500W 24Vdc-110Vac Off-Grid Inverter
- 1 pc 150A Fuse Holder & Fuse
- 1 pair 16ft 8AWG Solar Extension Cable
- 1 pc 4.9ft 11AWG Battery-Controller Cable
- 4 pcs 12V 50Ah Lithium Battery
Charge controller installation
The controller must be installed in a dry, cool (0°C to 40°C), and ventilated area. Allow at least 2 inches (50 mm) of clearance above and below, and 1 inch (25 mm) on each side. Mount as close to the batteries as possible. Drill holes for mounting and use expansion anchors if installing on drywall. Connect the battery to the controller first before connecting solar panels.


Solar panel installation
Choose a location with direct sunlight, free from shading. For Northern Hemisphere installations, face panels true south; for Southern Hemisphere, face true north. The tilt angle should ideally match the latitude of the location. Use Z-brackets and well-nuts for mounting on thin roofs (like RVs). Ensure the rubber flange of the well-nut is flush on the roofline. Use MC4 connectors for wiring; these feature a snap-in locking mechanism to prevent accidental disconnection.

Inverter wiring
The inverter converts DC battery power to AC. Ensure the power load is within the rated power of the inverter. Connect the battery cables to the inverter, ensuring the 150A fuse is installed between the positive battery post and the inverter. Connect the negative battery terminal and the inverter chassis ground to a system ground. Turn the inverter switch to OFF before connecting appliances.

Maintenance
- Clean solar panel glass surfaces with water and a soft sponge or mild non-abrasive cleaner.
- Check electrical and mechanical connections every six months for cleanliness, security, and damage.
- Ensure surfaces are free from dust and debris.
- Do not immerse lithium batteries in water. Store in a cool, dry environment when not in use.
Support
If you experience technical problems, contact ECO-WORTHY support.
Phone: (417) 459-7063
Email: [email protected]
Practical help
Common problems
Loose wire connections
Ensure all connections are tight and secure to prevent sparks and intermittent behavior.
Reverse polarity
Verify correct polarity when connecting solar panels, charge controller, and battery. Damage from reverse polarity is not covered by warranty.
Water ingress in controller
Install the controller in a dry area, avoiding locations where water can contact the unit.
Before use
- Disconnect all power sources before installation.
- Wear appropriate clothing and safety gear, including protective eyewear.
- Ensure the installation area is well-ventilated.
- Remove metal items like rings, bracelets, and watches.
- Verify the charge controller is installed in a dry, cool (0°C-40°C), and ventilated area.
Specs in practice
- 60A PWM Charge Controller
- Regulates voltage and current from solar panels to the battery.
- 3500W Inverter
- Converts 24V DC battery power to 110V AC for appliances.
- 12V 50Ah Lithium Battery
- Energy storage capacity per unit.
Images and diagrams
- Wiring diagrams show the series-parallel connection of batteries to achieve 24V.
- Solar panel installation diagrams illustrate the use of Z-brackets and well-nuts for roof mounting.
- Inverter wiring diagram shows the connection between the battery bank, fuse, and inverter.
Model compatibility
- Compatible with RV, Trailer, Shed, and House roofs.
- Inverter input voltage can be 12V, 24V, or 48V depending on the setup.

Manual page author
Michael Turner
Technical manual editor
Reviews PDF manuals for structure, safety notes, and practical product details so readers can find the right information quickly.