HVAC / Air Conditioners
User Manual for ACiQ 15RVZ Series RV Air Conditioner
Comprehensive installation and operation guide for ACiQ 15RVZ-WH and 15RVZ-BL RV air conditioners. Includes mounting instructions, wiring diagrams, remote control operation, maintenance, and troubleshooting.
Table of contents
Manual images
Click an image to enlargeQuick Guide from the Manual
This manual provides essential instructions for the installation, operation, and maintenance of the ACiQ 15RVZ series RV air conditioner. Before installation, ensure the vehicle roof is level and can support the unit. The unit requires a 115V AC, 60Hz, 1 Phase power supply. Always disconnect power before performing any maintenance or installation work.
Installation Instructions
The installation process must be performed by authorized personnel. Ensure the roof opening is 14-1/4" x 14-1/4".


- Preparation: Clean the sticking position on the outdoor unit chassis. Apply the sealing strip and sponge as indicated in the manual.
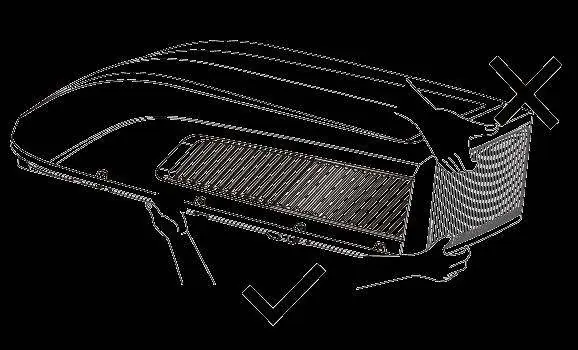
- Mounting: The unit must be mounted on a level plane. If the roof is sloped, use a leveling shim. Do not use the outer plastic shroud for lifting.
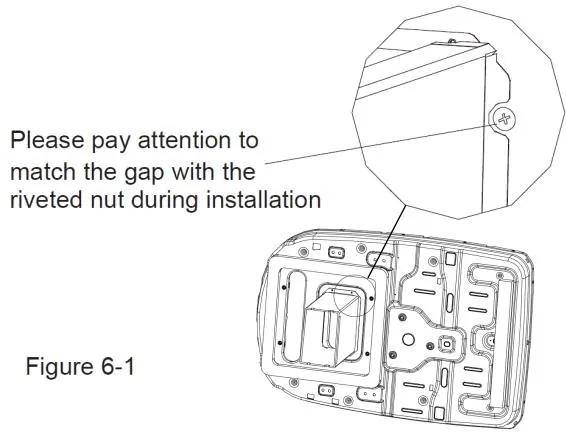
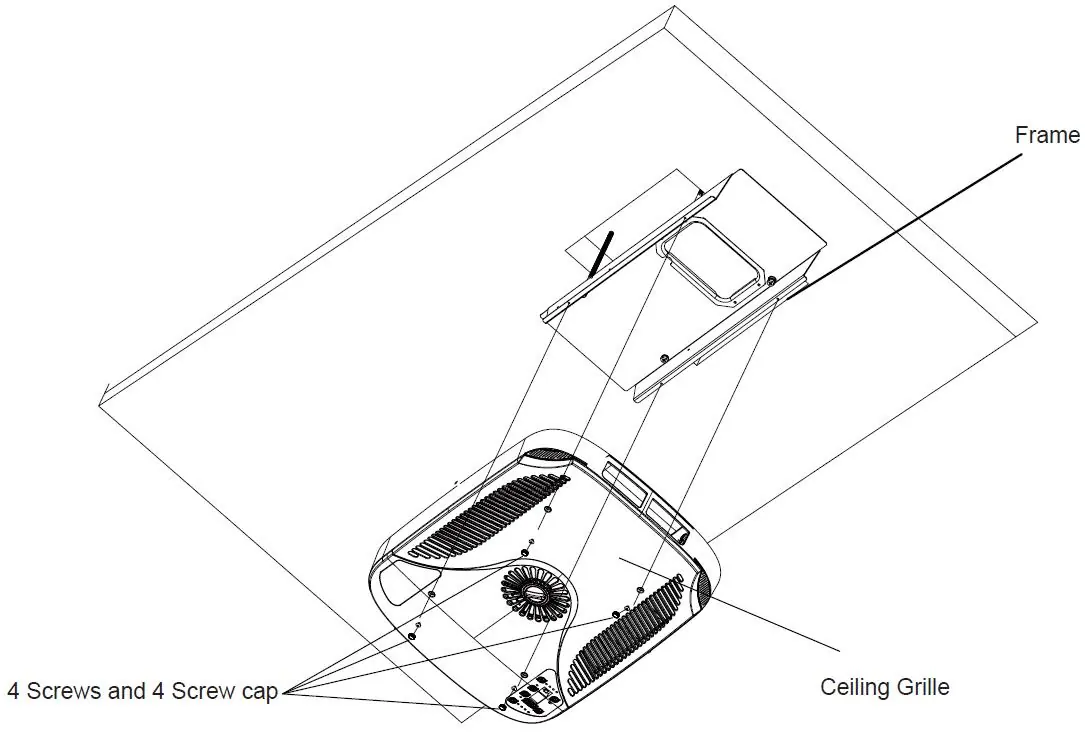
- Ceiling Assembly: Fasten the fabric duct collar to the basepan of the outdoor unit. Secure the ceiling assembly frame to the roof top unit using mounting bolts, ensuring the basepan gasket is evenly compressed. Max torque for bolts is 2.3Nm-2.5Nm.
- Electrical Wiring: Route 115V AC wiring through the junction box. Connect the power cord to the black, white, and ground wires using the terminal board. Secure with the provided strain relief clamp.
Operation
The unit can be operated via the wireless remote controller or the control panel on the indoor unit.
- Modes: Auto, Cool, Dry, Fan, and Heat.
- Fan Speed: Adjustable between Auto, Low, High, and Turbo.
- Special Functions: Includes Sleep mode, Timer On/Off, Child Lock, and WiFi connectivity.
- Temperature Range: 61-86°F (16-30°C).
Maintenance
Regular maintenance ensures efficient operation.
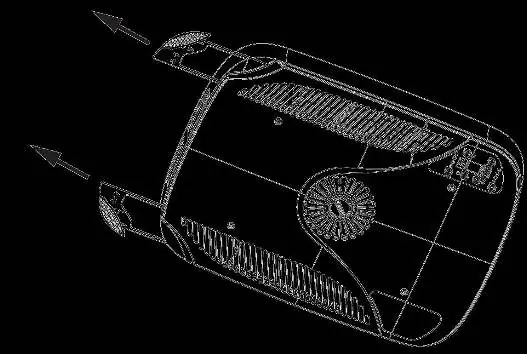
- Filter Cleaning: Clean the air filter when the FILTER CHECK light turns on. Wash with clean water or use a vacuum cleaner.
- Condenser Coil: Remove the cover and wash the condenser coil twice a year.
Troubleshooting
If the unit malfunctions, check the following before calling for service:
- Unit won't start: Check power supply connection.
- Not cooling: Ensure the unit is level, the filter is clean, and the temperature setting is appropriate.
- Water dripping: Ensure mounting bolts are tightened evenly to compress the gasket.
- Error Codes: E6/E8 (restart unit), PL (low voltage), F1/F2/F3/F4 (contact professional).
Manufacturer information
ACiQ
Practical help
Common problems
The unit will not start
Check the vehicle power supply and ensure it is connected correctly.
The unit is not cooling the room
Ensure the unit is mounted level, the air filter is clean, and the temperature setting is not too high.
Water is dripping inside
The basepan gasket may not be evenly compressed. Tighten the mounting bolts evenly.
Unit is making noise
Clicking and gurgling sounds are normal during operation.
Ice or frost on coils
Select FAN mode at HIGH fan speed and clean the filter.
Before use
- Ensure the vehicle roof is level.
- Verify the power supply is 115V AC, 60Hz.
- Check that air inlet and outlet are free from obstacles.
- Ensure mounting bolts are tightened to 2.3-2.5Nm.
- Verify the thermostat is routed through the holding guide and not touching metal.
Specs in practice
- Working Temperature
- 23-115°F (-5-46°C).
- Fuse Specification
- T3.15AH250V (max current 3.15A).
- Air Switch Capacity
- 25A.
Images and diagrams
- Wiring diagram shows connections for the main board, sensors, and motors.
- Installation figures illustrate the 14-1/4" x 14-1/4" roof opening requirements.
- Figure 5-1 and 6-1 detail the fabric duct and ceiling assembly installation.
Model compatibility
- Only for use on vehicles without convex roof surfaces.
- Do not install in laundry rooms.
- Not for use while the vehicle is driving.

Manual page author
Emily Carter
User documentation editor
Prepares concise manual descriptions and highlights the most useful setup, operation, and maintenance information for readers.