Home / Weather Stations & Thermometers
User Manual for AcuRite 1602RX Display for 5-in-1 Weather Sensor
Quick guide for the AcuRite 1602RX display unit. Learn how to set up your weather station, configure time and date, calibrate sensors, and manage weather alarms.
Table of contents
Manual images
Click an image to enlargeQuick Start Guide
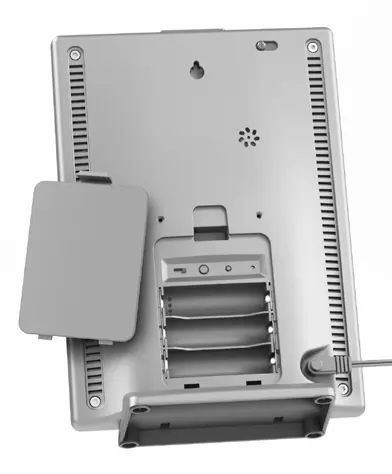
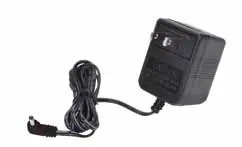
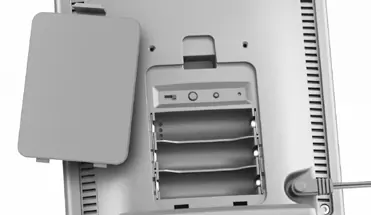
To begin using your AcuRite 1602RX display, ensure the A-B-C switch inside the battery compartment matches the setting on your 5-in-1 sensor. Install 3 AA alkaline batteries as a backup power source, then plug in the included power adapter for primary operation. The display will begin receiving data from the sensor automatically.
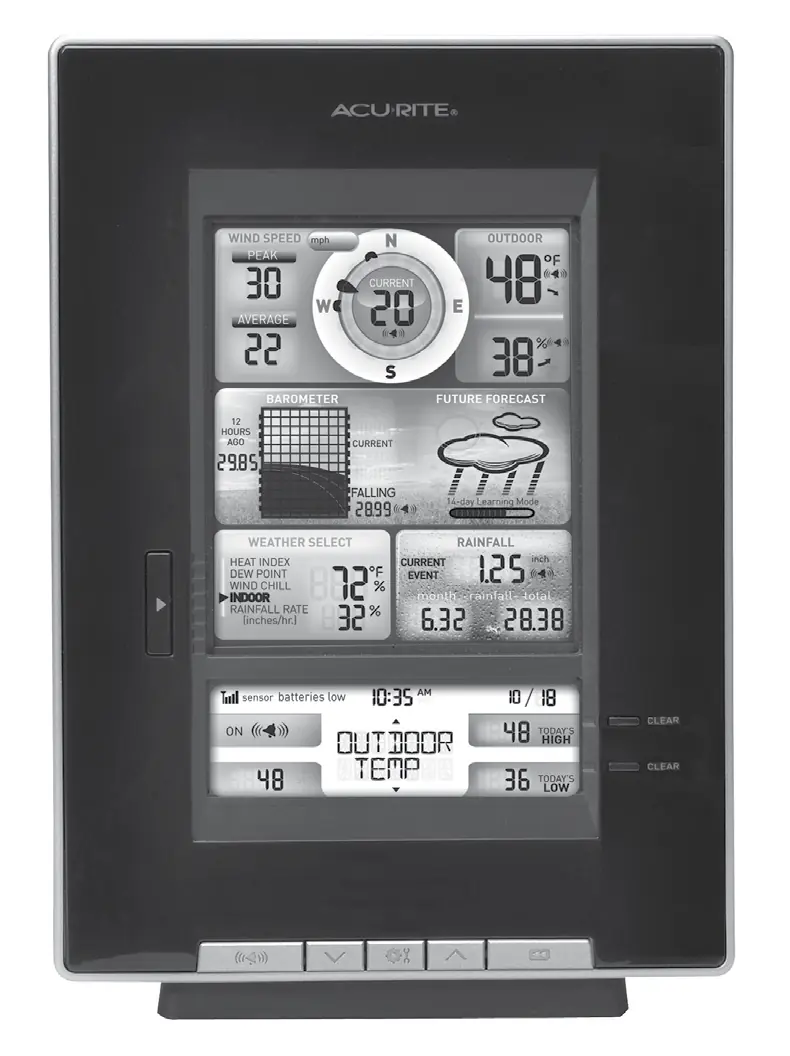
Display Overview
The front of the display unit provides comprehensive weather data, including wind speed, barometric pressure, rainfall, and indoor/outdoor temperature and humidity. The screen features a weather forecast area, a clock, and various indicators for alarms and sensor signal strength. Use the buttons on the bottom of the unit to navigate through weather categories and adjust settings.
Initial Setup
Time and Date: Press the up or down arrow buttons until SET CLOCK? appears on the display. Press the settings button to enter, then use the arrows to adjust hours and minutes, confirming with the settings button. Repeat the process for SET DATE? to configure the calendar.
Measurement Units: To switch between standard (mph, °F) and metric (kph, °C) units, navigate to SET UNITS? using the arrow buttons. Press the settings button to select your preference and confirm.
Placement Guidelines
For maximum accuracy, place the display unit in a dry area free of dirt and dust, away from direct sunlight and heat sources. The unit can be used on a tabletop or mounted on a wall. Ensure the display is within 330 feet (100 m) of the 5-in-1 sensor. Avoid placing the unit near large metallic items, thick walls, or electronic devices like TVs and computers to prevent wireless interference.
Operation
Learning Mode: The device uses a self-calibrating algorithm to analyze pressure changes over time. This process takes 14 days, after which the Learning Mode icon will disappear, indicating the unit is fully calibrated to your location.
Weather Alarms: You can set alarms for various categories such as temperature, humidity, and wind speed. Navigate to the desired category, press and hold the alarm button until the SET indicator appears, adjust the value with the arrow buttons, and confirm. Press the alarm button again to activate the alarm.
Care & Maintenance
Clean the display unit with a soft, damp cloth. Avoid caustic cleaners or abrasives. Keep ventilation ports clear of dust and debris. If readings are inaccurate, you can calibrate temperature and humidity by holding the up, down, and settings buttons simultaneously for 15-20 seconds until the CAL icon appears.
Specifications
The display operates at 433 MHz with a wireless range of up to 330 feet (100 m). It requires a 5V, 100mA power adapter and 3 AA alkaline batteries for backup. Temperature ranges are -40°F to 158°F (outdoor) and 32°F to 122°F (indoor).
Manufacturer information
AcuRite
Practical help
Common problems
Learning Mode icon is still visible
The unit is self-calibrating; this process takes 14 days to complete.
Alarm is not sounding
Ensure the alarm is activated (ON indicator visible) and that the alarm values are correctly programmed.
Inaccurate temperature or humidity readings
Use the calibration mode (hold up, down, and settings buttons) to adjust the readings manually.
Before use
- Match the A-B-C switch on the display with the setting on your 5-in-1 sensor.
- Install 3 AA alkaline batteries as a backup power source.
- Plug in the power adapter for primary operation.
- Place the display within 330 feet (100 m) of the sensor.
- Keep the unit at least 3 feet away from electronic devices to prevent interference.
Specs in practice
- Operating Frequency
- 433 MHz
- Wireless Range
- Up to 330 feet (100 m) depending on construction materials.
- Power Requirements
- 5V, 100mA power adapter (primary) and 3 AA alkaline batteries (backup).
Images and diagrams
- The front display shows wind speed, barometer, forecast, and weather select categories.
- The back of the unit contains the A-B-C switch, reset button, and battery compartment.
Model compatibility
- Requires a compatible 5-in-1 weather sensor to function.

Manual page author
David Miller
Documentation analyst
Organizes user manual content into clear summaries, with attention to model details, product context, and everyday usability.