Electronics / Amplifiers Receivers
User Manual for Adastra UX120 and UX240 Mixer Amplifiers
Comprehensive user guide for Adastra UX120 and UX240 mixer amplifiers. Includes installation, 100V and low impedance wiring instructions, audio player operation, and troubleshooting.
Table of contents
Manual images
Click an image to enlargeQuick guide from the manual
The Adastra UX-series mixer amplifiers are designed for public address systems. Before operating, ensure the unit is placed in a well-ventilated area away from moisture. The amplifier supports either 100V line systems or 2Ω low impedance systems, but these configurations cannot be used simultaneously. Always ensure the total speaker load matches the amplifier's output capabilities.
Installation and Mounting
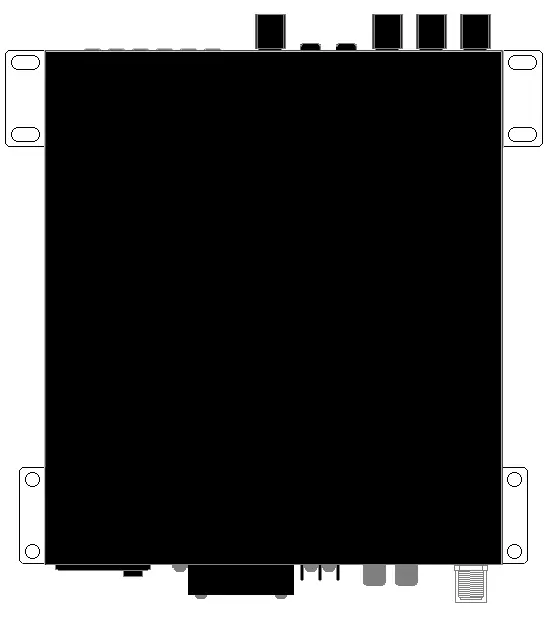
The UX-series amplifiers can be rack-mounted into a 19-inch cabinet using the supplied rack accessories. Two joining brackets can link a pair of amplifiers to form a full-width 1U rack-mount pair. Alternatively, the rack ears can be attached to mount the amplifier against a wall or under a counter, with the controls visible vertically.
Connections and Setup
Power: Connect the rear IEC inlet to the mains using the supplied lead.
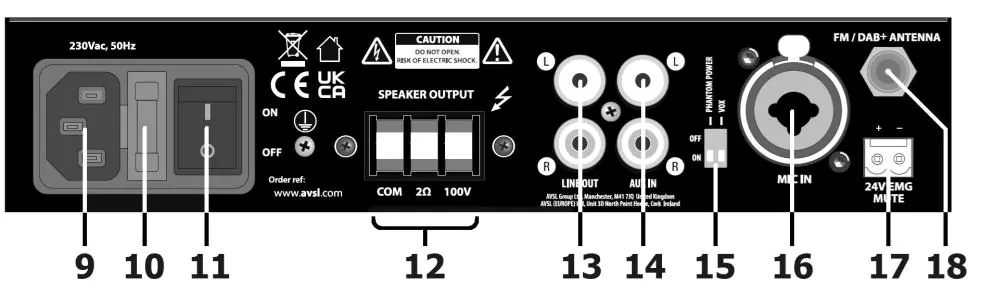
Inputs: Connect a microphone to the rear XLR/jack input. Line-level audio can be connected via rear RCA sockets or the front 3.5mm AUX input.
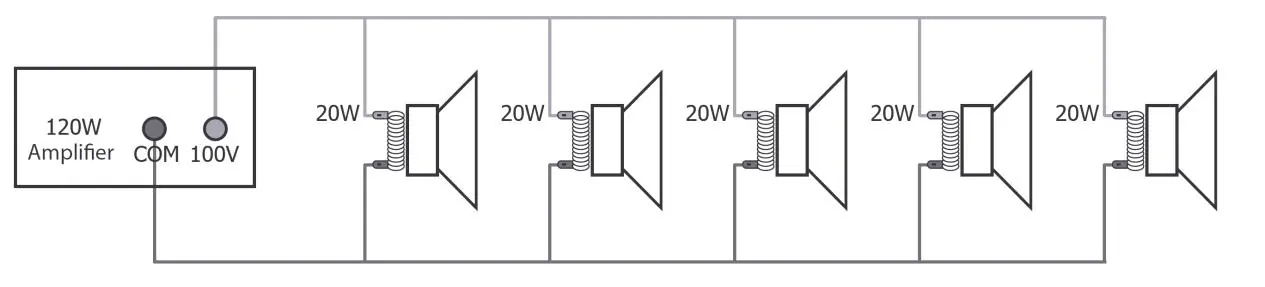
100V Line Systems: Connect the "100V" output terminal to the positive (+) speaker connection and "COM" to the negative (-). Connect speakers in parallel. Ensure the combined wattage of speakers does not exceed 90% of the amplifier's power rating.
Low Impedance Systems: Connect the "2Ω" output to the positive (+) speaker connection and "COM" to the negative (-). Ensure the total speaker load is not lower than 2Ω.
Emergency Mute: The 24V Mute terminals can be connected to a fire or security panel to mute all inputs except the microphone when 24V is present.
Operation and Audio Player
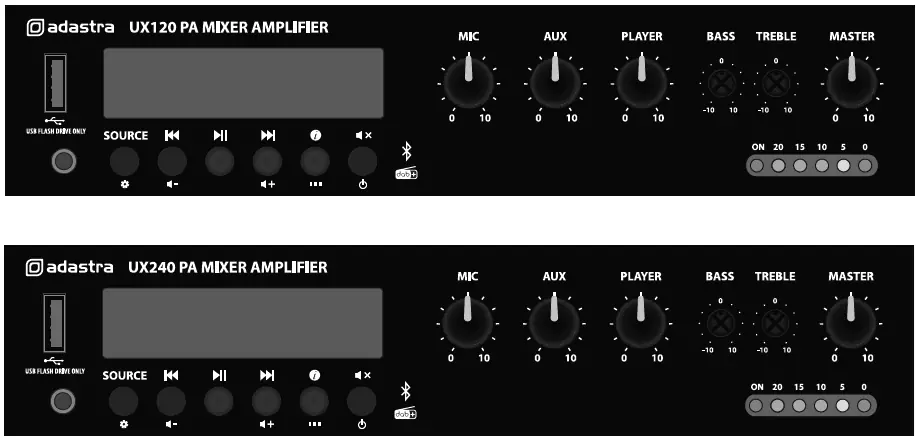
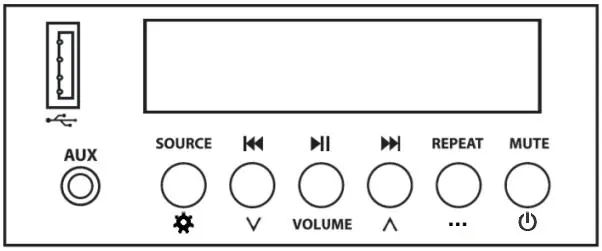
The built-in audio player supports Bluetooth, USB (mp3/wma), and DAB/FM radio. Use the SOURCE button to cycle through modes. The front panel includes volume controls for MIC, AUX, PLAYER, and MASTER, as well as BASS and TREBLE EQ controls.
Settings Menu
Hold the SOURCE button to access global settings. Use the navigation buttons to adjust:
- Time: Set time/date, 12/24 hour format, and auto-update settings.
- Backlight: Adjust timeout and brightness levels.
- Language: Select display language.
- Factory Reset: Reset the audio player.
- SW version: View current software version.
Troubleshooting
If you encounter issues, check the following:
- No power: Check the IEC lead, mains switch, and inlet fuse.
- No output: Ensure volume controls are turned up and input signals are connected correctly.
- Bluetooth issues: Ensure the device is within 5-10m range and paired correctly.
- Distorted sound: Check that input levels are not too high and that Hi-Z line inputs are not connected to the MIC input.
- Overheating: Ensure low impedance speakers are not connected to 100V terminals and that the total load is not lower than 2Ω.
Specifications
Power Output: 120W (UX120) or 240W (UX240).Power Supply: 170-264Vac, 50Hz or 24Vdc.Inputs: 1x Mic (6.3mm), 1x Line (2x RCA), 1x Aux (3.5mm).Speaker Outputs: Screw terminals (100V / 2Ω / Com).Bluetooth: Version 5.0.
Practical help
Common problems
Amplifier overheating or cutting out
Check that low impedance speakers are not connected to 100V terminals and that the total load is not lower than 2Ω.
Output is very loud or distorted
Reduce MIC, AUX, PLAYER, or MASTER levels. Ensure Hi-Z line level inputs are not connected via the MIC input.
Bluetooth cannot connect
Ensure the sending device is within 5-10m range and that the correct ID is selected.
No audio from USB player
Ensure the USB drive is formatted to FAT32 or exFAT and contains standard mp3 or wma files.
Before use
- Check mains voltage and condition of the IEC lead.
- Decide between 100V or 2Ω configuration (cannot be mixed).
- Ensure adequate ventilation and do not cover cooling vents.
- Check that speaker impedance/wattage matches the amplifier output.
- Ensure all volume controls are turned down before switching on.
Specs in practice
- 2Ω Low Impedance
- Used for standard speaker setups; total load must not be lower than 2Ω.
Images and diagrams
- Front panel: Contains volume controls, source selection, and playback transport controls.
- Rear panel: Contains power input, speaker terminals, line inputs/outputs, and antenna connection.
- 100V Wiring: Shows parallel connection of speakers to the 100V and COM terminals.
Model compatibility
- Do not mix 100V and 2Ω outputs on a single zone.
- USB drives must be formatted as FAT32 or exFAT.
- DAB/FM antenna requires an F-type connector.

Manual page author
Michael Turner
Technical manual editor
Reviews PDF manuals for structure, safety notes, and practical product details so readers can find the right information quickly.