Home Appliances / Cookers & Ranges
User Manual for Amica 2022C(GX) Electric Cooker
Comprehensive user guide for the Amica 2022C(GX) electric cooker. Includes installation, operation, maintenance, and troubleshooting.
PDF source: SV · summary: English
Quick answers from the manual
Quick answer
- This manual covers the installation, operation, and maintenance of the Amica 2022C(GX) electric cooker, including hob and oven usage. p. 1, 3
Key actions
- Install the hob seal before placing the hob in the countertop. p. 14
- Set the current time on the digital timer after power connection. p. 25
First start
- Clean the oven interior and accessories, then heat the oven to 250°C for 30 minutes. p. 21
Show 4 more answers Show less
Problems and fixes
Appliance not working
Check the fuse.
p. 41Maintenance and reset
- Steam Clean: Place 0.25L water in the oven, set to 50°C and 'bottom heat' for 30 minutes. p. 37
Technical specifications
| Parameter | Value | Meaning | Pages |
|---|---|---|---|
| Voltage | 230/400V~ 50 Hz | Power supply | p. 42 |
Where to find it in the PDF
- Installation p. 13, 14, 15, 16
Table of contents
Manual images
Click an image to enlargeQuick guide from the manual
This document provides essential instructions for the installation, safe operation, and maintenance of the Amica 2022C(GX) electric cooker. Before first use, ensure the oven is cleaned and heated to 250°C for 30 minutes to remove manufacturing residues. Always supervise children near the appliance and ensure proper ventilation.
Safety Instructions
- Hot Surfaces: The hob and oven become very hot during use. Keep children under 8 years old away.
- Fire Safety: Never use water to extinguish oil or grease fires; use a lid or fire blanket. Do not use the hob for storage.
- Maintenance: Disconnect power before replacing the oven bulb. Do not use steam cleaners.
- Damaged Surface: If the ceramic hob cracks, disconnect the power immediately to avoid electric shock.
Installation
Installation must be performed by an authorized electrician. The appliance requires a separate circuit.

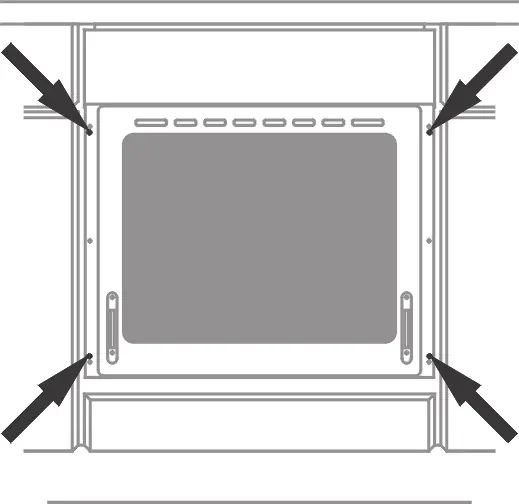
- Hob Cutout: The countertop must be 28-40 mm thick and heat-resistant up to 100°C. Ensure a minimum of 50 mm clearance to walls and 60 mm to the front edge.
- Sealing: The self-adhesive foam seal must be installed on the hob before placing it into the countertop.
- Electrical Connection: Follow the wiring diagrams provided on the back of the appliance for 1N~, 2N~, or 3N~ connections.
Using the Hob
The ceramic hob features zones with 7-step power control (0-3 with intermediate steps). Residual heat indicators show when a zone is still hot (above 50°C). Use pots with flat, dry bottoms that are equal to or larger than the cooking zone for optimal efficiency.

Using the Oven
The oven offers various heating modes, including top/bottom heat, grill, and fan-assisted modes. Use the function knob and temperature knob to select settings. The digital timer allows for setting the current time, cooking duration, and delayed start.
Cleaning and Maintenance
- Steam Clean: Place 0.25 liters of water in the bottom of the oven, set to 50°C and 'bottom heat' for 30 minutes, then wipe clean.
- Oven Door: The door can be removed for easier cleaning by lifting the safety latches on the hinges.
- Bulb Replacement: Ensure the power is disconnected. Use a 230V, 25W halogen bulb.
Manufacturer information
Amica S.A.
Practical help
Common problems
Electrical appliance not working
Check the fuse in the fuse box and replace it if it has blown.
Oven light not working
Tighten the bulb or replace it (see 'Cleaning and Maintenance' section).
Before use
- Remove all packaging.
- Clean the oven interior and accessories with warm water and detergent.
- Heat the oven to 250°C for 30 minutes to remove manufacturing residues.
- Set the current time on the digital timer.
Show more Show less
Images and diagrams
- Installation diagrams show cutout dimensions (560x490mm).
- Wiring diagrams for 1N~, 2N~, and 3N~ connections are provided on page 20.
Model compatibility
- Use pots with flat, dry bottoms.
- Pots should be equal to or larger than the cooking zone.
- Avoid using aluminum foil on the oven bottom.

Manual page author
David Miller
Documentation analyst