Baby / Children Products
User Guide for Anko Pet 2-in-1 Gate Enclosure
Quick guide for the Anko Pet 2-in-1 Gate Enclosure. Learn how to install as a barrier gate or playpen, operate the gate, and maintain the unit safely.
Quick answers from the manual
Quick answer
- The Anko Pet 2-in-1 Gate Enclosure can be configured as a wall-mounted barrier gate or a freestanding playpen. It features an auto-close mechanism and a 180-degree swing. p. 1, 3, 6
Key actions
- Install as barrier gate p. 3, 4
- Configure as playpen p. 6, 7
First start
- Unfold panels and position in the desired location. p. 3, 6
Problems and fixes
Gate not closing
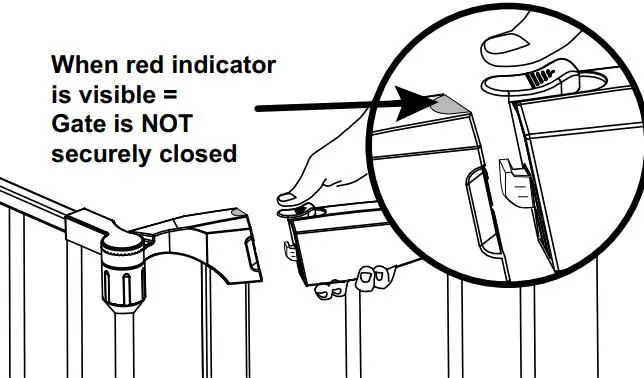
If the red indicator is visible, the gate is not securely closed.
p. 9Maintenance and reset
- Clean the product with a damp fabric and inspect components regularly. p. 10
Technical specifications
| Parameter | Value | Meaning | Pages |
|---|---|---|---|
| Fireplace clearance | 60cm | Minimum distance from fire source | p. 5 |
| Timber pilot hole | 2mm | Drill bit size for timber | p. 4 |
| Brick hole | 5.5mm | Drill bit size for brick | p. 4 |
Where to find it in the PDF
- Barrier Gate Installation p. 3, 4
- Playpen Installation p. 6, 7
- Gate Operation p. 9
Table of contents
Manual images
Click an image to enlargeQuick Guide
The Anko Pet 2-in-1 Gate Enclosure is a versatile product that can be used as a wall-mounted barrier gate or a freestanding playpen. It features an auto-close mechanism and a 180-degree swing. Always ensure the gate is mounted firmly and vertically for safety.
Parts Included
- Screws (8pcs)
- Masonry Plugs (8pcs)
- Plastic Key (1pc)
Installation as Barrier Gate
- Cut the tie and unfold the barrier and gate panels.
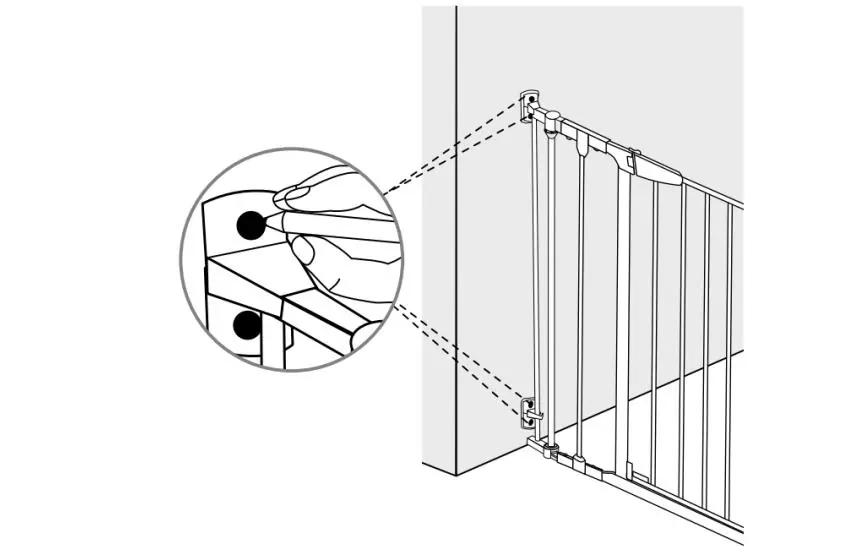
- Position the gate in the desired location with wall mounts flat against the wall.
- Use a pencil to mark the screw hole positions.
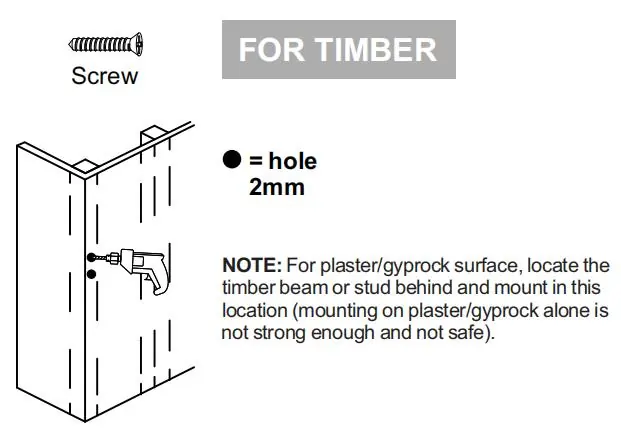
- Remove the gate and drill pilot holes. For timber, use a 2mm drill bit. For brick, use a 5.5mm drill bit and insert masonry plugs.
- Reposition the gate and drive the screws into place.
- Tighten each tension knob to secure the position.
Installation as Playpen
- Cut the tie and unfold the barrier and gate panels.
- Use the plastic key to depress the release button while pulling the panel to remove wall mounts from the end of the barrier panel.
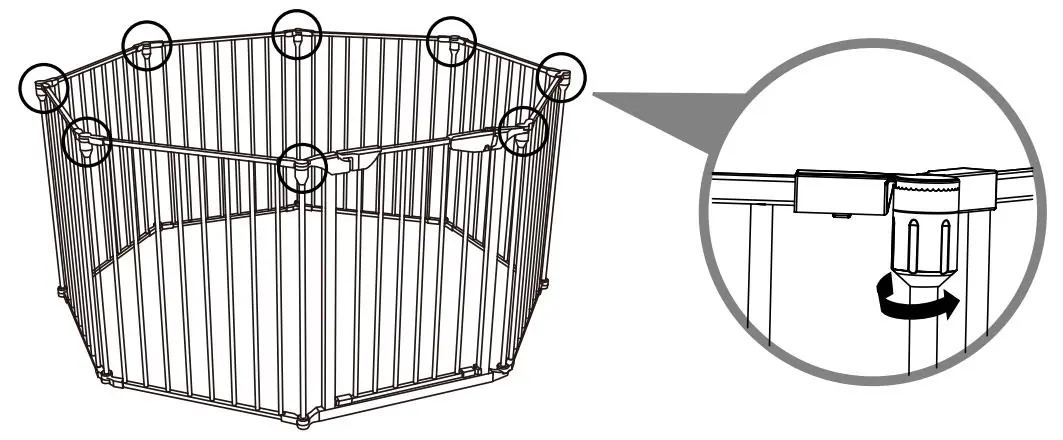
- Push the release button to click panels into place.
- Ensure the open angle is larger than 100 degrees.
- Tighten each tension knob after positioning to ensure the playpen is secure.
Gate Operation
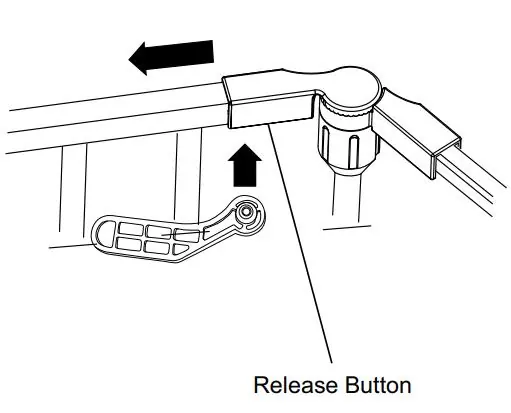
To open the gate, slide the release switch and lift the gate panel. The door is movable 180 degrees in both directions. When the door is opened below 90 degrees, it will auto-close. When opened to 90 degrees, it will stay open. If the red indicator is visible, the gate is not securely closed.
Safety and Maintenance
This enclosure is for pet use only. Do not place the enclosure close to an open fire or other heat source. If using as a fireplace barrier, ensure it is installed at least 60cm from the fire source. Inspect components regularly to ensure they are tight and remove the product if damaged. Clean the product with a damp fabric.

Manufacturer information
Anko
Practical help
Common problems
Gate not closing securely
Check if the red indicator is visible; if so, the gate is not securely closed.
Gate won't stay open
The gate is designed to auto-close when opened below 90 degrees. Open to 90 degrees to keep it open.
Before use
- Ensure all parts (screws, masonry plugs, plastic key) are present.
- Verify the mounting surface is strong enough (use timber beam or stud for plaster/gyprock).
- Check that the gate is mounted firmly and vertically.
- Ensure the playpen open angle is larger than 100 degrees.
- Check tension before use.
Specs in practice
- Fireplace clearance
- Must be installed at least 60cm from the fire source.
- Timber pilot hole
- 2mm drill bit required.
Images and diagrams
- Red indicator: Visible red means the gate is not securely closed.
- Tension knob: Tighten to secure the position of the panels.
- Plastic key: Used to depress the release button for panel adjustment.
Model compatibility
- For plaster/gyprock surfaces, locate the timber beam or stud behind the wall for mounting.

Manual page author
Emily Carter
User documentation editor
Prepares concise manual descriptions and highlights the most useful setup, operation, and maintenance information for readers.