Lighting / Outdoor Lighting
Artika C7 LED Wall Light Instruction Manual
Comprehensive installation and safety guide for the Artika C7 LED wall light. Learn how to mount, wire, and maintain your fixture for indoor or outdoor use.
Quick answers from the manual
Quick answer
- The Artika C7 LED wall light is installed by mounting the bracket to a junction box, connecting the wires (Black-L, White-N, Ground-G), securing the fixture with decorative screws, and applying sealant for weather protection. p. 3, 6, 7, 8
Key actions
- Turn off power at the breaker p. 4
- Connect wires (Black-L, White-N, Ground-G) p. 7
- Apply sealant p. 8
Where to find it in the PDF
- Included Hardware p. 2
- Installation Steps p. 3, 6, 7, 8
- Safety Warnings p. 4
- Warranty p. 11
Table of contents
Manual images
Click an image to enlargeQuick Guide
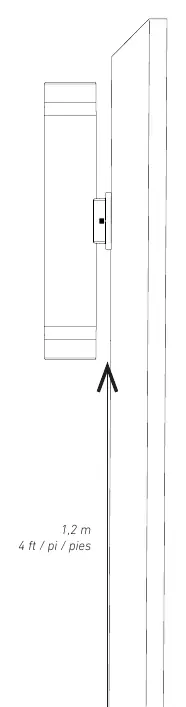
The Artika C7 LED wall light is designed for both indoor and outdoor residential use. Before beginning installation, ensure the main electrical supply is turned off at the circuit breaker. We strongly recommend that this product be installed by a certified electrician in accordance with local building and electrical codes. A minimum clearance of 1.2 meters (4 feet) is required for proper installation.
Included Hardware
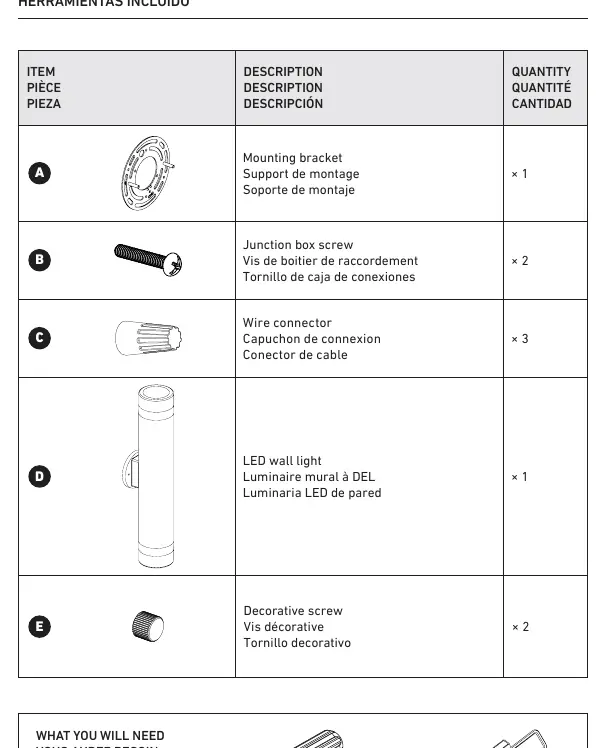
- Mounting bracket (x1)
- Junction box screws (x2)
- Wire connectors (x3)
- LED wall light (x1)
- Decorative screws (x2)
Tools required: Screwdriver, Sealant.
Installation Steps
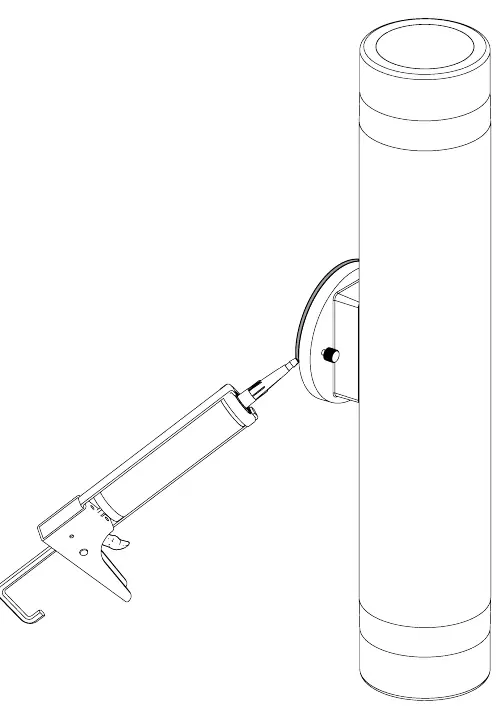
1. Mounting Bracket Installation
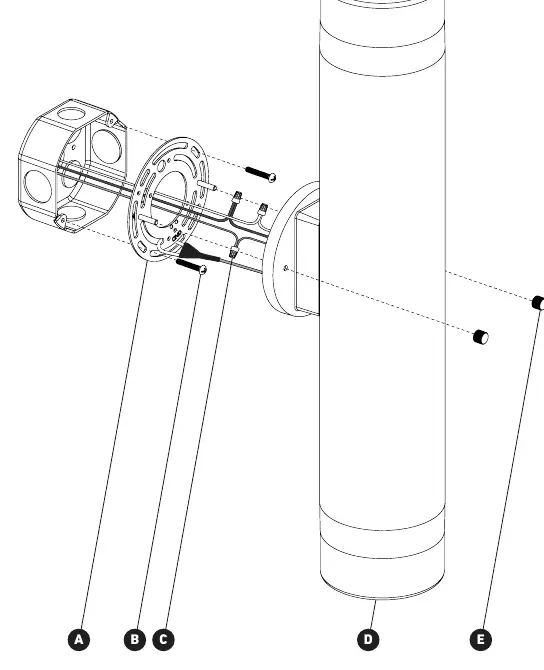
Secure the mounting bracket to your junction box using the provided junction box screws. Ensure the bracket is level and firmly attached.
2. Connecting the Wires
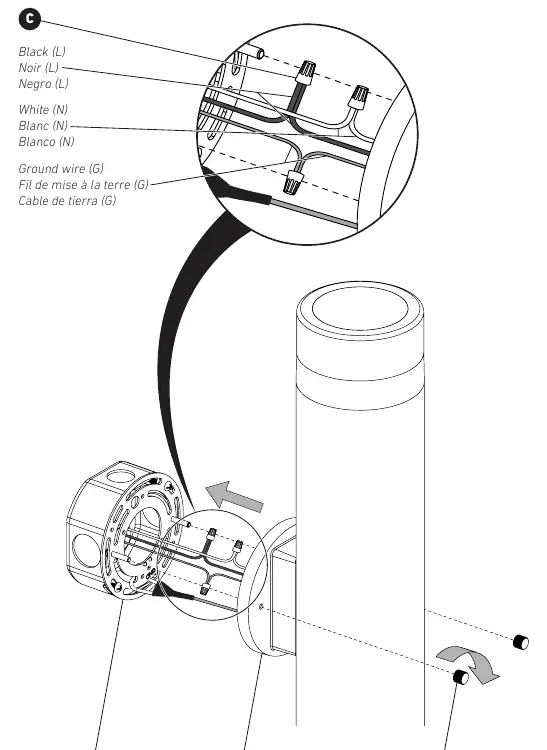
Connect the fixture wires to the supply wires using the provided wire connectors:
- Black (L) to Black (L)
- White (N) to White (N)
- Ground (G) to Ground (G)
3. Final Installation
Mount the light fixture onto the bracket and secure it using the decorative screws. Apply sealant around the fixture base to ensure a weather-tight seal for outdoor installations.
Safety Warnings
- Risk of electrical shock: Always turn off the main power at the circuit breaker before installation or maintenance.
- Professional installation: It is recommended to have this product installed by a certified electrician.
- Usage: For residential use only.
Warranty
Artika For Living Inc. offers a five-year limited warranty on manufacturing defects for residential use. The warranty is valid for the original owner in the USA, Canada, Mexico, UK, Iceland, France, and Spain. It does not cover improper installation, misuse, or normal wear and tear. Proof of purchase is required for all claims.
Manufacturer information
Artika
Practical help
Common problems
Light does not turn on
Verify that the circuit breaker is on and that all wire connections are secure and correctly matched.
Fixture is loose
Ensure the mounting bracket is securely fastened to the junction box and the decorative screws are tightened.
Before use
- Turn off the main electrical supply at the circuit breaker.
- Verify you have all included hardware (bracket, screws, connectors).
- Ensure you have a screwdriver and sealant ready.
- Confirm the installation location allows for the required 1.2m (4ft) clearance.
- Consult a certified electrician if you are unsure about the wiring process.
Show more Show less
Specs in practice
- Minimum Clearance
- A distance of 1.2 meters (4 feet) is required for safe and proper operation.
Images and diagrams
- The wiring diagram illustrates the connection of Black (L), White (N), and Ground (G) wires using the provided wire connectors.
- The installation diagram shows the sequence of attaching the mounting bracket to the junction box, followed by the light fixture.
Model compatibility
- Designed for residential use only.
- Must be installed in accordance with local building and electrical codes.

Manual page author
David Miller
Documentation analyst