Automotive / Car Audio
User Manual for AudioControl Space Series SPC-W10 Subwoofer
Quick guide for the AudioControl Space Series SPC-W10 sealed wedge enclosure. Includes installation steps, wiring methods, mounting instructions, and technical specifications.
Table of contents
Manual images
Click an image to enlargeQuick guide from the manual
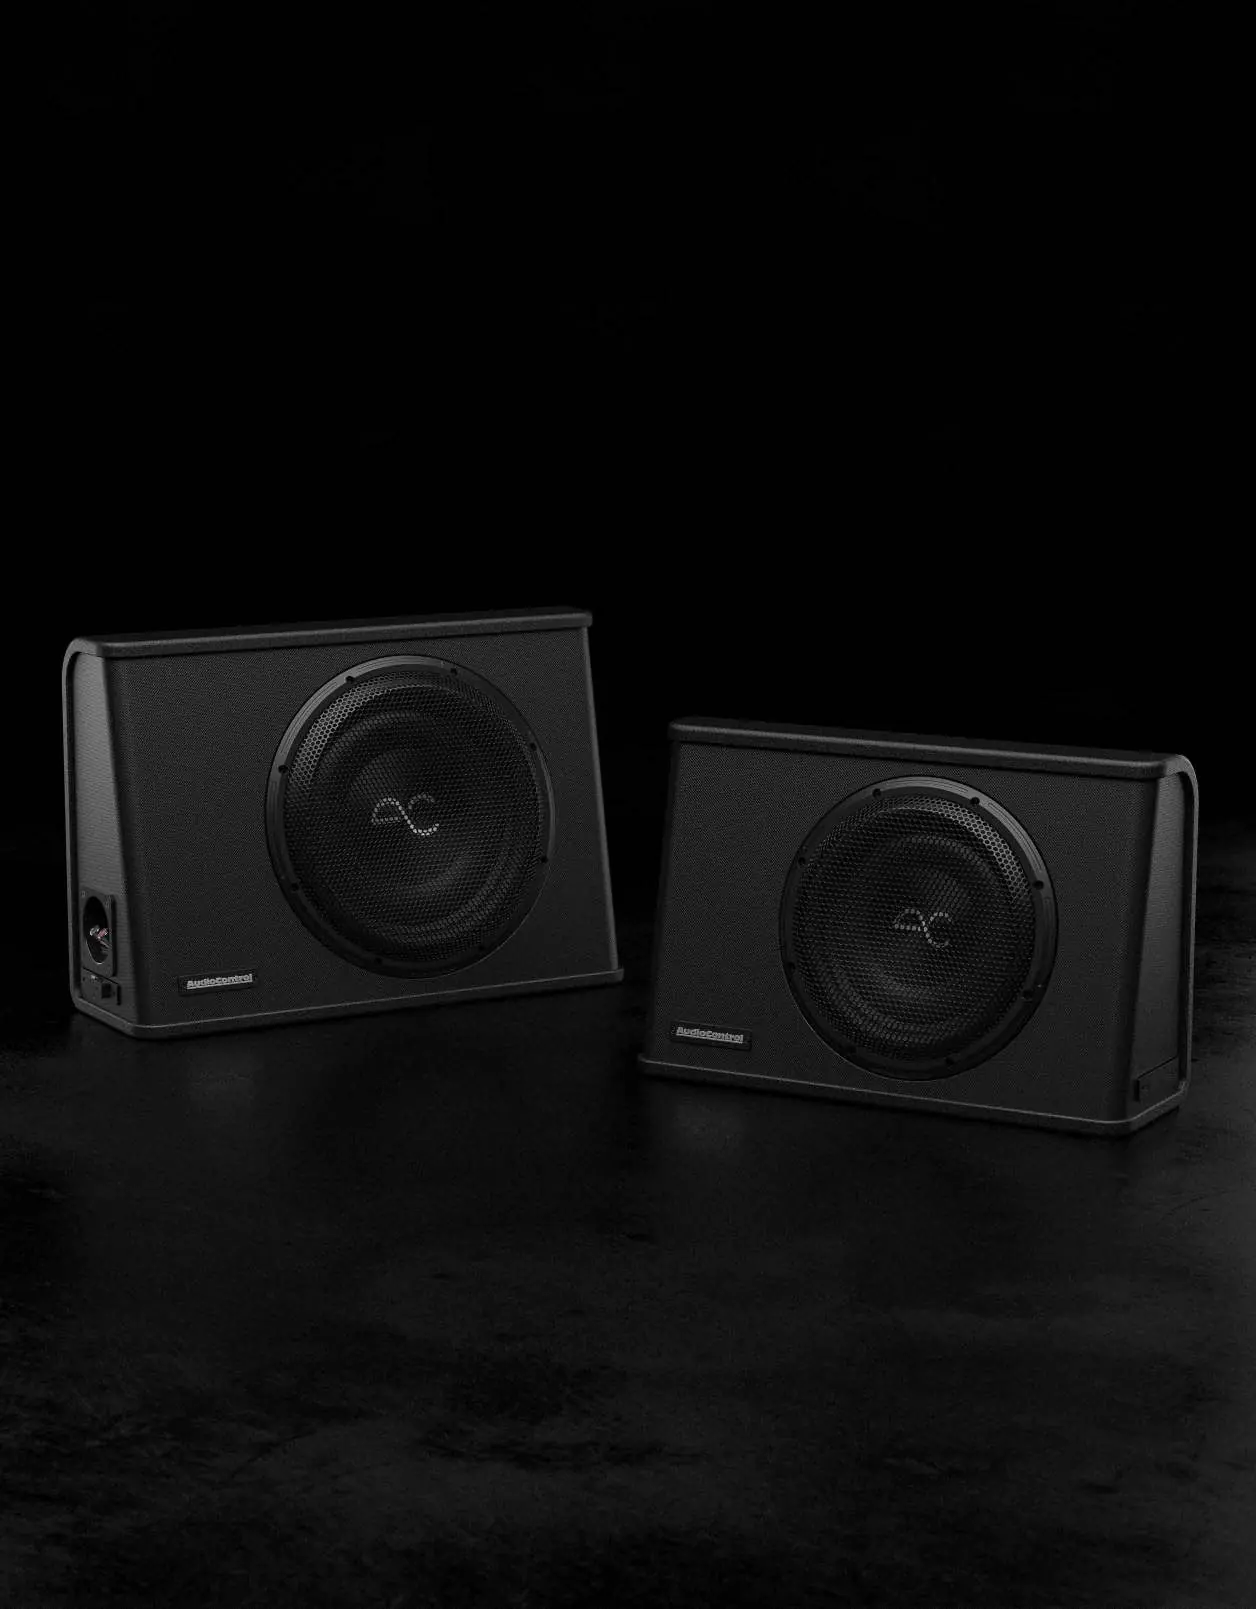
The AudioControl SPC-W10 is a sealed wedge enclosure featuring a 10-inch subwoofer. This guide provides essential information for safe installation and optimal performance. Always ensure the enclosure is securely mounted in your vehicle and that you avoid drilling into fuel or electrical lines. Use 10-14 gauge speaker wire for connections and consider using a subsonic filter set 1/2 octave below the enclosure's frequency response to prevent damage.
Important safety instructions
- Vehicle Safety: The enclosure must be properly secured. Improper installation can lead to injury or death.
- Drilling Warning: Before drilling, inspect the area for fuel lines, power cables, and electrical wiring.
- Wiring: Use 10-14 gauge speaker wire to ensure adequate current.
- Protection: Use a subsonic filter set 1/2 octave below Fb (Hz) to prevent excessive cone excursion.
- Hearing: Exposure to high sound pressure levels can cause permanent hearing loss.
Connection methods
The enclosure offers two connection methods. Only one is required.
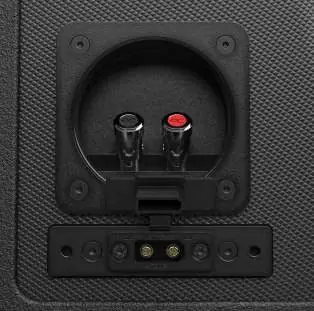
Quick-Plug harness
This harness uses red (positive) and black (negative) 12-gauge wires. The wires are pre-tinned. It is recommended to use solder and heat-shrink for an optimal connection. Once prepared, lift the rubber cover and plug in the harness.
Standard speaker push terminals
Strip at least 1/2 inch of insulation from your speaker wire to expose the copper or silver strands. Push down on each terminal and insert the wire. Red is positive, black is negative.
Enclosure mounting
The enclosure includes a versatile mounting system. Always check for obstructions before drilling.
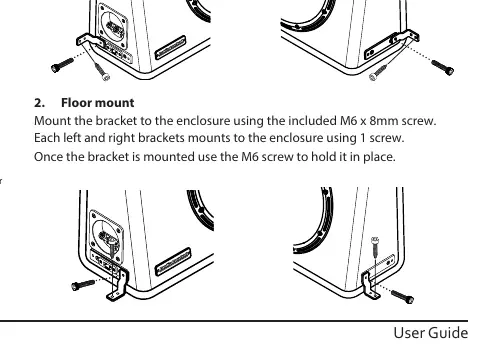
Back mount
Mount the bracket to the enclosure using the included M6 x 8mm screw. Each left and right bracket uses one screw. Once the bracket is attached to the enclosure, use the M6 screw to secure it to the vehicle.
Floor mount
Similar to the back mount, attach the bracket to the enclosure using the included M6 x 8mm screw. Secure the bracket to the floor using the M6 screw.
Specifications
- Woofer Size: 10 inches
- Subwoofer Model: SPC-10S2
- Frequency Response: 20-150 Hz
- Sensitivity: 86.1 dB
- Enclosure Type: Sealed
- Terminal Wire Acceptance: 12-8 Gauge
- RMS Power Handling: 200W - 600W (400W ideal)
Warranty
AudioControl provides a one-year warranty from the date of purchase, which extends to two years if installed by an authorized AudioControl dealer. The warranty requires product registration within 15 days of purchase and the original sales receipt. It does not cover damage from improper installation, abuse, or unauthorized repairs.
Practical help
Common problems
Distortion or potential damage
Often caused by overpowering or sending a clipped signal from the amplifier. Ensure RMS power ratings are matched and amplifier gain is set correctly.
Overheating or voice coil damage
Caused by underpowering with a clipped signal. Ensure the amplifier is not overworked and the crossover is set correctly.
Cone tearing or excessive excursion
Use a subsonic filter set 1/2 octave below the enclosure's frequency response to prevent the cone from moving beyond its mechanical limits.
Before use
- Verify amplifier RMS power is between 200W and 600W (400W ideal).
- Use 10-14 gauge speaker wire for connections.
- Check for fuel lines and electrical wiring before drilling any holes.
- Ensure the enclosure is securely mounted using the provided brackets.
- Register your product at www.audiocontrol.com/product-registration within 15 days.
Specs in practice
- Frequency Response
- The range of frequencies the subwoofer can reproduce (20-150 Hz).
Images and diagrams
- Quick-Plug Harness: A dedicated connector for easy removal, requiring soldering and heat-shrinking.
- Push Terminals: Standard spring-loaded terminals for direct wire connection.
- Mounting Brackets: M6 x 8mm screws are used to attach brackets to the enclosure for secure vehicle installation.
Model compatibility
- Compatible with AudioControl amplifiers for optimal performance.
- Designed for vehicle installation; not tested for outer space.

Manual page author
Michael Turner
Technical manual editor
Reviews PDF manuals for structure, safety notes, and practical product details so readers can find the right information quickly.