Accessories / Mounts & Stands
av:link LPF600 TV Wall Bracket Installation Guide
Installation guide for the av:link LPF600 TV wall bracket. Includes step-by-step mounting instructions for concrete and wood stud walls, TV bracket attachment, and safety guidelines for TVs up to 70 inches and 40kg.
Table of contents
Manual images
Click an image to enlargeQuick Guide from the Manual
The av:link LPF600 is a TV wall bracket designed for screens between 32 and 70 inches with a maximum weight capacity of 40kg. This guide covers the installation process for both concrete and wood stud walls. Important: Installation requires two people to ensure safety and proper alignment. Ensure the wall structure is capable of supporting the combined weight of the TV and the bracket before beginning.
Parts and Tools
The kit includes various screws (M4, M5, M6, M8) and washers to accommodate different TV back designs. You will need a drill, a screwdriver, and a stud finder (for wood walls) or masonry drill bit (for concrete walls).
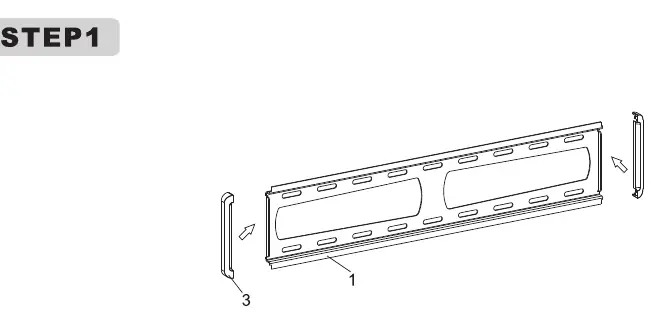
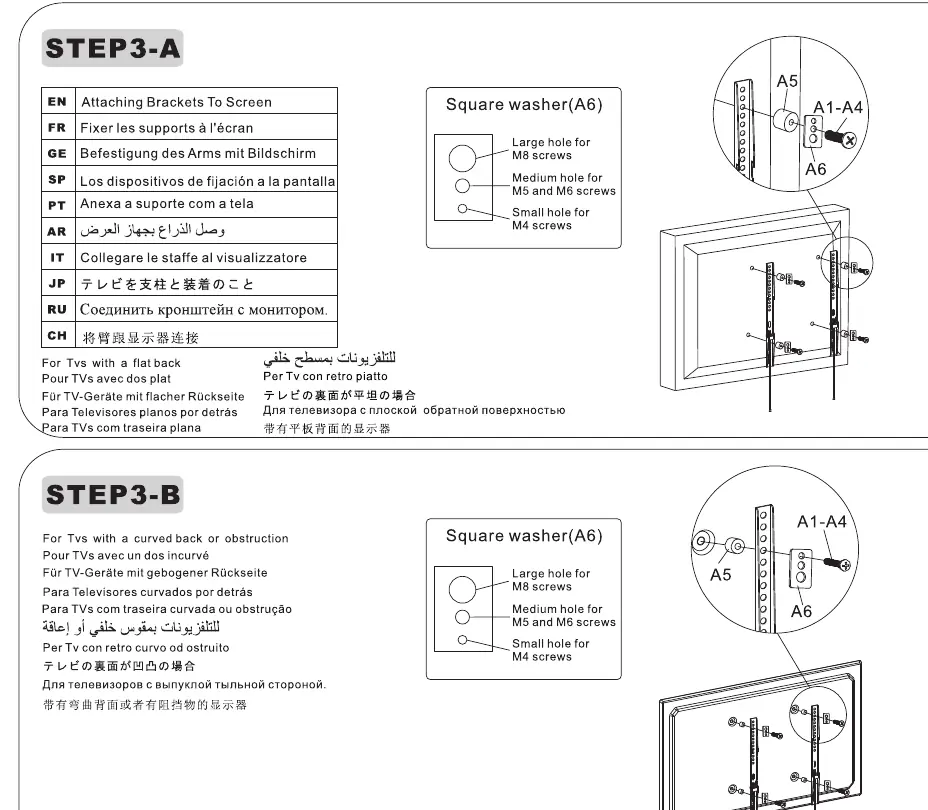
Step 1: Attaching Brackets to TV
Lay the TV face down on a soft surface. Align the mounting brackets with the VESA holes on the back of the TV. Select the appropriate screws from the provided hardware kit. If the TV has a curved back or obstructions, use the provided square washers (A6) to ensure a secure fit.
Step 2: Wall Mounting
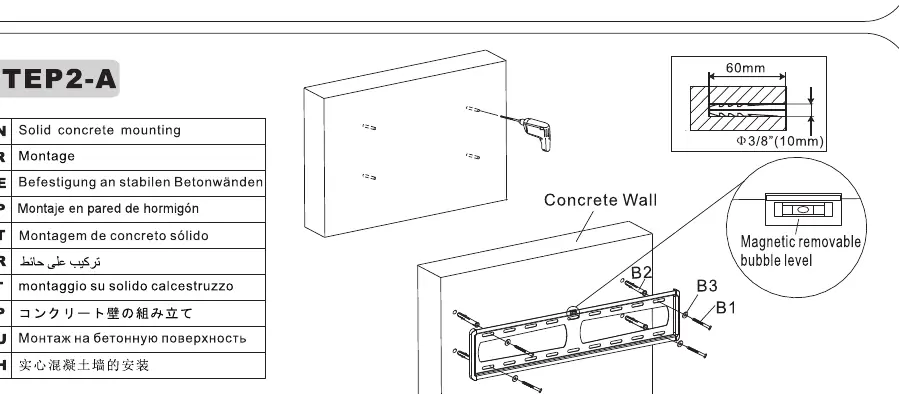
Concrete Wall Mounting
Mark the hole positions on the wall using the wall plate as a template. Drill holes using a masonry bit, insert wall anchors, and secure the wall plate using the provided screws. Use the integrated magnetic bubble level to ensure the plate is perfectly horizontal.
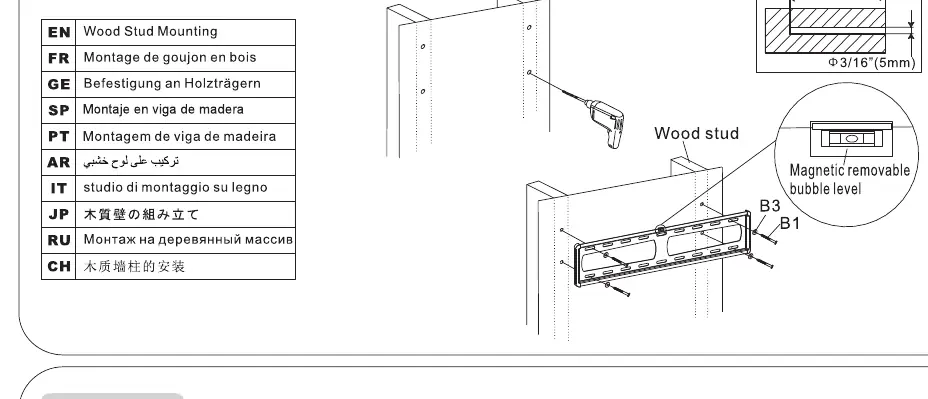
Wood Stud Mounting
Locate the center of the wood studs using a stud finder. Align the wall plate with the studs, mark the holes, and drill pilot holes. Secure the wall plate directly into the wood studs using the provided lag screws. Ensure the plate is level using the magnetic bubble level.
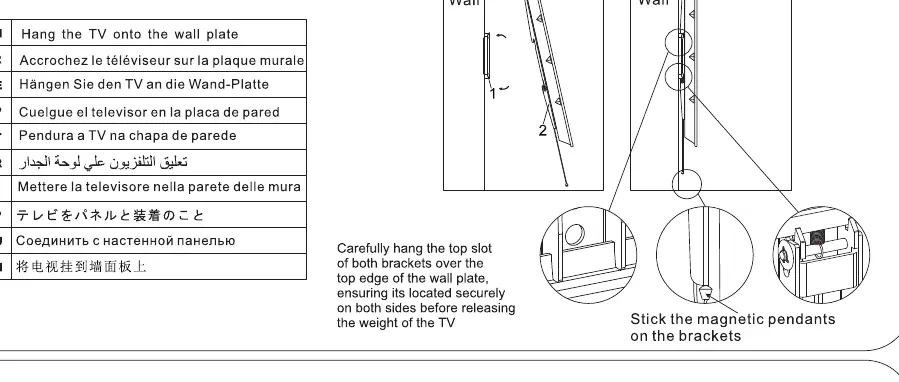
Step 3: Hanging the TV
With two people, lift the TV and hook the top slot of the brackets over the top edge of the wall plate. Ensure the TV is centered. Once in place, pull down the two magnetic pendants on the brackets to lock the TV securely onto the wall plate.
Safety Warnings
- Do not exceed the maximum weight capacity of 40kg.
- This product is for indoor use only.
- Ensure the wall structure is sufficient to support the load.
- Keep small parts away from children to prevent choking hazards.
- Check all screws and connections every two months to ensure they remain tight.
Practical help
Common problems
TV is not locking onto the wall plate
Ensure the top slot of the brackets is fully engaged over the top edge of the wall plate. Pull down the magnetic pendants to engage the locking mechanism.
Wall plate is not level
Use the integrated magnetic bubble level during installation to adjust the plate before fully tightening the screws.
Screws do not fit the TV back
The kit includes multiple screw sizes (M4, M5, M6, M8). If the TV back is curved or obstructed, use the provided square washers (A6) to create a flat mounting surface.
Before use
- Verify the wall is solid concrete or wood stud; do not mount on drywall alone.
- Ensure two people are available for the installation process.
- Check that the TV weight does not exceed 40kg.
- Confirm the TV size is within the 32-70 inch range.
- Ensure you have a drill and appropriate drill bits for your wall type.
- Check that all screws are tightened securely.
Specs in practice
- Max Weight: 40kg
- The absolute maximum weight the bracket can support. Exceeding this may cause failure.
- VESA Compatibility: 600x400
- The maximum mounting hole pattern distance supported by the bracket.
- TV Size: 32-70 inches
- Recommended screen size range for this bracket.
Images and diagrams
- Step 2-A: Shows concrete wall mounting using anchors and screws.
- Step 2-B: Shows wood stud mounting using lag screws directly into the stud.
- Step 3-A/B: Illustrates the use of square washers (A6) for flat or curved TV backs.
Model compatibility
- Compatible with flat and curved TV backs using provided spacers/washers.
- Designed for indoor use only.

Manual page author
David Miller
Documentation analyst
Organizes user manual content into clear summaries, with attention to model details, product context, and everyday usability.