Home Appliances / Commercial Kitchen Equipment
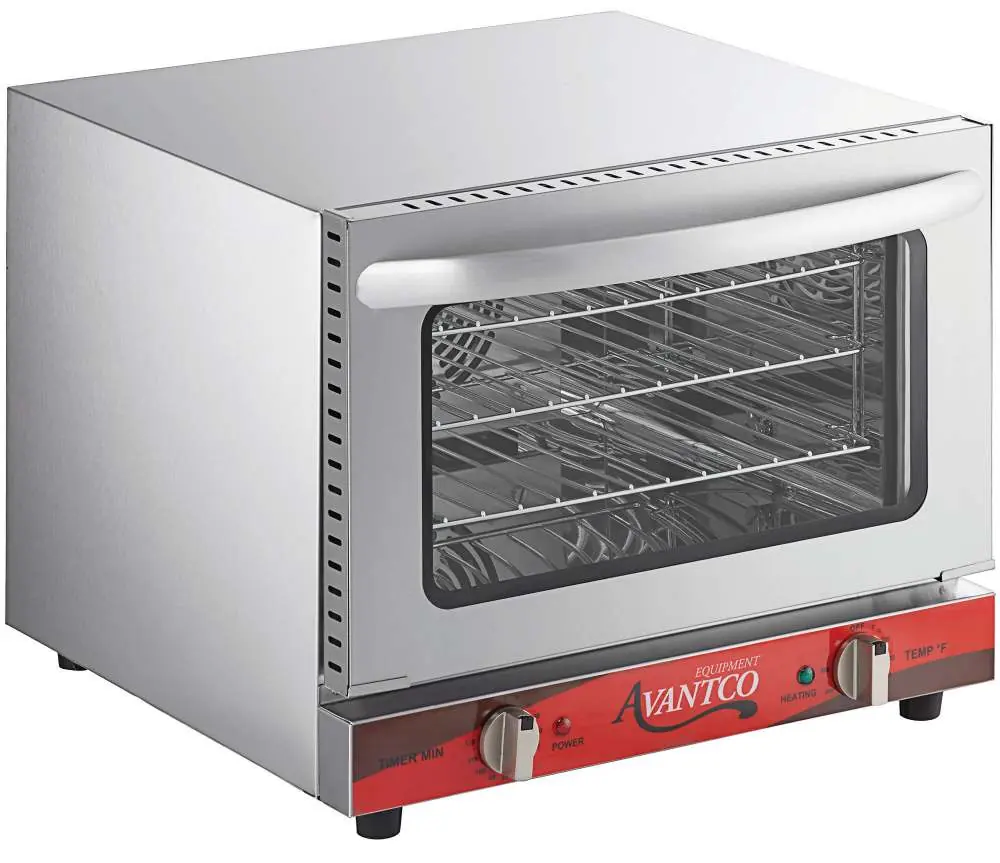
Avantco 177CO Series Countertop Convection Oven
A comprehensive guide for the Avantco 177CO series convection ovens, covering setup, operation, cleaning, safety precautions, and troubleshooting steps for models 177CO14, 177CO16, and 177CO28M.
Quick answers from the manual
Quick answer
- To start the oven, plug it in, set the temperature dial to your desired heat, and set the timer dial. Ensure the unit has 12 inches of clearance and that the rubber feet are installed. p. 6, 7
Key actions
- Perform a 30-minute burn-in at max temperature before first use. p. 6
- Reset the safety switch if the unit stops working. p. 8
First start
- Wash racks and handle, wipe interior, and run a 30-minute burn-in cycle. p. 6
Problems and fixes
Unit stops working or loud pop sound
Reset switch tripped due to overheating. Press the reset switch on the back of the unit.
p. 8Maintenance and reset
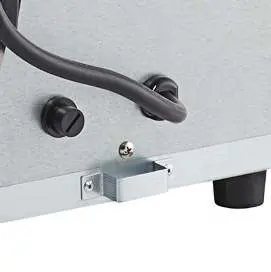
- Reset switch is located on the back of the unit under a black screw cap. p. 8
Technical specifications
| Parameter | Value | Meaning | Pages |
|---|---|---|---|
| 177CO14 Power | 120V, 60Hz, 1440W | Electrical requirements | p. 8 |
| 177CO16 Power | 120V, 60Hz, 1600W | Electrical requirements | p. 8 |
| 177CO28M Power | 208/240V, 60Hz, 2100/2800W | Electrical requirements | p. 8 |
Where to find it in the PDF
- Safety Instructions p. 3
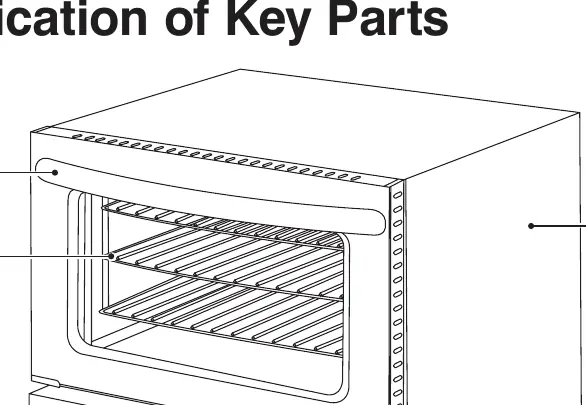
- Parts Identification p. 4
- Usage Guidelines p. 5
- Specifications p. 8
Table of contents
Manual images
Click an image to enlargeQuick guide from the manual
This manual provides instructions for the Avantco 177CO series countertop convection ovens. Before using the oven, ensure it is placed on a flat, well-ventilated surface with at least 12 inches of clearance from surrounding walls. Perform the initial burn-in process to remove manufacturing odors. Always use oven mitts when handling hot items and ensure the reset switch is accessible on the back of the unit.
Important Safety Information
- Commercial use only: This appliance is intended for commercial environments.
- Clearance: Maintain a minimum of 12 inches (30.4 cm) between the oven and surrounding walls.
- Safety: Do not use outdoors. Do not place on or near hot gas or electric burners.
- Operation: Never leave the appliance unattended while in operation.
- Prohibited items: Do not store items on top of the oven, and do not place paper, cardboard, or plastic inside.
- Cleaning: Do not use metal scouring pads or soak the interior with water.
Before First Use
Follow these steps to prepare your oven for operation:
- Wash the handle and roasting racks with soapy water using a small amount of detergent.
- Gently wipe down the interior walls with a damp cloth. Do not touch the electric heating elements.
- Dry all surfaces thoroughly.
- Perform a burn-in: Close the door, set the temperature to the maximum setting, and run the timer for 30 minutes. A slight odor is normal during this process.
Operating the Oven
To operate the oven, follow this typical sequence:
- Plug in the oven.
- Adjust the temperature control knob to the desired setting; the heating indicator light will turn on.
- Load the product into the oven.
- Set the timer to the desired cooking time (0-120 minutes).
- When the timer reaches zero, it will chime.
- Unload the oven using caution as the product will be hot.
Cleaning and Maintenance
Always unplug the unit and allow it to cool completely before cleaning. Use a damp cloth or sponge to wipe the interior. Avoid soaking the interior or washing it under running water, as this can cause serious damage to the electrical components.
Troubleshooting
If the oven fails to heat, check if it is plugged in and if the temperature knob is set. If the unit stops working or makes a loud pop, the safety reset switch may have tripped. This switch is located on the back of the unit, covered by a black plastic screw cap. Remove the cap and press the switch to reset.
Manufacturer information
Avantco Equipment
Practical help
Common problems
Oven does not heat up
Ensure the unit is plugged in, the temperature knob is set, and the safety reset switch on the back has not tripped.
Metallic sound during operation
Do not attempt to dismantle the oven; contact a service agent to examine the fan.
Food overcooked or burned
Check that the fan is working, ensure racks are level, provide sufficient air space around trays, and avoid opening the door unnecessarily.
Before use
- Wash handle and roasting racks with soapy water.
- Wipe interior walls with a damp cloth.
- Ensure the unit is on a flat, well-ventilated surface.
- Perform a 30-minute burn-in at maximum temperature.
- Ensure rubber feet/legs are installed.
Specs in practice
- Space Clearance
- Minimum 12 inches (30.4 cm) required between the oven and surrounding walls.
- Temperature Range
- 0-500°F for 120V models; 0-550°F for 208/240V models.
Images and diagrams
- The reset switch is located on the back of the unit, protected by a black plastic screw cap.
- The fan is located on the backside of the oven.
Model compatibility
- 177CO14 uses 177COTRAY1 and Quarter Size bun pans.
- 177CO16 and 177CO28M use 177COTRAY2 and Half Size bun pans.

Manual page author
Michael Turner
Technical manual editor
Reviews PDF manuals for structure, safety notes, and practical product details so readers can find the right information quickly.