Home Appliances / Commercial Kitchen Equipment
User Manual for Avantco 177CPO16TS Countertop Snack Oven
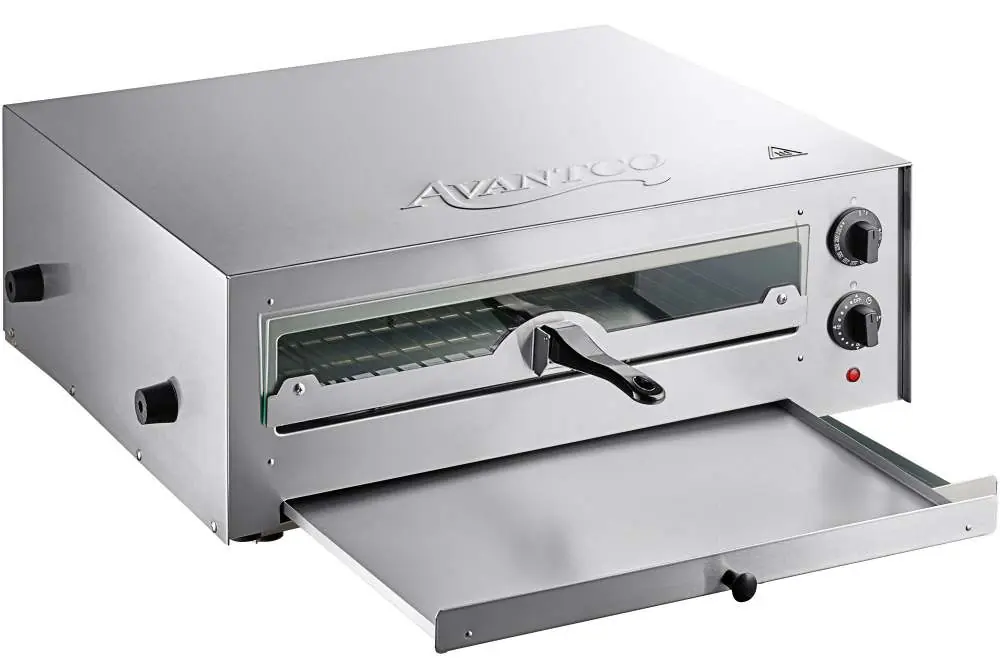
Get started with your Avantco 177CPO16TS Countertop Snack Oven. This guide covers assembly, safe operation, temperature settings, daily cleaning, and maintenance procedures.
Quick answers from the manual
Quick answer
- The Avantco 177CPO16TS is a countertop snack oven. It requires a NEMA 5-15R grounded outlet, 12 inches of clearance, and should be cleaned daily. It does not require preheating. p. 1, 3, 5
Key actions
- Assemble the handle and grill using the provided screw and washer. p. 4
- Perform a 5-minute burn-off cycle before first use. p. 4
- Clean the crumb tray and exterior daily. p. 5
First start
- Wash the rack, close the door, and run the oven for 5 minutes to burn off manufacturing grease. p. 4
Problems and fixes
Smoke during first use
Normal; heating elements are lubricated.
p. 4Maintenance and reset
- Daily cleaning of the crumb tray and exterior surfaces. p. 5
Technical specifications
| Parameter | Value | Meaning | Pages |
|---|---|---|---|
| Temperature Range | 150°F - 570°F | Operating temperature range. | p. 5 |
Where to find it in the PDF
- Safety Information p. 3
- Assembly p. 4
- Usage and Cleaning p. 5
- Parts Diagram p. 6
Table of contents
Manual images
Click an image to enlargeQuick Guide from the Manual
The Avantco 177CPO16TS is a countertop snack oven designed for indoor use. Key operational requirements include:
- Clearance: Maintain at least 12 inches of space on all sides, including the top and back.
- Power: Must be plugged into a NEMA 5-15R, 3-prong grounded outlet.
- Supervision: Never leave the oven unattended during operation.
- Temperature: Adjustable between 150°F and 570°F.
Assembly Instructions
- Ensure the unit is on a flat, sturdy surface with proper clearance.
- Line up the unit handle and panel, ensuring the handle flips upwards.
- Insert the grill hook into the oval opening on the panel (hook facing upwards).
- Place the washer on the bolt and insert it into the top round hole through the handle and panel.
- Secure tightly with the included screw from behind the panel.
Note: Improper assembly of the handle can cause the grill to fall, leading to injury or burns.
Before Using Your Oven
Before the first use, perform a burn-off process:
- Wash the rack with soapy water (do not use spray or abrasive agents).
- Wipe interior walls with a damp cloth. Do not touch heating elements or soak the inside with water.
- Close the door and set the timer for 5 minutes.
- After the timer resets, open the door to remove smoky residue. A light amount of smoke is normal during this process.
Usage Instructions
The oven requires no preheating.
- Plug in the unit.
- Set the desired temperature using the thermostatic controls (150°F - 570°F).
- Use oven mitts or protective gear when removing food to avoid contact with hot panels.
- Unplug the oven when not in use.
Cleaning Instructions
Clean the unit daily to maintain performance and longevity. Do not immerse the unit in water.
- Allow the unit to cool completely.
- Disconnect the power cord.
- Slide out the crumb tray and remove food debris.
- Wipe the crumb tray with a damp cloth and return it to position.
- Wipe the outside of the unit with a damp cloth and dry thoroughly.
Warning: Do not use abrasive cleaners or scouring pads. Ensure all soap residue is rinsed away, as chemical residue can corrode the surface.
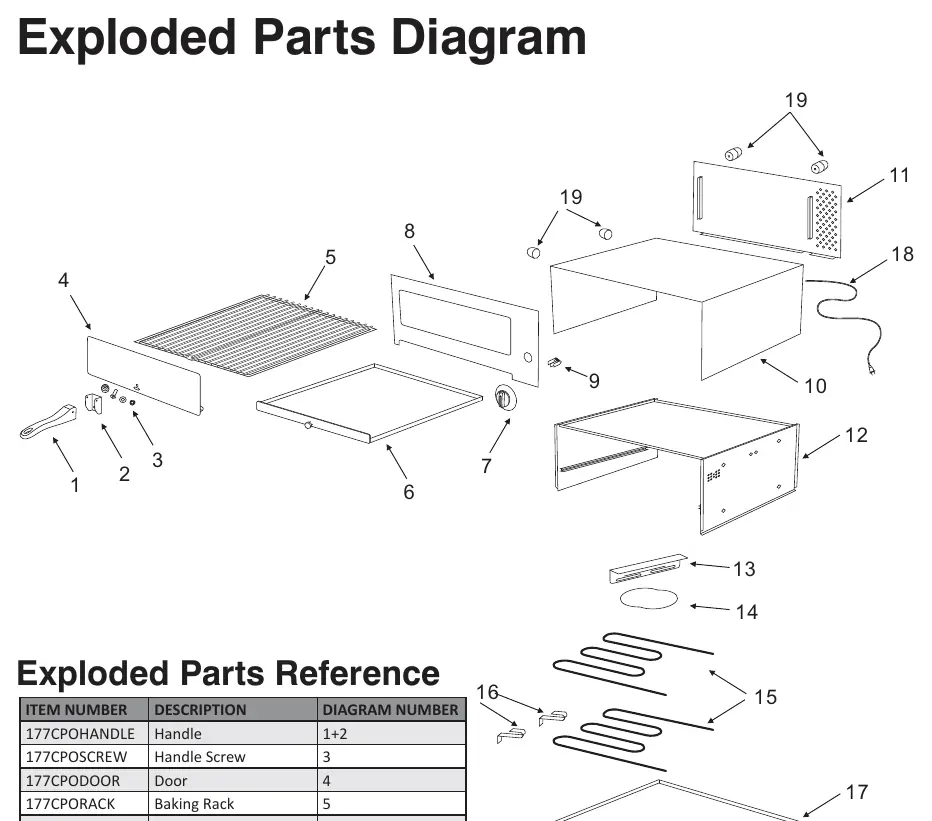
Exploded Parts Diagram
The manual provides a detailed exploded parts diagram identifying components such as the handle, baking rack, crumb tray, timer knob, and heating elements. Refer to the diagram on page 6 for part identification and replacement reference.
Manufacturer information
Avantco Equipment
Practical help
Common problems
Smoke during initial use
This is normal; the heating elements are lubricated, and the burn-off process removes excess grease.
Grill falls off or turns
Ensure the handle is correctly assembled with the washer and screw as per the assembly instructions.
Electrical hazard
Do not use with wet hands, do not immerse in liquid, and ensure the outlet is a NEMA 5-15R grounded type.
Before use
- Ensure 12-inch clearance on all sides.
- Wash the rack with soapy water.
- Perform a 5-minute burn-off cycle to remove manufacturing residue.
- Verify the power outlet is NEMA 5-15R grounded.
Specs in practice
- Temperature Range
- 150°F to 570°F, adjustable via thermostatic controls.
- Power Requirement
- NEMA 5-15R, 3-prong grounded outlet.
Images and diagrams
- The exploded parts diagram on page 6 illustrates the assembly of the handle, door, rack, crumb tray, and heating elements.
- Use the reference table on page 6 to identify specific part numbers for maintenance.
Model compatibility
- Indoor use only.
- Not for use with greasy foods that may damage heating coils.

Manual page author
David Miller
Documentation analyst
Organizes user manual content into clear summaries, with attention to model details, product context, and everyday usability.