Home Appliances / Commercial Kitchen Equipment
User Manual for Avantco 177SL Series Meat Slicers
Quick guide for Avantco 177SL series meat slicers. Includes installation, operation, blade sharpening, cleaning procedures, and troubleshooting tips.
Quick answers from the manual
Quick answer
- To operate the Avantco meat slicer, place the product on the hopper, set the thickness knob, and use the product pusher to guide the carriage. Always clean the unit immediately after use and sharpen the blade every 2 weeks. p. 5, 6, 7
Key actions
- Sharpening the blade p. 7
- Cleaning the unit p. 6
First start
- Clean the unit before its first use. p. 6
Problems and fixes
Machine won't start
Check power connection, voltage, and circuit breakers.
p. 8Maintenance and reset
- Apply food-grade lubricant to the carriage slide rod and product pusher slide rod to prevent sticking. p. 6
Technical specifications
| Parameter | Value | Meaning | Pages |
|---|---|---|---|
| Voltage | 120V | Standard electrical requirement for all models. | p. 2 |
| Hertz | 60 Hz | Frequency requirement. | p. 2 |
Where to find it in the PDF
- Specifications p. 2
- Parts Identification p. 4
- Operation p. 5
- Cleaning & Maintenance p. 6
- Sharpening p. 7
Table of contents
Manual images
Click an image to enlargeQuick guide from the manual
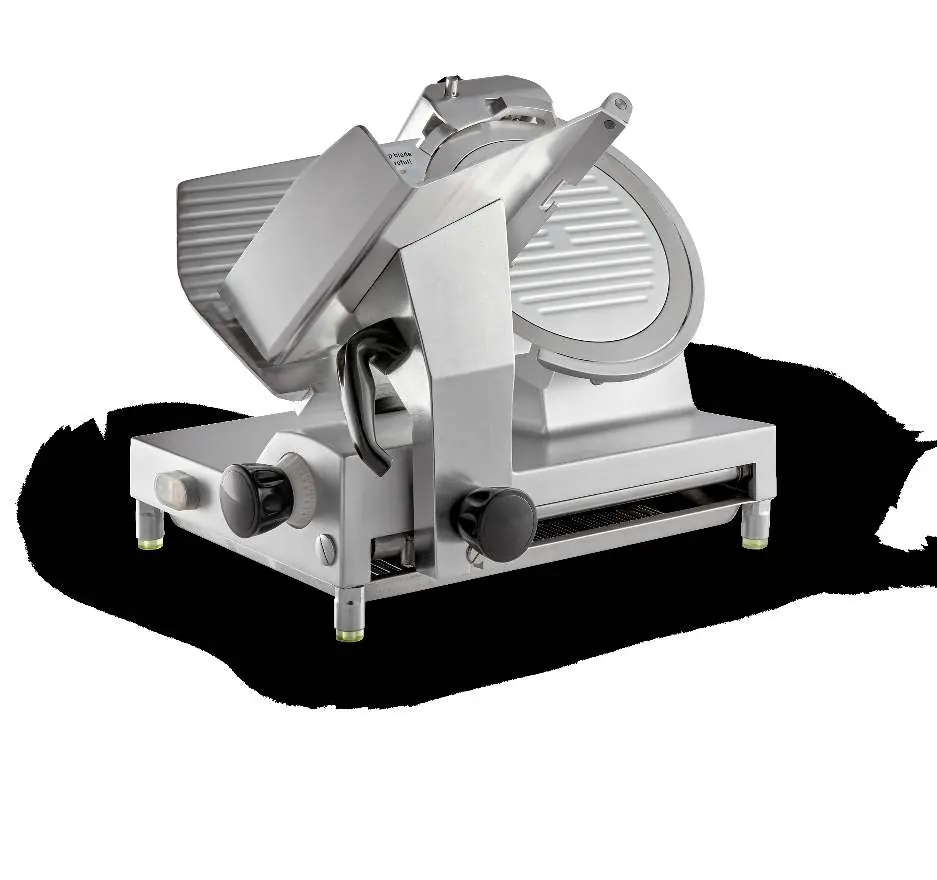
This manual covers the operation, maintenance, and safety procedures for the Avantco 177SL series manual gravity feed meat slicers. These units are designed for commercial, indoor use only. Always use the product pusher and never guide product by hand. The blade is extremely sharp; handle with extreme caution.
Safety Precautions
- Commercial Use Only: This appliance is intended for commercial and indoor use.
- Blade Safety: The blade is very sharp. Always use the product pusher and wear cut-resistant gloves during cleaning or blade handling.
- Prohibited Items: Do not attempt to cut raw, frozen, or bone-in products. The slicer is designed for boneless, non-frozen meats and vegetables.
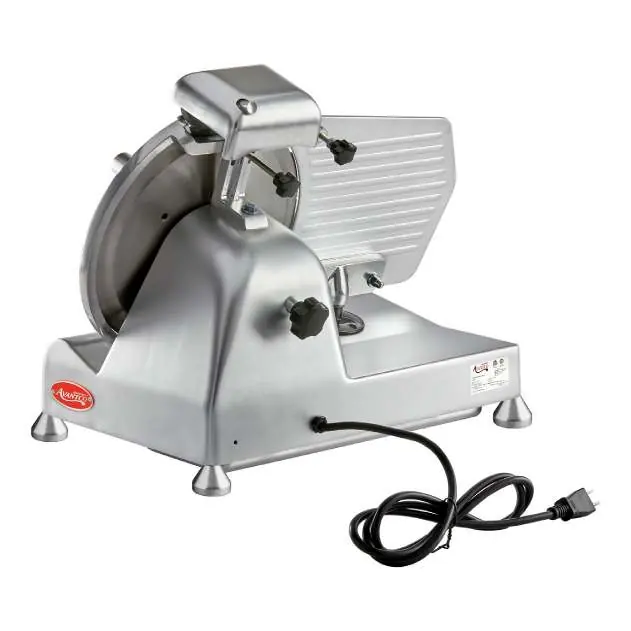
- Electrical Safety: Do not use extension cords. Ensure the outlet is properly grounded and matches the voltage on the serial plate.
- Supervision: Keep children away from the unit.
Installation
Place the machine on a level, steady surface at a comfortable working height. Ensure the area is well-lit and the power outlet is accessible. If the sharpening device is not factory-fitted (models 177SL310, 177SL312, 177SL512, 177SL713MAN), fit it into the socket on the rear of the machine and tighten the safety locking knob.
Operation

- Set the desired slice thickness using the thickness control knob.
- Ensure the carriage is in the start position (closest to the operator).
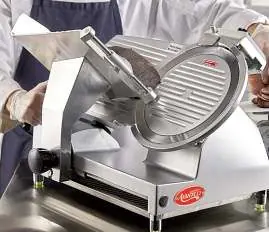
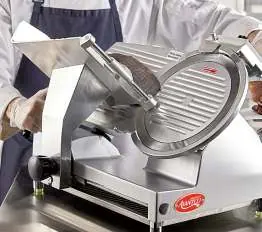
- Lift the product pusher and place the product on the hopper with the raw edge against the thickness gauge plate.
- Return the product pusher to its original position.
- Turn on the motor.
- Guide the carriage toward the blade using the pusher handle with steady pressure.
- When finished, turn off the motor and clean the unit immediately.
Cleaning & Maintenance
Warning: Disconnect from the power source before cleaning. Do not use high-pressure water jets or immerse the unit in water.
- General Cleaning: Turn the thickness knob to 0. Clean the blade with a gentle cleaning pad on a wand while it spins. Remove the carriage, product hopper, slice deflector, and blade cover to clean thoroughly.
- Sanitization: Use a food-contact sanitizer spray for the exterior. Removable parts can be cleaned using a standard 3-sink method (wash, rinse, sanitize).
- Lubrication: Apply food-grade lubricant to the carriage slide rod and product pusher slide rod to prevent sticking.
Sharpening the Blade
Sharpen the blade every 2 weeks or when cut quality drops.
- Ensure the blade is clean and the unit is unplugged.
- Set thickness to 0.
- Unlock the sharpening device, lift, and turn 180° so grinding wheels are in position. Lock it.
- Plug in and switch on.
- Press the sharpening button on the rear for 30 seconds.
- Press the finishing button on the front for 3 seconds to remove the burr.
- Switch off, unplug, and return the sharpener to its original position.
Troubleshooting
If the machine does not start, check if it is plugged in, the voltage is correct, or if circuit breakers have tripped. If the blade does not sharpen, ensure the grinding wheels are clean. If the carriage slides poorly, lubricate the guide rails.
Manufacturer information
Avantco Equipment
Practical help
Common problems
Machine does not start
Check if the unit is plugged in, verify the outlet voltage, and check if circuit breakers have tripped.
Sliced product has jagged edges or excess resistance
The blade is likely dull; sharpen the blade following the instructions on page 7.
Poor sliding of carriage or product pusher
Lubrication has worn off; apply food-grade lubricant to the guide rails.
Blade does not sharpen properly
Clean debris from the grinding wheels using a stiff brush or check if the blade has been ground down too far (replace if diameter is 10mm less than original).
Before use
- Clean the unit before its first use.
- Ensure the machine is on a level, steady surface.
- Verify the power outlet is properly grounded and matches electrical requirements.
- Inspect the power cable for fraying or damage.
- Ensure the sharpening device is installed and locked (if applicable).
Specs in practice
- Max Product Temperature
- 68°F (20°C); do not slice products warmer than this.
- Blade Sharpening Frequency
- Every 2 weeks or whenever cut speed/quality drops.
- Cleaning Method
- Use a 3-sink method (wash, rinse, sanitize) for removable parts; do not immerse the main unit.
Images and diagrams
- The Parts Identification diagram (page 4) labels the thickness control knob, product pusher, carriage, and sharpening components.
- Operation figures (page 5) show the correct hand placement and use of the product pusher.
- Sharpening figures (page 7) illustrate the 180-degree rotation of the sharpening device and the location of the sharpening/finishing buttons.
Model compatibility
- For commercial use only.
- Not for use with frozen products or products with bones.
- Use only food-grade lubricant for maintenance.

Manual page author
David Miller
Documentation analyst
Organizes user manual content into clear summaries, with attention to model details, product context, and everyday usability.