Power / DC Converters
User Manual for Braun SE 400 dig Transceiver
Quick guide for the Braun SE 400 dig 2-meter SSB/FM transceiver. Includes connection instructions, operation modes, tuning, and technical specifications.
Quick answers from the manual
Quick answer
- The SE 400 dig is a 2-meter SSB/FM transceiver. It features manual tuning, multiple operation modes (CW, LSB, USB, FM, FMR), and adjustable output power. p. 1, 7
Key actions
- Tuning the frequency p. 7
- Selecting operation mode p. 8
First start
- Connect power, antenna, and microphone to the rear panel sockets. p. 5
Problems and fixes
dB-meter alignment
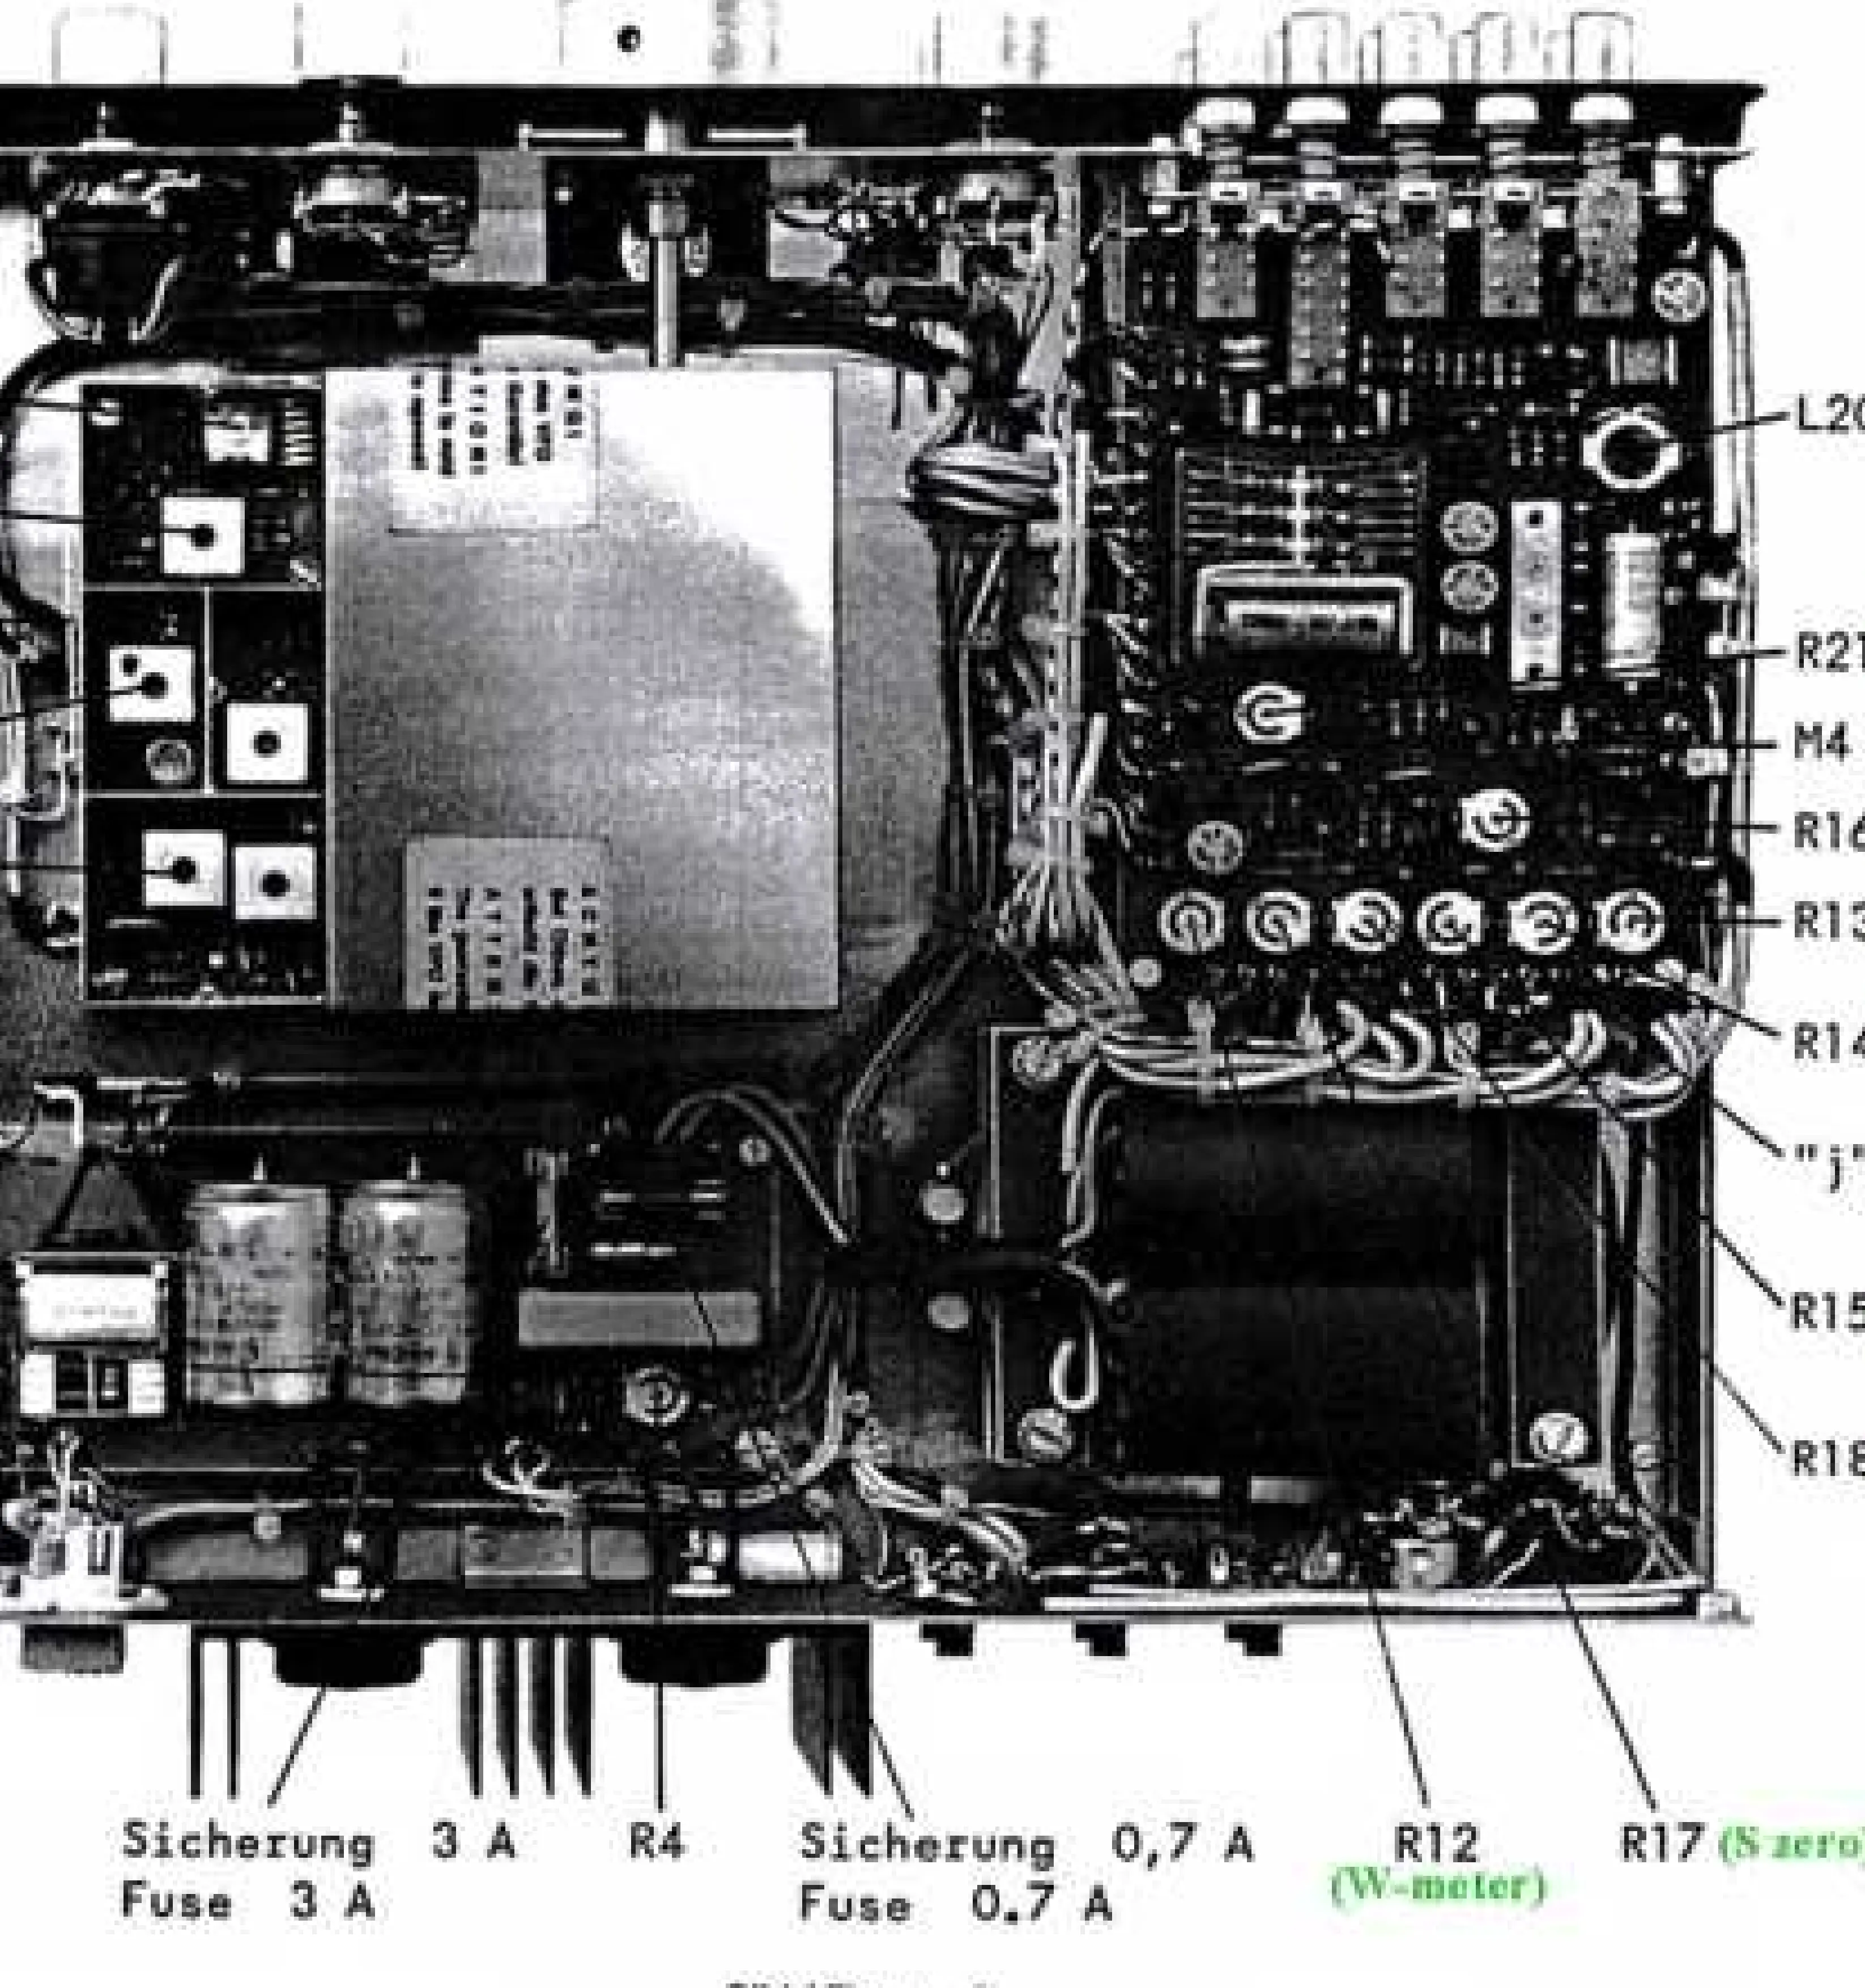
Align R17 (Fig 5) if it does not return to zero.
p. 15Technical specifications
| Parameter | Value | Meaning | Pages |
|---|---|---|---|
| Frequency range | 144 - 146 MHz | Operating band | p. 11 |
| RF Output | 10 W | Transmitter power | p. 11 |
Where to find it in the PDF
- Connections p. 5, 6
- Operation p. 7, 8, 9, 10
- Technical Specifications p. 11
Table of contents
Manual images
Click an image to enlargeQuick Guide
The Braun SE 400 dig is a 2-meter SSB/FM transceiver designed for amateur radio use. This guide provides essential information for connecting, operating, and maintaining the device. Always ensure the unit is connected to a stable power source and a compatible antenna before operation.
Connections
All connections are located on the rear panel of the unit (see Fig 1).
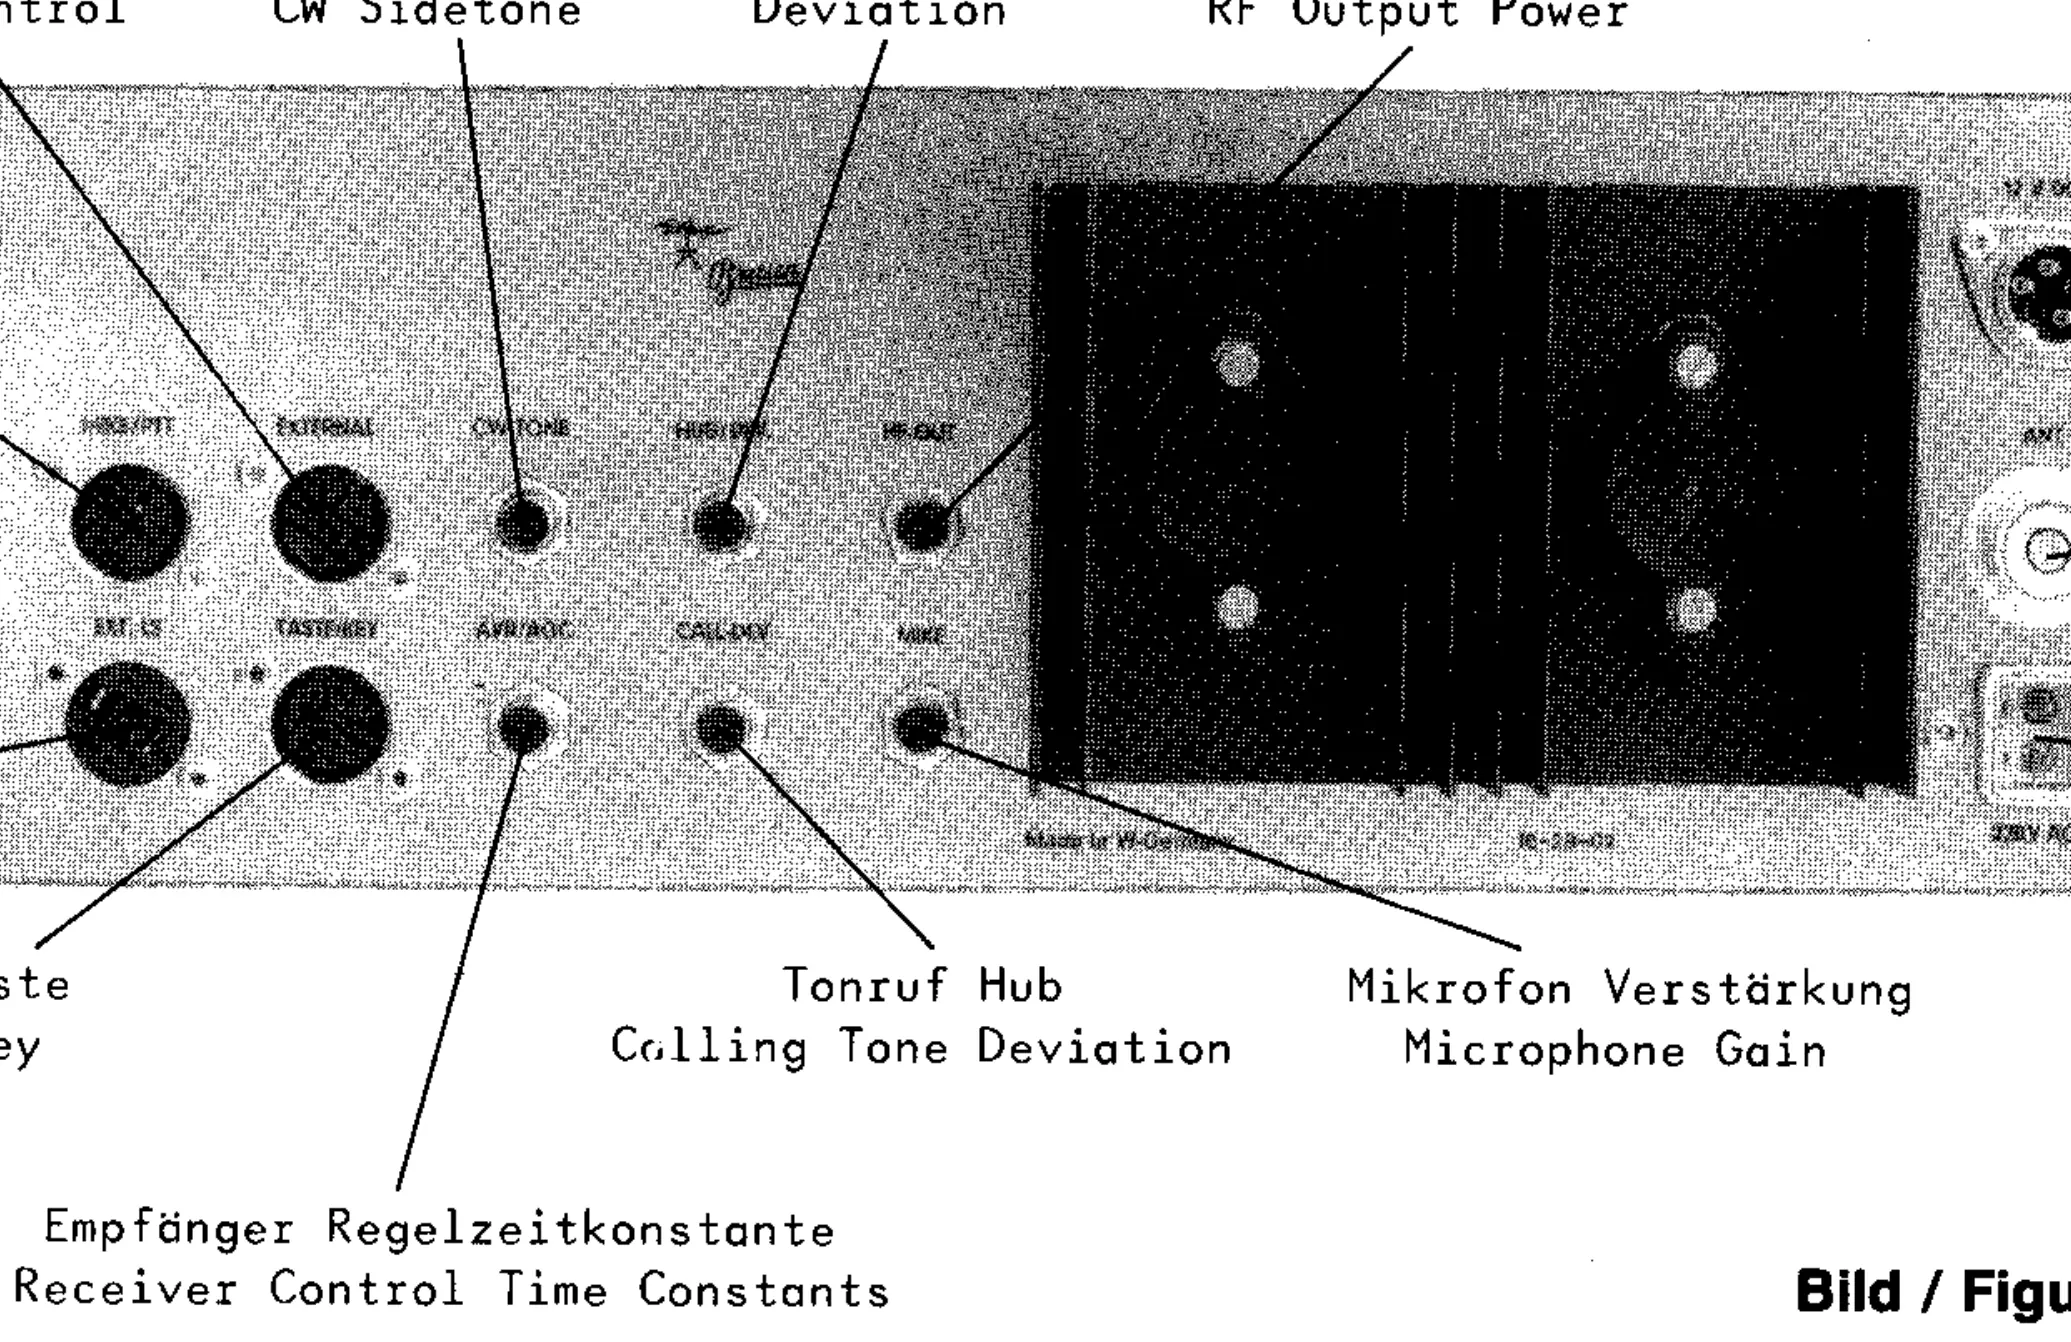
- Power: Connect the supplied cable to the 12V DC socket (11V to 14.5V) or the 220V AC power line socket.
- Antenna: Connect a coaxial cable with an impedance of 50 to 75 Ohms to the 'ANT' socket.
- Microphone: Connect the 5-pin plug to the 'MIKE/PTT' socket.
- Key: Connect the 3-pin plug to the 'TASTE/KEY' socket.
- External Speaker: Connect to the 'EXT.LS' socket.
Operation
The front panel contains all primary controls for tuning and mode selection (see Fig 3).
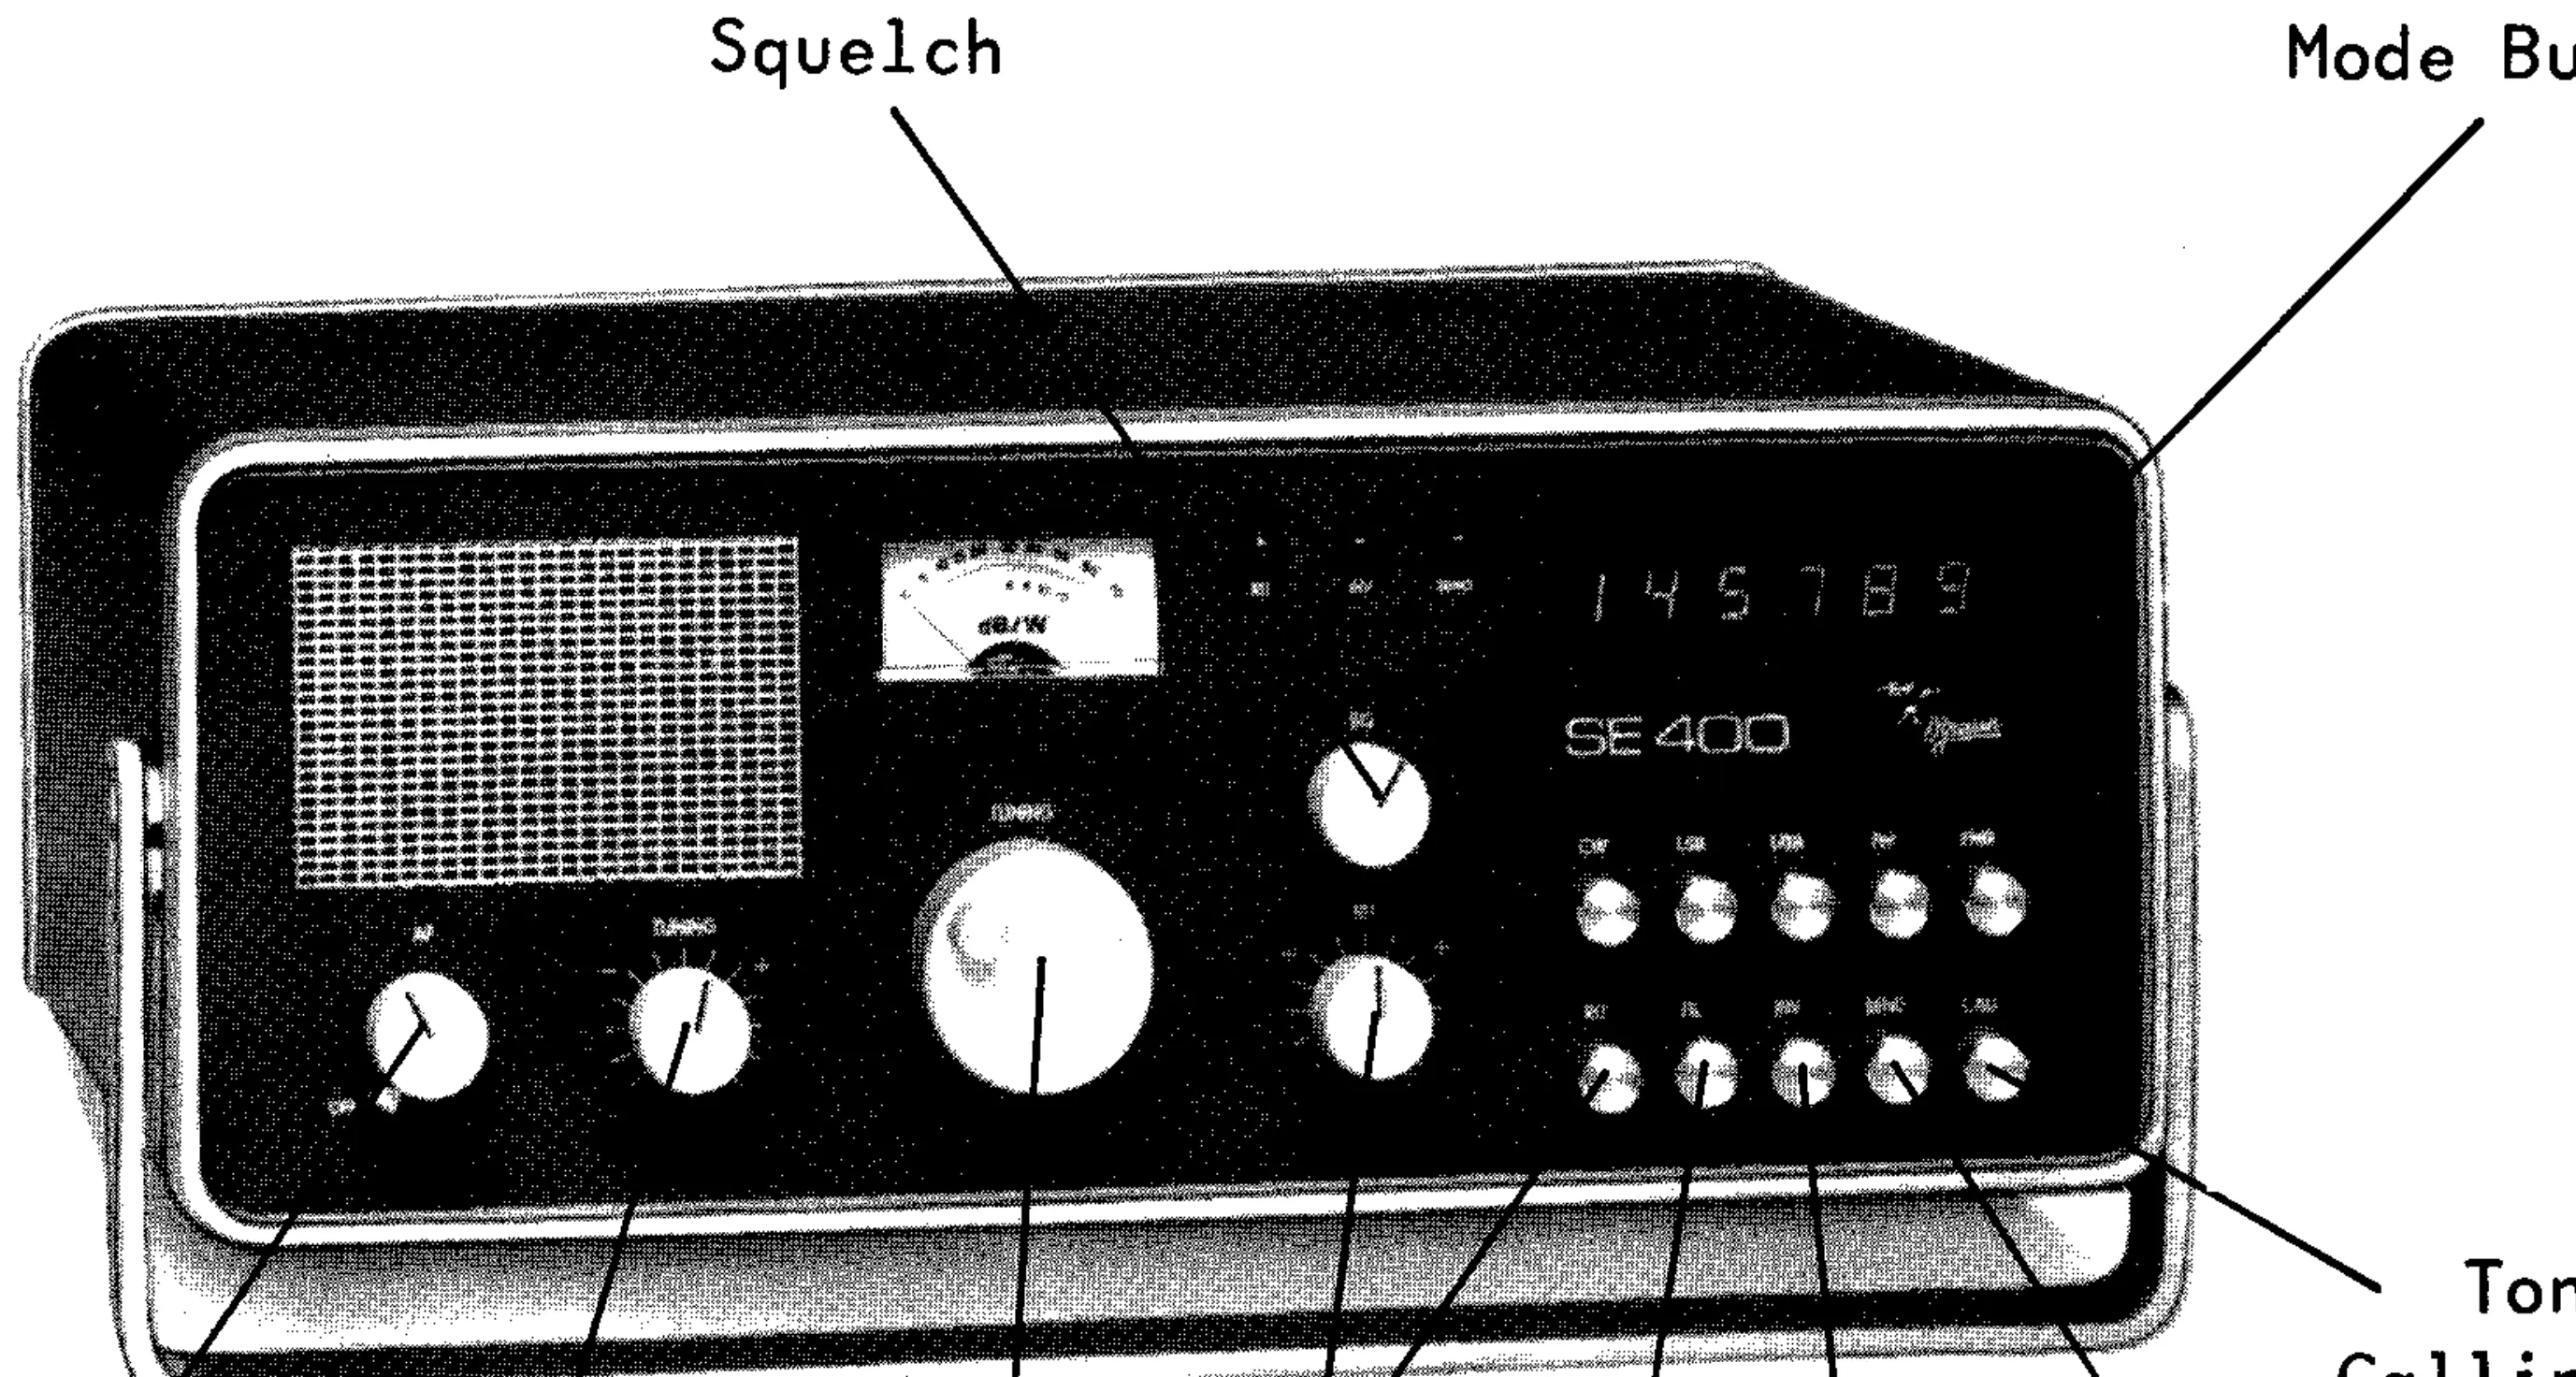
- On/Off: Combined with the volume control.
- Tuning: Use the 'TUNING' knob for frequency selection. For coarse tuning, press the knob while turning.
- Mode Selection: Use the push buttons to select between CW, LSB, USB, FM, and FMR modes.
- Squelch: Adjust the 'SQ' control to mute the receiver when no carrier is present.
- Fine-Tuning: Use the 'RIT' control to shift the receiver frequency by approximately ±1 kHz.
- Transmit: Use the 'SEND' button or the PTT switch on the microphone.
Technical Specifications
- Frequency Range: 144 - 146 MHz
- RF Output: 10 W
- Audio Output: 2 W (4 - 8 Ohm)
- Power Consumption: 25 VA (receive), 50 VA (transmit)
- Weight: 7.3 kg
Service and Alignment
Alignment should only be performed by qualified personnel using appropriate test equipment (e.g., multimeter, frequency counter, signal generator). The internal layout (Fig 5) provides access to various adjustment potentiometers for squelch, dB-meter, and frequency settings.
Official resources from the manual
Manufacturer information
Braun
Practical help
Common problems
dB-meter does not return to zero
Align with R17 (Fig 5) while the unit is in a warmed-up condition.
Squelch threshold is incorrect
Adjust the squelch threshold using R21 (Fig 5).
Low output power
Check local oscillator voltage or perform transmitter alignment (see section 4.7).
Before use
- Ensure 12V battery voltage is between 11V and 14.5V.
- Connect antenna with 50-75 Ohm impedance.
- Ensure microphone is connected to the 5-pin socket.
- Check fuse ratings (0.7A for power line, 3A for battery).
- Verify the unit is on a stable surface.
Specs in practice
- Frequency range
- 144 - 146 MHz (2-meter band)
- Power consumption
- 25 VA (receive), 50 VA (transmit)
Images and diagrams
- Fig 1: Rear panel connections including power, antenna, and microphone.
- Fig 3: Front panel controls including tuning, volume, and mode buttons.
- Fig 5: Internal layout showing adjustment points for service.
Model compatibility
- Designed for 2-meter band operation.
- Compatible with LT 470 transverter for 70 cm band coverage.

Manual page author
Emily Carter
User documentation editor
Prepares concise manual descriptions and highlights the most useful setup, operation, and maintenance information for readers.