Home / Pet Supplies
User Manual for Carlson 2-in-1 Plastic Gate & Pet Pen
Quick guide for the Carlson 2-in-1 Plastic Gate & Pet Pen (models 2360, 2365). Includes installation instructions for wall-mounted and freestanding configurations, safety warnings, and maintenance tips.
Quick answers from the manual
Quick answer
- The Carlson 2-in-1 Plastic Gate & Pet Pen can be installed as a wall-mounted gate (36-192 inches) or a freestanding pet pen. It requires adult assembly and should be checked regularly for stability. p. 1, 3, 6, 10
Key actions
- Install as wall gate p. 6, 7, 8
- Install as freestanding p. 10, 11
Problems and fixes
Gate is unstable
Ensure all four mounting brackets are used and secured to the wall.
p. 3Maintenance and reset
- Clean by sponging with warm water and a mild detergent. Do not use abrasive cleaners or bleach. p. 12
Technical specifications
| Parameter | Value | Meaning | Pages |
|---|---|---|---|
| Opening Width | 36 - 192 inches | Minimum to maximum width for wall mounting. | p. 3, 9 |
Where to find it in the PDF
- Safety Warnings p. 3, 4
- Parts List p. 5
- Wall Installation p. 6, 7, 8
- Freestanding Installation p. 10, 11
Table of contents
Manual images
Click an image to enlargeQuick guide from the manual
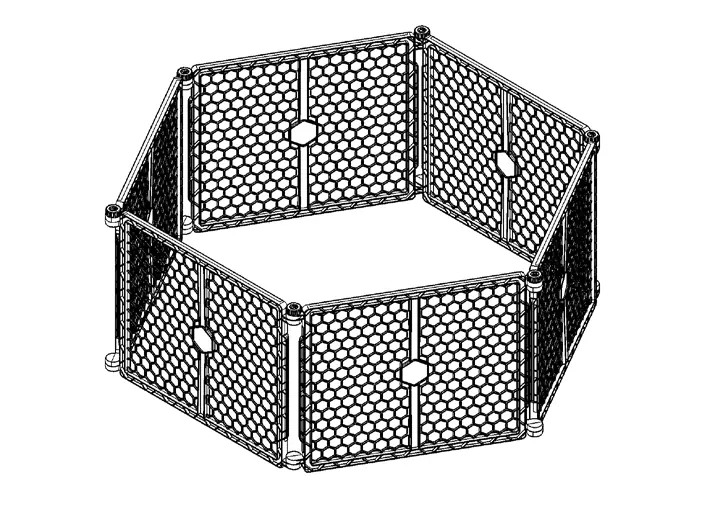
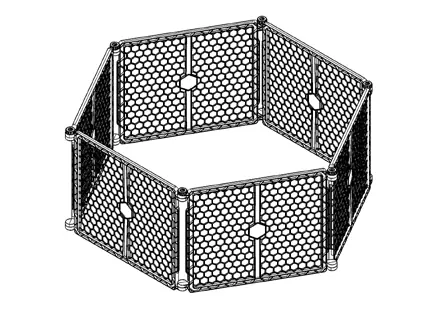
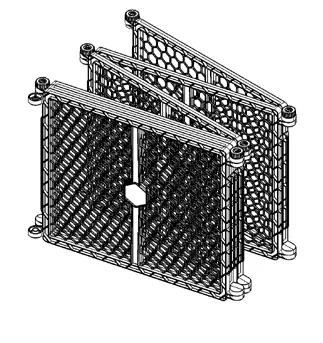
The Carlson 2-in-1 Plastic Gate & Pet Pen is designed to function as either a wall-mounted gate or a freestanding enclosure. It is intended for children between 6 and 24 months or pets. Important: Always read all instructions before assembly. Do not use if any components are missing or damaged. The gate is designed to fit openings from 36 to 192 inches.
Safety Warnings
- Not for use at the top of stairs.
- Never use to keep a child or pet away from a pool.
- Never stack gates on top of each other.
- Stop using if a child or pet can climb over or dislodge the gate.
- Ensure the gate is resting against the floor before installation.
- Adult assembly is required.
Parts List
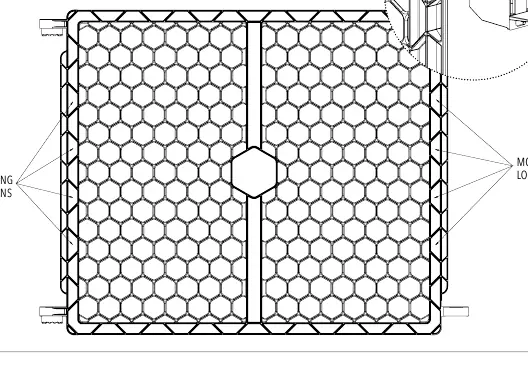
- Play Yard Gate Frame (6 Panels)
- Wall Mounting Bracket (4)
- Gate Connector (4)
- 1" Wall Mounting Screws (8)
- Small Threaded Gate Cap (1)
- Tall Gate Cap (2)
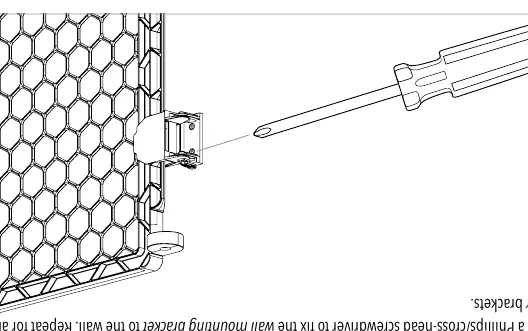
Option A: Installing Your Gate Between Two Walls

- Unfold: Unfold the gate frame at each pivoting joint by loosening each cap.
- Adjust Size: Determine the opening size. Remove panels by unhooking upper and lower knobs, or add panels by hooking opposite ends together.
- Attach Connectors: Attach two gate connectors to the free ends of the gate at the specified mounting locations.
- Mounting: Attach the wall mounting brackets to the gate connectors.
- Fix to Wall: Use a Phillips/cross-head screwdriver to fix the four brackets to the wall.
- Lock: Rotate the wall mounting bracket to the locked position.
Option B: Installing Your Gate as a Freestanding Enclosure
- Unfold: Unfold the gate frame at each pivoting joint by loosening each cap.
- Configure: Position the pet pen into your desired configuration.
- Connect: Join the free ends of the pet pen together at the plastic joints.
- Secure: Tighten the locking knobs to secure the pen. Note: Panels must be added or subtracted in sets of two for the enclosure to function properly.
Care and Maintenance
Periodically check the gate for signs of damage, wear, or missing components. Do not use abrasive cleaners or bleach. Clean by sponging with warm water and a mild detergent. Ensure all hardware and mountings are tightened regularly.
Warranty
This product includes a 90-day limited warranty for the original purchaser against defects in materials or workmanship under normal, non-commercial use. Proof of purchase is required.
Practical help
Common problems
Gate is unstable
Ensure all four mounting brackets are used and secured to the wall. Check that all hardware is tightened.
Cannot fit opening
The gate fits openings 36 to 192 inches. Add or remove panels in sets of two to adjust the size.
Before use
- Verify all parts are present (6 panels, 4 brackets, 4 connectors, 8 screws, caps).
- Ensure the gate is resting against the floor.
- Check that all hardware and mountings are tightened.
- Confirm the locking mechanism is securely engaged.
- Ensure the pet/child cannot climb over or dislodge the gate.
Specs in practice
- Opening Range
- 36 to 192 inches (91.44 to 487.68 cm).
Images and diagrams
- Wall mounting requires attaching connectors to the gate ends and then to the wall brackets.
- Freestanding setup involves connecting the free ends of the panels together and tightening the locking knobs.
Model compatibility
- Not recommended for use with children (despite age range, follow all safety warnings).
- Do not use at the top of stairs.
- Do not use to keep child or pet away from a pool.

Manual page author
David Miller
Documentation analyst
Organizes user manual content into clear summaries, with attention to model details, product context, and everyday usability.