General / Other Manuals
Celestron StarSense Explorer DX 130AZ Telescope Setup Guide
Quick setup and operation guide for the Celestron StarSense Explorer DX 130AZ telescope, including assembly, StarPointer finder alignment, smartphone dock installation, and app synchronization.
Table of contents
Manual images
Jump to the sectionQuick guide from the manual
This document provides essential instructions for setting up and using the Celestron StarSense Explorer DX 130AZ telescope. It covers physical assembly, finder scope alignment, smartphone integration for the StarSense Explorer app, and basic maintenance.
Assembly and Setup

- Unpack the telescope and verify all parts: optical tube, altazimuth mount with tripod, accessory bag, slow-motion handles, accessory tray, 10mm and 25mm eyepieces, StarPointer finder, smartphone dock, app code card, and hex key.
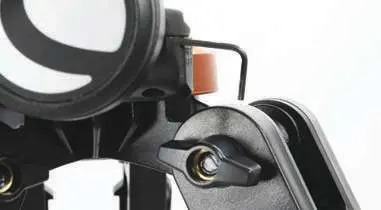
- Extend the tripod legs and secure the accessory tray to the center brace using the provided wing nuts.
- Attach the slow-motion handles to the mount using the hex key stored in the mount's front slot.
- Slide the optical tube onto the mount's dovetail holder and tighten the locking screw.
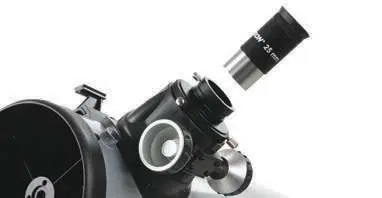
- Insert the 25mm eyepiece into the focuser and tighten the locking screw.
- Slide the StarPointer finder bracket onto the base near the focuser and tighten the locking screw.
Smartphone Dock Installation
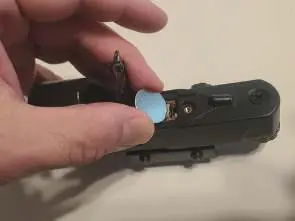
- Remove the protective plastic sheet from the battery contact in the StarPointer finder.
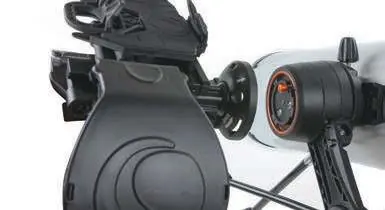
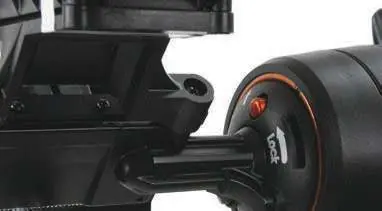
- Attach the StarSense smartphone dock to the mount by inserting the bayonet mount into the port.
- Align the arrow on the dock with the position mark on the mount, then rotate counter-clockwise while pressing inward until it clicks into place.
Finder Alignment
Alignment is best performed during the day on a distant object (at least 500m away).
- Center a distant object in the 25mm eyepiece.
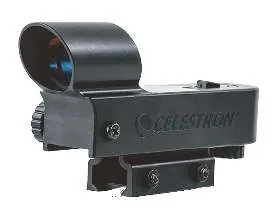
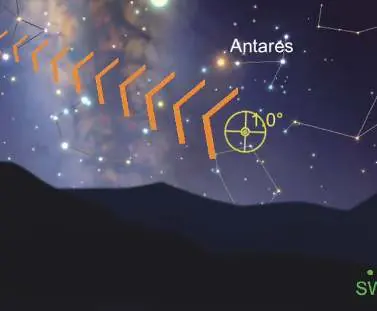
- Turn on the StarPointer finder and look through it.
- Use the two adjustment knobs on the finder to align the red dot with the object centered in the eyepiece.
Using the StarSense Explorer App
- Download the StarSense Explorer app from the Apple App Store or Google Play.
- Use the activation code from the included card to unlock the app.
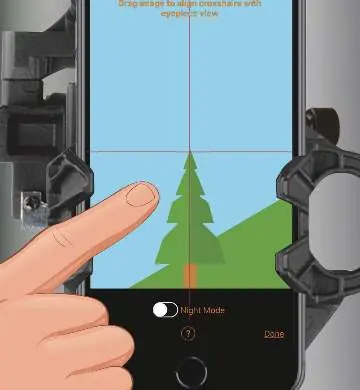
- Sync the smartphone camera with the telescope view by following the in-app tutorial.
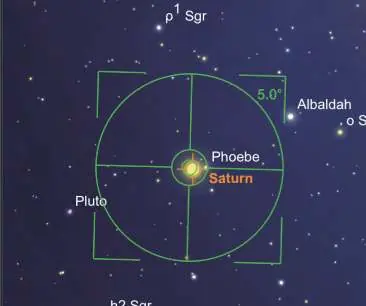
- Use the app's interface to locate celestial objects; the app will guide you with arrows to move the telescope manually until the target is centered.
Maintenance and Safety
- Warning: Never look directly at the sun through the telescope, finder, or eyepiece. Permanent eye damage may occur.
- Clean lenses using a blower and specialized camera lens cleaning paper. Avoid touching lens surfaces with fingers.
- Store the telescope in a dry, well-ventilated area away from direct sunlight.
Manufacturer information
Celestron
Practical help
Common problems
LED dot in StarPointer finder does not turn on
Check if the battery insulation sheet has been removed. If it still fails, replace the CR2032 battery.
Image is blurry
Adjust the focus knob located under the focuser until the image is sharp.
Smartphone dock does not align with the app
Ensure the smartphone is seated firmly at the bottom of the holder and that the camera view is centered in the app's alignment screen.
Before use
- Verify all components are present.
- Ensure the tripod is set up on a stable, level surface.
- Remove the lens cap from the telescope.
- Ensure the smartphone case is removed if it is bulky or folio-style.
- Check that the StarPointer finder battery is active.
Specs in practice
- Smartphone Compatibility
- Supports phones up to 180mm x 80mm. Requires Android 7.1.2+ or iOS (iPhone 6+).
- Battery Type
- CR2032 coin cell battery for the StarPointer finder.
Images and diagrams
- The mount features a free-stop design; hold the tripod with one hand and the tube with the other to move it.
- Slow-motion handles are used for fine adjustments and tracking celestial objects.
- The StarPointer finder has two adjustment knobs for vertical and horizontal alignment.
Model compatibility
- App requires camera, gyroscope, and accelerometer sensors.
- Some Android devices may not be fully compatible with the app.

Manual page author
Michael Turner
Technical manual editor
Reviews PDF manuals for structure, safety notes, and practical product details so readers can find the right information quickly.