Tools / Power Tools
User Manual for CLAS PW 1080 and PW 1081 1/2" Impact Wrench
Quick guide for the CLAS PW 1080 and PW 1081 1/2" 20V Brushless Impact Wrench. Includes operating instructions, safety guidelines, battery charging, and speed settings.
Table of contents
Manual images
Click an image to enlargeQuick guide from the manual
This manual covers the operation and maintenance of the CLAS PW 1080 and PW 1081 1/2" Impact Wrench. Always lock the trigger switch and remove the battery before performing any maintenance or changing accessories. The tool features an electronic clutch with three forward speed settings and two reverse modes, including an Auto Break function for controlled loosening of lug nuts.

Product Overview
The impact wrench consists of the following main components:
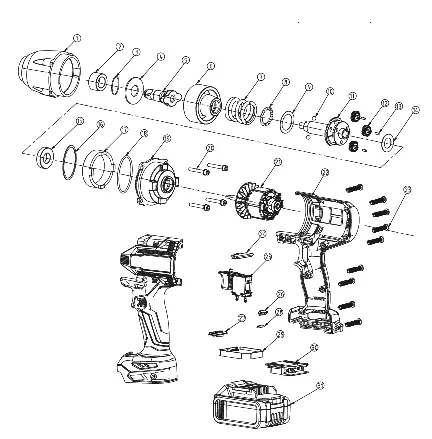
- 1/2" Square Drive
- Directional switch and trigger lock
- Handle
- Cooling air outlet
- Electronic Clutch & Auto Brake control panel
- Trigger
- LED Light
- Battery Button
- Battery Status Display
Technical Specifications
Key performance parameters for the tool:
- Max tightening torque: 860/500/300 Nm (adjustable)
- Max breakaway torque: 1080 Nm
- Battery: 20V 4Ah Li-Ion
- Drive: 1/2"
- Max bolt diameter: M24
- Weight: 1.90 kg (without battery) / 2.55 kg (with battery)
- Speeds: 3 forward settings
Safety Instructions
Follow these safety guidelines to prevent accidents:
- Workplace: Keep the area clean and well-lit. Do not use in explosive environments.
- Electrical: Do not modify plugs. Avoid contact with grounded surfaces. Do not expose to rain or wet conditions.
- Personal: Wear eye protection and appropriate safety gear. Avoid accidental starting by locking the switch when not in use.
- Maintenance: Repairs must be performed by a qualified expert using identical replacement parts.
Battery Charging and Maintenance
To charge the battery:
- Remove the battery pack from the handle by pressing the lock button.
- Slide the battery onto the charger.
- The red LED indicates charging is in progress. When the red LED turns off and the green LED illuminates, charging is complete (approx. 1 hour).
- Check that the charger contacts are clean and undamaged if the battery fails to charge.
Check the battery status by pressing the button on the rear of the battery: all LEDs illuminated means fully charged; yellow and red means adequate charge; red only means the battery is empty.
Operation
Forward Operation: The motor has an electronic clutch with three speed settings (1, 2, and 3). Use the button on the base of the tool to cycle through settings. One green LED indicates speed 1, two LEDs indicate speed 2, and three LEDs indicate speed 3.
Reverse Operation: The tool has two reverse modes:
- Full Reverse: Activated when the direction switch is in reverse. No LEDs on the control panel should be illuminated.
- Auto Break: Engaged by pressing the button on the control panel (red LED illuminates in the third position). The tool stops immediately when the bolt breaks loose and resistance is gone. This function is only available in the third speed position.
Operating Tips
To install a socket, align it with the square drive and press until locked. To remove, pull while twisting back and forth. Accessories may be hot after use. Always verify the final tightening torque with a torque wrench.
Manufacturer information
CLAS EQUIPEMENTS
Practical help
Common problems
Battery not charging
Ensure the electrical outlet has power and check that charger contacts are undamaged and making contact with battery leads.
Tool does not start
Ensure the battery is fully inserted and the trigger lock is disengaged.
Socket is stuck
Pull the socket off while twisting it back and forth to dislodge it.
Before use
- Ensure the battery is fully charged.
- Set the rotational direction switch to the center position (locked) before inserting the battery.
- Wear appropriate safety gear, including eye protection and gloves.
- Verify the socket is securely attached to the square drive.
- Check that the work area is clean and well-lit.
Specs in practice
- Max tightening torque
- 860/500/300 Nm; adjustable via the electronic clutch settings.
- Max breakaway torque
- 1080 Nm; the maximum force the tool can apply to loosen a bolt.
Images and diagrams
- 1: 1/2" Square Drive
- 2: Directional switch and trigger lock
- 5: Electronic Clutch & Auto Brake control panel
- 9: Battery Status Display
Model compatibility
- Use only the specified charger provided by the manufacturer.
- Auto Break function is only available when the electronic clutch is set to the third speed position.

Manual page author
David Miller
Documentation analyst
Organizes user manual content into clear summaries, with attention to model details, product context, and everyday usability.