Computers / Printers
User Manual for ClearClick Virtuoso 3.0 22MP Film and Slide Scanner
Quick start guide and user manual for the ClearClick Virtuoso 3.0 22MP Film and Slide Scanner. Learn how to set up, scan slides and negatives, transfer images to your computer, and maintain your device.
Quick answers from the manual
Quick answer
- The ClearClick Virtuoso 3.0 is a film and slide scanner. To use it, insert a Class 10 SD card, connect power, select the film type in the menu, insert the film/slide into the appropriate holder, and press OK to scan. p. 5, 6, 7
Key actions
- Scanning slides p. 7
- Scanning negatives p. 7
- Transferring images p. 9, 10
First start
- Insert SD card (Class 10, 32GB max), connect power, turn on, and select scan settings. p. 5
Show 4 more answers Show less
Problems and fixes
Computer connection fail
Check cable connection and ensure 'USB' mode is selected in the menu.
p. 10, 15Maintenance and reset
- Clean the internal scanning area using the supplied brush. p. 13
Technical specifications
| Parameter | Value | Meaning | Pages |
|---|---|---|---|
| Sensor | 14 Mega CMOS | Image sensor resolution | p. 16 |
| Display | 7 inch | LCD screen size | p. 16 |
| Power | 5V/1A | Power input requirements | p. 17 |
Where to find it in the PDF
- Quick Start Guide p. 5, 6, 7, 8
- Technical Specifications p. 16, 17
Table of contents
Manual images
Click an image to enlargeQuick Guide from the Manual
The ClearClick Virtuoso 3.0 is a film and slide scanner designed to digitize your physical media. To get started, insert a compatible SD card (Class 10, 32GB or less), connect the device to a 5V/1A power source, and turn it on. Use the menu to select your film type, insert the film or slide into the appropriate holder, and press the OK button to scan.
What's In The Box
- Virtuoso 3.0 Film & Slide Scanner
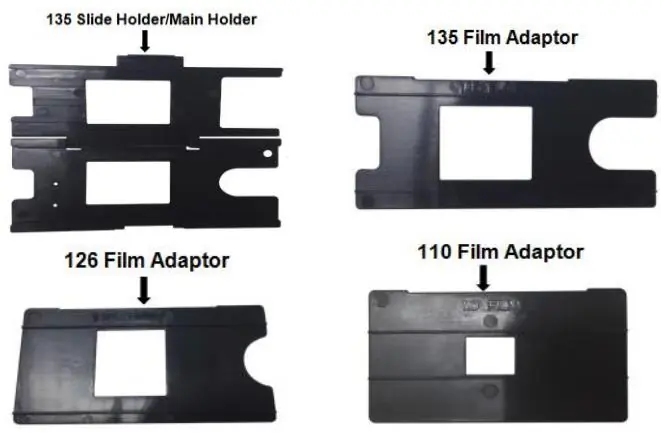
- 35mm Slide Holder (Main Holder)
- 35mm Film Adapter
- 110 Film Adapter
- 126 Film Adapter
- HDMI Cable
- USB Cable & Power Adapter
- Cleaning Brush
- User’s Manual
Note: An SD Memory Card is required but not included (must be 32 GB or less, Class 10 or higher).
Safety Precautions
- Do not disassemble the unit.
- Do not operate the unit around water or rain.
- Do not operate the unit around any kind of machines or appliances (other than computers).
- Turn off and unplug the unit when not in use.
- Do not allow children to use this device.
Scanning Procedure
Preparing Slides and Negatives
To scan slides, open the main holder, insert one slide, and close the holder. To scan negatives, open the main holder, select the appropriate adapter (135/35mm, 126, or 110), place it inside the main holder, close it, and feed your film into the side of the adapter.
Scanning
- Select the first menu option ("Scan/Settings") and press OK.
- Choose the type of media: Slides, Color Negatives, or Black & White Negatives.
- If choosing negatives, select the specific film type (35mm, 110, or 126).
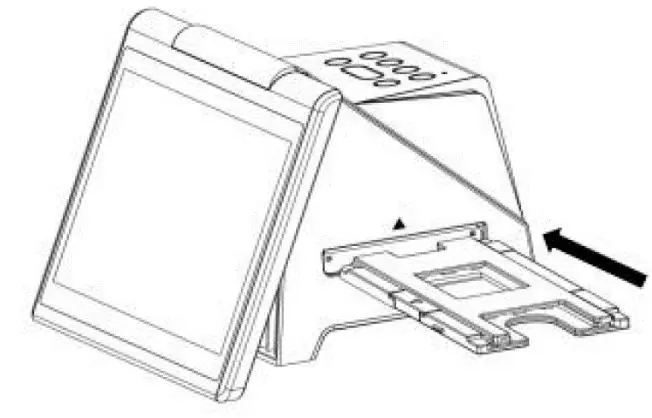
- Insert the holder into the right side of the scanner.
- Optionally, adjust resolution, brightness, and RGB color before scanning.
- Press the OK button to scan the image. The image will be saved to the SD card.
Image Management and Transfer
To view or delete images on the device, select the "Photo Gallery" option from the main menu. You can view individual images or start a slideshow.
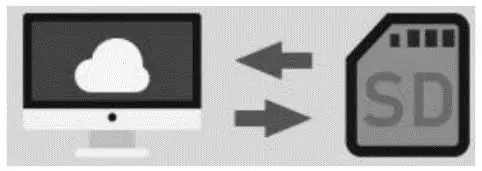
To transfer images to a computer:
- Unplug the USB cable from the power adapter and connect it to your computer.
- Turn on the scanner.
- Navigate to the "USB" option in the main menu and press OK.
- The scanner will appear as a removable external drive on your computer.
- Access the "DCIM"/"100" folder on the memory card to copy your photos.
Maintenance
Use the supplied cleaning brush to clean the internal scanning area. Turn off and disconnect the scanner first, lay it on its side, and insert the brush into the slot where you would normally insert the film holder, brushing gently.
Technical Specifications
- Image Sensor: 14 Mega CMOS Sensor
- Display: 7-inch color LCD
- Lens: F=3.5, f=4mm, 7 Elements Glass Lens
- Power Source: 5V/1A via USB Type-C
- PC Interface: USB 2.0
- Dimensions: 175 x 112 x 113 mm
Practical help
Common problems
Scanner not recognized by computer
Ensure you are in 'USB' mode in the main menu and the cable is connected properly to the computer.
SD card error
Ensure the card is 32GB or less, Class 10 or higher, and not locked.
Image quality issues
Clean the internal scanning area with the supplied brush.
Before use
- Insert a Class 10 SD card (32GB or less)
- Connect to a 5V/1A power source
- Select the correct film type in the menu
- Clean the scanning area if necessary
Show more Show less
Images and diagrams
- The scanner uses specific holders for 35mm slides, 135 film, 110 film, and 126 film.
- The main holder is inserted into the right side of the scanner.
Model compatibility
- Supports 135, 110, and 126 film formats.
- Requires SD card (not included).

Manual page author
David Miller
Documentation analyst