Lighting / Fixtures
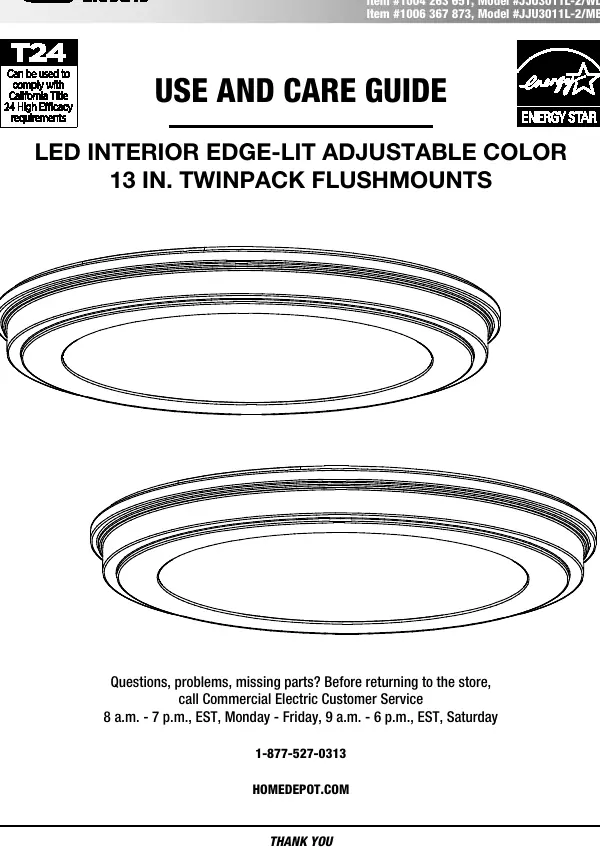
User Manual for Commercial Electric 13-inch LED Flush Mount
Quick guide for installing and using the Commercial Electric 13-inch LED Interior Edge-Lit Flush Mount. Includes wiring instructions, CCT color selection, and troubleshooting.
Table of contents
Manual images
Click an image to enlargeQuick guide from the manual
This guide provides instructions for the Commercial Electric 13-inch LED Interior Edge-Lit Flush Mount. Before beginning, ensure the power is turned off at the circuit breaker or fuse box. The fixture features an adjustable color temperature (CCT) switch, allowing you to choose between 3000K (soft white), 4000K (bright white), and 5000K (daylight). The factory setting is 3000K.
Safety Information
WARNING: Carefully read and understand the information in this manual before beginning assembly and installation. Failure to do so could lead to electric shock, fire, or other injuries. Ensure the electricity to the wires you are working on is shut off.
Installation
Attaching the mounting bracket
Place the mounting bracket (AA) over the outlet box so the interior oval holes on the bracket align with the screw holes on the outlet box. Secure the bracket using the provided outlet box screws (BB).
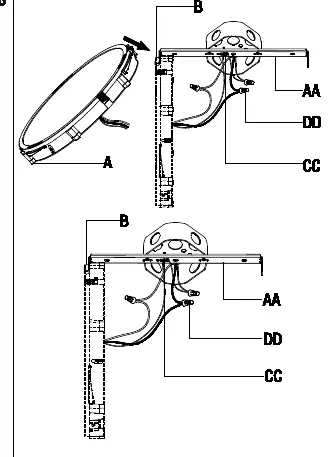
Connecting the electrical wires
Hang the fixture (A) hook (B) onto the mounting bracket (AA). Wrap the ground wire from the fixture around the ground screw (CC) on the bracket. Use a wire connector (DD) to connect the ground wire from the fixture to the ground wire from the outlet box. Connect the white wire from the fixture to the white (neutral) wire from the outlet box, and the black wire from the fixture to the black (live) wire from the outlet box using wire connectors (DD). Wrap the connections with electrical tape and position the wires inside the outlet box.
Securing the fixture to the ceiling
Raise the fixture (A) until it is flush with the ceiling. Align the locking hole (C) with the hole on the mounting bracket (AA) and secure it using the locking screw (EE).
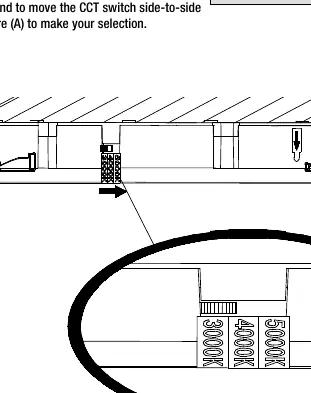
Selecting the CCT option
Choose your desired color temperature by moving the CCT switch on the fixture (A) side-to-side. Options are 3000K, 4000K, or 5000K.
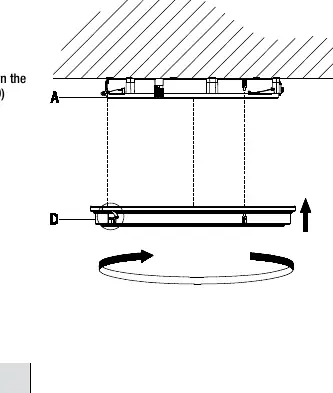
Securing the fixture ring
Hold the fixture ring (D) with the arrow label pointing up. Align the arrow on the ring with the arrow on the fixture (A). Place the ring over the fixture and turn it clockwise until it locks into place. Remove the arrow label once installed.
Care and Cleaning
Before cleaning, disconnect the power to the fixture. Clean the fixture with a soft, dry cloth. Do not use any cleaners with chemicals, solvents, or harsh abrasives.
Troubleshooting
If the fixture will not light, ensure the power supply is on and the circuit breaker is in the On position. If the fuse blows or the circuit breaker trips when the light is turned on, check the wire connections or contact a qualified electrician.
Manufacturer information
Commercial Electric
Practical help
Common problems
The fixture will not light
Ensure the power supply is On and the circuit breaker is in the On position.
The fuse blows or the circuit breaker trips when the light is turned on
Check the wire connections for shorts or contact a qualified electrician.
Before use
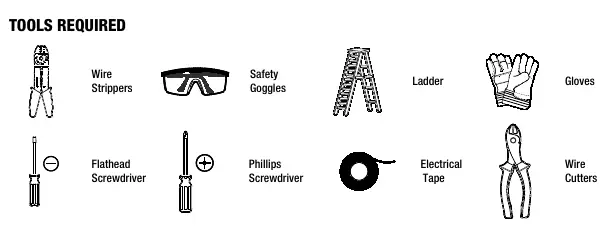
- Turn off power at the circuit breaker or fuse box.
- Ensure you have the required tools: wire strippers, safety goggles, ladder, gloves, flathead screwdriver, Phillips screwdriver, electrical tape, wire cutters.
- Assemble the fixture on a soft, non-abrasive surface like carpet or cardboard.
- Keep your receipt and these instructions for proof of purchase.
Images and diagrams
- Wiring diagram: Shows how to connect the ground wire to the ground screw, and the white/black wires using wire connectors.
- CCT switch: Located on the fixture to select between 3000K, 4000K, and 5000K color temperatures.
Model compatibility
- Compatible with standard outlet boxes.

Manual page author
David Miller
Documentation analyst
Organizes user manual content into clear summaries, with attention to model details, product context, and everyday usability.