Computers / Computer Cases
Installation Guide for Corsair Graphite Series 230T Mid-Tower PC Case
A comprehensive installation guide for the Corsair Graphite Series 230T mid-tower PC case, including component installation steps, hardware specifications, and cable management instructions.
Quick answers from the manual
Quick answer
- The Corsair Graphite Series 230T is a mid-tower PC case. Installation involves removing side panels, installing the motherboard, PSU, expansion cards, and drives using the provided tool-free mechanisms and screws. p. 1, 7, 8, 9
Key actions
- Remove side panels p. 7
- Install motherboard p. 7
- Install PSU p. 8
Technical specifications
| Parameter | Value | Meaning | Pages |
|---|---|---|---|
| Maximum GPU length (top) | 430mm | Maximum length for graphics cards in top slots | p. 4 |
| Maximum GPU length (lower) | 320mm | Maximum length for graphics cards in lower slots | p. 4 |
| Maximum CPU cooler height | 160mm | Maximum height for CPU air coolers | p. 4 |
Show 1 more answers Show less
Where to find it in the PDF
- Installation Steps p. 7, 8, 9, 10
Table of contents
Manual images
Click an image to enlargeQuick Guide
This guide provides instructions for assembling a PC system using the Corsair Graphite Series 230T mid-tower case. It covers the installation of the motherboard, power supply, expansion cards, and storage drives.
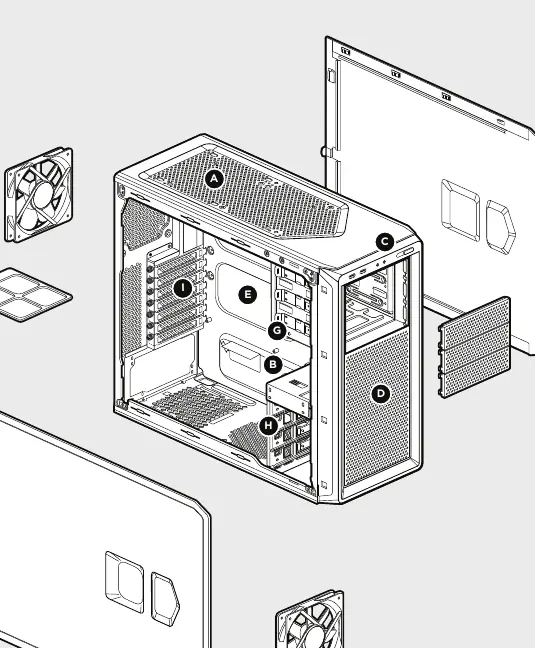
Package Contents
- Graphite Series 230T mid-tower PC case
- 120mm rear exhaust fan
- 120mm front intake fan
- Installation Guide
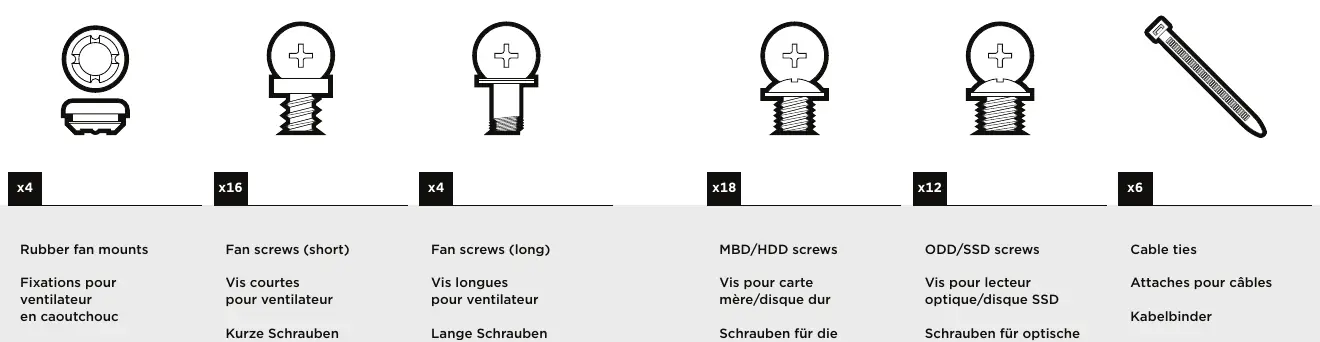
- Accessory Kit (includes rubber fan mounts, fan screws, MBD/HDD screws, ODD/SSD screws, and cable ties)
Specifications
- Maximum GPU length: 430mm (top slots), 320mm (lower slots)
- Maximum CPU cooler height: 160mm
- Drive bays: (x3) Tool-free optical drive bays, (x4) 3.5" hard drive cages with 2.5" compatibility
- Expansion slots: 7
Installation Steps
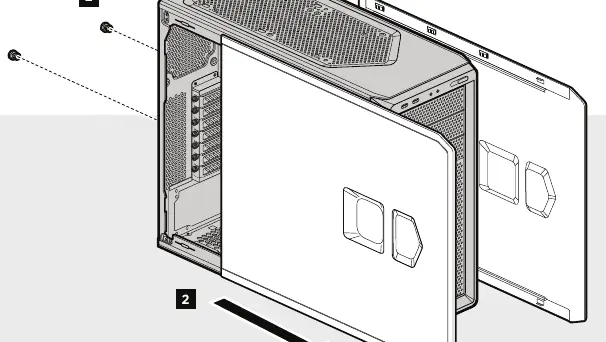
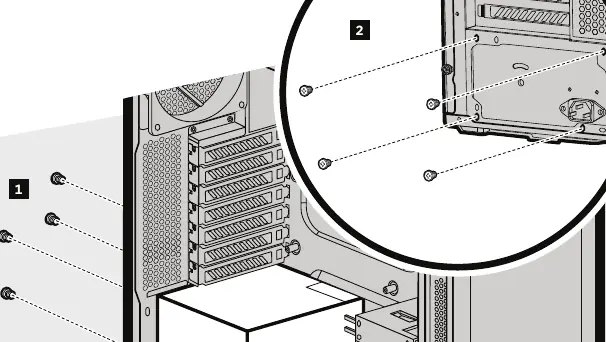
Removing Side Panels
Remove the thumbscrews and slide the side panel forward toward the front of the case to remove it. Corsair recommends removing both side panels during system assembly to avoid accidental damage.
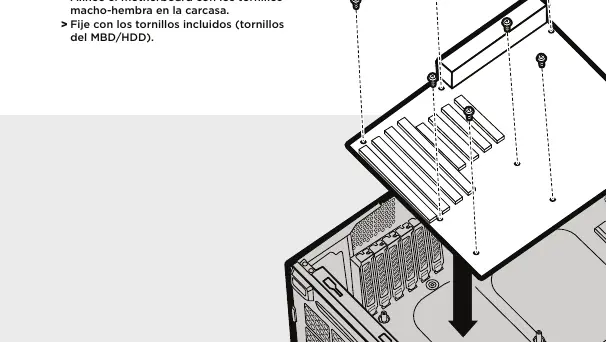
Installing the Motherboard
Install your motherboard's I/O shield. Align the motherboard with the standoffs in the case and secure it using the included MBD/HDD screws.
Installing the Power Supply (PSU)
Unscrew and remove the PSU mounting bracket. Place the PSU on the bottom of the case with the fan side facing outwards. Align the holes and secure it with screws.
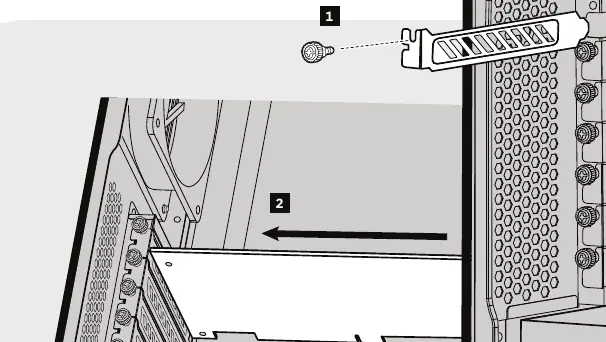
Installing PCI-E/PCI Cards
Remove the thumbscrews and the corresponding slot covers. Install the add-on card and secure it with the thumbscrews.
Installing 5.25" Drives (ODD)
Remove the front panel 5.25" drive bay cover. Insert the ODD into the drive bay until the tool-free latch clicks, securing the drive. To remove, push the tool-free tab.
Installing 3.5" HDD and 2.5" SSD
Place the drive into the tool-free cage until it feels secure. To remove the drive, pull the tabs to release.
Connecting Cables
Attach the case fan cables to the motherboard headers. Connect the front I/O connectors (USB 3.0, Power/Reset, Audio) to the motherboard according to your motherboard manual's pin-out diagram.
Manufacturer information
Corsair Memory, Inc.
Practical help
Common problems
Difficulty installing motherboard
Ensure the I/O shield is installed first and the motherboard is correctly aligned with the case standoffs.
PSU does not fit
Ensure the PSU mounting bracket is removed before attempting to place the PSU on the bottom of the case.
Before use
- Remove both side panels to prevent damage during assembly
- Install the motherboard I/O shield
- Verify motherboard standoff alignment
- Prepare the PSU mounting bracket
- Identify correct screws from the accessory kit (MBD/HDD vs ODD/SSD)
Show more Show less
Specs in practice
- Maximum GPU length
- 430mm for top slots, 320mm for lower slots; determines the longest graphics card that can fit.
- Maximum CPU cooler height
- 160mm; determines the maximum height of the CPU air cooler.
Images and diagrams
- The case features built-in cable routing cutouts for cleaner builds.
- Front I/O panel includes USB 3.0, headphone/mic jacks, and power/reset buttons.
- Tool-free drive cages support both 3.5-inch and 2.5-inch drives.
Model compatibility
- Supports 240mm/280mm radiators.
- Tool-free drive bays for 5.25" ODDs.
- 3.5" drive cages are compatible with 2.5" drives.

Manual page author
David Miller
Documentation analyst