Tools / Saws
Owner's Manual for Craftsman 10-inch Stationary Table Saw 315.228490
Quick guide and setup manual for the Craftsman 10-inch Stationary Table Saw (Model 315.228490). Includes assembly instructions, alignment procedures, operation tips, and troubleshooting.
Table of contents
Manual images
Click an image to enlargeQuick guide from the manual
This manual provides essential instructions for the assembly, operation, and maintenance of the Craftsman 10-inch Stationary Table Saw (Model 315.228490). Before using the saw, ensure you have read all safety rules and that the saw is properly assembled and aligned. The saw is designed for cutting wood and wood composition products only.
Safety rules
- Always wear safety glasses with side shields and a full face shield when needed.
- Never stand directly in the line of cut to avoid injury from kickback.
- Keep guards in place and in good working order, including the blade guard, riving knife, and anti-kickback pawls.
- Use a pushstick for small pieces of wood to keep hands away from the blade.
- Disconnect power before servicing, changing blades, or making adjustments.
Assembly
Assembly should be performed in the area where the saw will be used. Key assembly steps include:
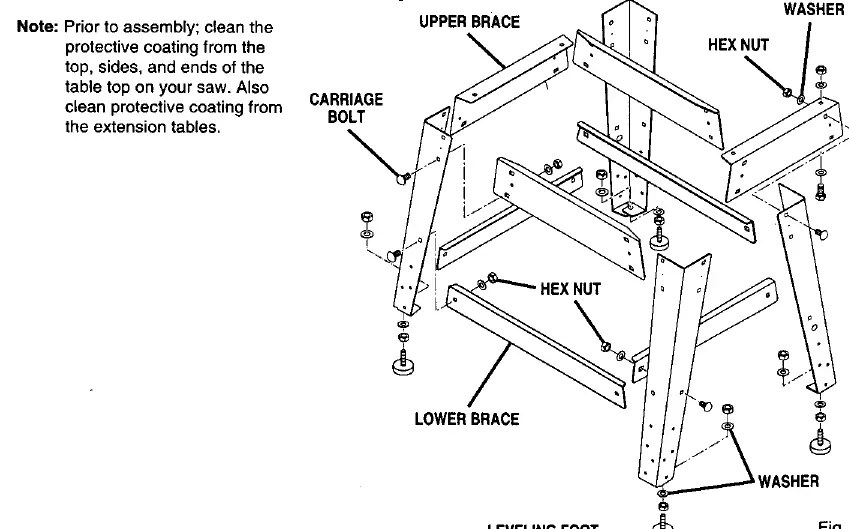
- Leg Stand: Assemble the steel leg stand using the provided carriage bolts, washers, and hex nuts.
- Table Extensions: Attach the extensions to the main table, ensuring they are flush and aligned.
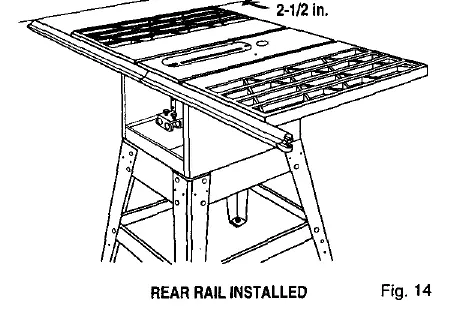
- Rails: Install the front and rear rails. The saw features a split rail design; ensure the pieces are joined correctly with the provided connectors.
- Motor and Switch: Mount the motor and switch assembly, ensuring the belt is properly tensioned.
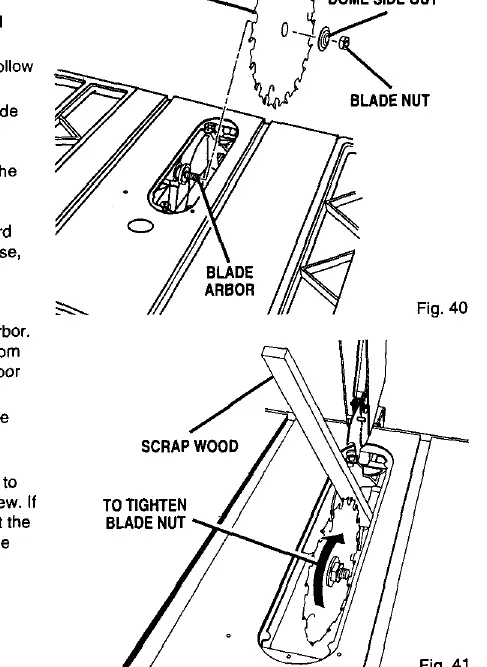
- Blade Guard: Install the blade guard assembly, ensuring it is properly aligned with the riving knife.
Adjustments
Proper alignment is critical for safe and accurate operation:
- Throat Plate: Ensure the throat plate is flush with the table surface to prevent kickback.
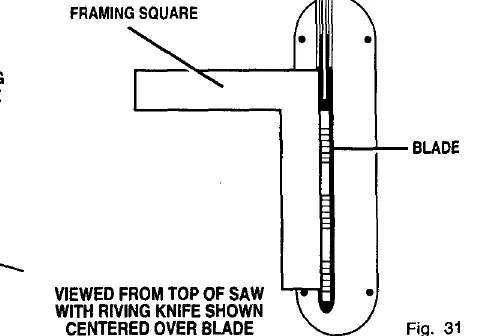
- Riving Knife: Must be aligned with and centered over the blade.
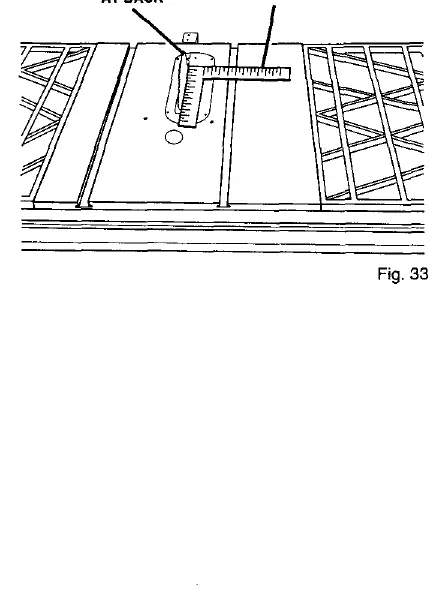
- Heeling (Paralleling): The sawblade must be parallel to the miter gage groove. If not, adjust the table brackets underneath the saw.
- Rip Fence: Check alignment before first use. If the fence is not parallel to the blade, loosen the screws around the handle and adjust.
- Bevel Stops: Ensure the bevel scale reads 0 when the blade is at 90 degrees and 45 when tilted.
Operation
The saw supports various cuts, including cross cuts, rip cuts, miter cuts, bevel cuts, and compound cuts. Always use the correct blade depth (teeth should clear the workpiece by 1/8 to 1/4 inch). If the motor overheats, the thermal overload protector will shut it off; allow the motor to cool before pressing the reset button.
Maintenance
- Frequently vacuum or blow out sawdust from the motor.
- Clean the table, rails, and rip fence with gum and pitch remover.
- Apply a thin coat of paste wax to the table top to ensure smooth wood movement.
- Regularly check all nuts, bolts, screws, and belts for tightness.
Manufacturer information
CRAFTSMAN
Practical help
Common problems
Saw does not start
Check if the motor cord or wall cord is plugged in, the circuit fuse is blown, or the circuit breaker is tripped.
Motor is slow or weak
Check for low voltage, defective switch, or circuit overload. Ensure the saw is not wired for 240V if using a 120V supply.
Saw vibrates excessively
Check for a warped blade, damaged belt, loose mounting hardware, or an uneven work surface.
Cut binds, burns, or stalls motor
Check if the blade is dull, the blade is heeling (misaligned), the board is warped, or the rip fence is not parallel to the blade.
Before use
- Check all fasteners for tightness.
- Ensure blade guard and anti-kickback pawls are installed.
- Verify blade is sharp and properly set.
- Check rip fence alignment.
- Ensure work area is clean and well-lit.
- Confirm the switch is in the OFF position before plugging in.
Specs in practice
- Blade Diameter
- 10 inches.
- No Load Speed
- Approximately 3,600 RPM.
Images and diagrams
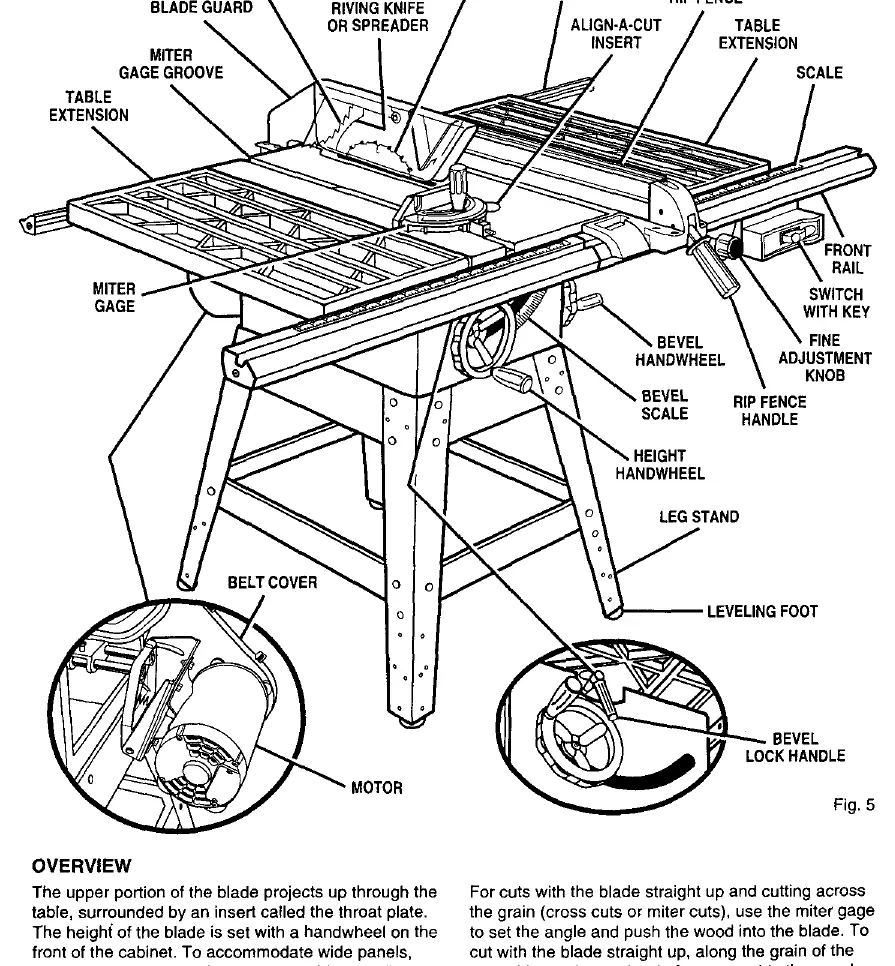
- Figure 5: Overview of table saw components and controls.
- Figure 11: Aligning table extensions for smooth rail operation.
- Figure 29-31: Aligning the riving knife with the blade.
- Figure 32-33: Checking blade heeling (paralleling to miter groove).
- Figure 40: Replacing the blade.
Model compatibility
- Designed for wood and wood composition products only.
- Requires 120V, 60Hz, AC power (can be rewired for 240V).
- All blades and dado sets must be rated for at least 5,000 RPM.

Manual page author
Emily Carter
User documentation editor
Prepares concise manual descriptions and highlights the most useful setup, operation, and maintenance information for readers.