Sports / Fitness
User Manual for Crivit 2-in-1 Dumbbell & Barbell Set IAN 483779_2404
Quick guide for the Crivit 2-in-1 Dumbbell & Barbell Set (IAN 483779_2404). Includes assembly instructions, safety guidelines, exercise routines, and maintenance tips.
Quick answers from the manual
Quick answer
- This manual provides assembly instructions for converting the Crivit 2-in-1 set between a dumbbell and a barbell, along with safety guidelines and exercise routines. p. 9, 10, 16, 17
Key actions
- Assemble as dumbbell p. 10, 17, 31, 38
- Assemble as barbell p. 10, 17, 31, 38
Problems and fixes
Weight discs sliding
Ensure fasteners are screwed tightly against the discs.
p. 10, 17, 31, 38Maintenance and reset
- Clean with a damp cloth and wipe dry. Do not use harsh cleaning agents. p. 14, 20, 27, 35
Technical specifications
| Parameter | Value | Meaning | Pages |
|---|---|---|---|
| Maximum load | 20 kg | Maximum weight capacity of the set. | p. 9, 16, 22, 30 |
Where to find it in the PDF
- Assembly p. 2, 10, 17, 31
- Exercises p. 3, 4, 5, 11
Table of contents
Manual images
Click an image to enlargeQuick guide from the manual
This manual provides instructions for the Crivit 2-in-1 Dumbbell & Barbell Set. It covers assembly, safety precautions, exercise suggestions, and maintenance. Always ensure the equipment is in good condition before use and consult a doctor if you have health concerns.
Package contents
- 2 x dumbbell bar
- 4 x weight disc 2 kg
- 4 x weight disc 1.5 kg
- 4 x weight disc 1.25 kg
- 4 x dumbbell release fastener
- 1 x connecting bar
Assembly
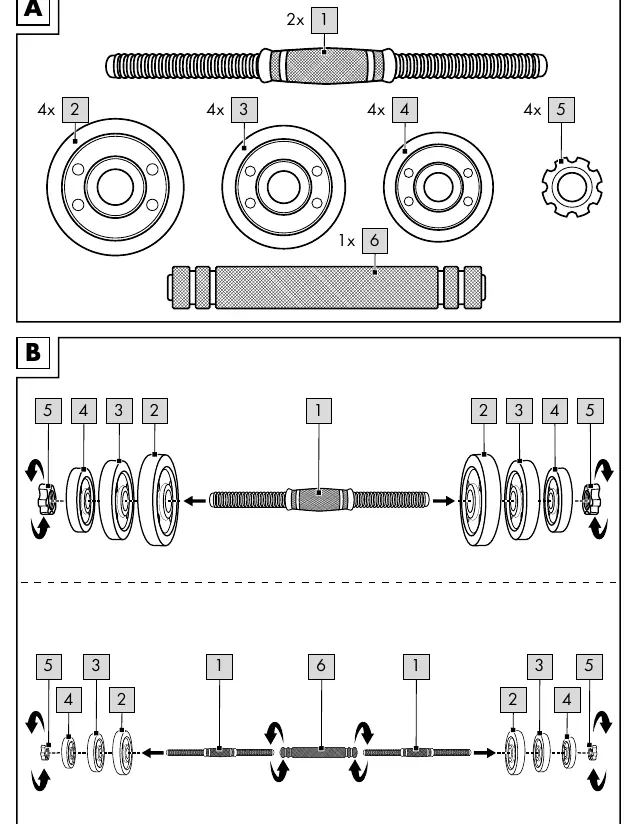
Mounting weight discs on the dumbbell bar
Attach the weight discs (2, 3, and 4) to both sides of the dumbbell bar (1). Place the largest and heaviest discs first, and the smallest and lightest last. Secure the discs by screwing the dumbbell release fasteners (5) onto the ends of the bar. Ensure the fasteners are tight against the discs so they do not slide during training.
Mounting weight discs on the barbell bar
Screw the dumbbell bars (1) onto both sides of the connecting bar (6). Attach the weight discs (2, 3, and 4) to both sides of the dumbbell bars (1) as described above. Secure with the dumbbell release fasteners (5).
General exercise instructions
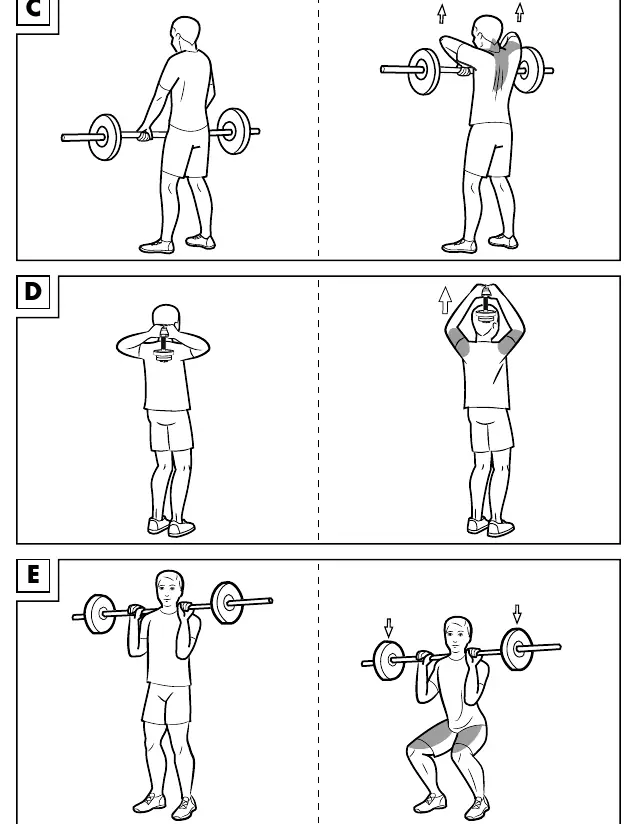
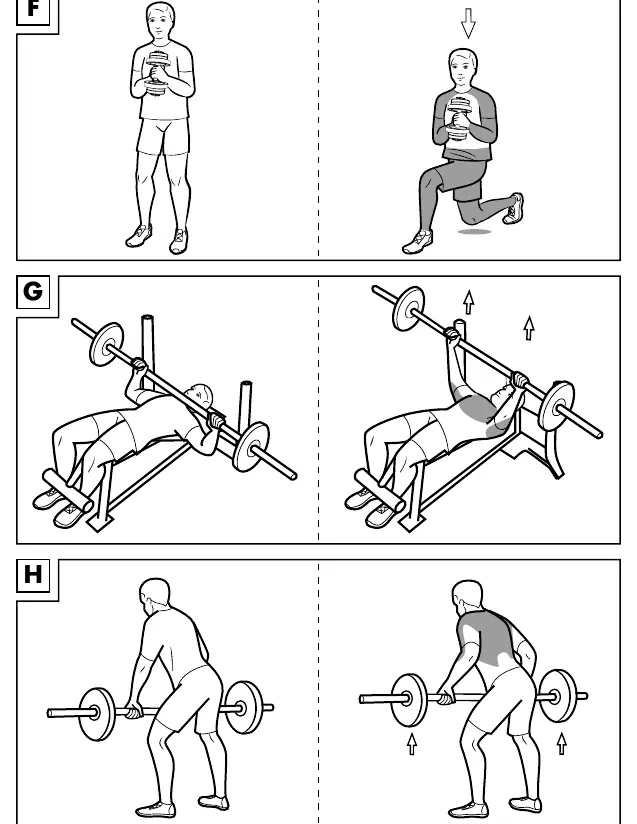
- Wear comfortable sports clothing and athletic shoes.
- Warm up before each session and cool down gradually.
- Take sufficient breaks between exercises and stay hydrated.
- Perform exercises smoothly, not jerkily or fast.
- Maintain correct body posture.
Safety information
- Keep children away from packaging materials (risk of suffocation).
- Consult a doctor before starting training.
- Attach the same weight to both ends of the bar.
- Keep a clear space of at least 0.6m around the training area.
- Exercise on a flat, non-slip surface.
- Do not use if injured or if health is impaired.
Storage and cleaning
Store the product in a dry, clean place at room temperature when not in use. Clean only with a damp cloth and wipe dry. Do not use harsh cleaning agents.
Manufacturer information
Crivit
Practical help
Common problems
Weight discs sliding during exercise
Ensure the dumbbell release fasteners are screwed tightly against the weight discs.
Uneven weight distribution
Always attach the same weight to both ends of the bar to maintain balance.
Before use
- Check the product for damage or wear before each use.
- Ensure the training area is clear (at least 0.6m).
- Consult a doctor before starting training.
- Ensure fasteners are secure.
- Wear appropriate sports clothing and shoes.
Specs in practice
- Maximum load
- 20 kg total weight capacity.
Images and diagrams
- Fig A: Overview of package contents.
- Fig B: Assembly instructions for dumbbell and barbell configurations.
- Fig C-J: Various exercise positions and techniques.
- Fig K: Required clearance area for training.
Model compatibility
- Only use the weights included in the package contents.

Manual page author
David Miller
Documentation analyst
Organizes user manual content into clear summaries, with attention to model details, product context, and everyday usability.