Sports / Fitness
User Manual for VirtuFit Elite FDR 2.5i Semi-Pro Crosstrainer
Comprehensive user guide for the VirtuFit Elite FDR 2.5i Semi-Pro Crosstrainer. Includes assembly instructions, console operation, training modes, maintenance tips, and troubleshooting.
Quick answers from the manual
Quick answer
- The VirtuFit Elite FDR 2.5i is a semi-pro crosstrainer. This manual covers assembly, console operation, training modes, and maintenance. p. 1
Key actions
- Assemble the device p. 6, 7, 8, 9
- Connect the power adapter p. 15
First start
- Plug in the power supply to turn on the console. p. 20
Problems and fixes
Display shows no values
Check sensor cables and cables in the back of the display.
p. 17Error codes
| Code | Meaning | Action | Pages |
|---|---|---|---|
| E-1 | No heart rate signal input detected or user not holding hand grips correctly. | Hold hand grips correctly. | p. 23 |
| E-4 | FAT% exceed setting range (5.0%~ 50%). | Check body fat settings. | p. 23 |
Maintenance and reset
- Press the RESET button for 2 seconds to restart the computer. p. 18
Technical specifications
| Parameter | Value | Meaning | Pages |
|---|---|---|---|
| Max User Weight | 165 kg | Maximum weight capacity | p. 4 |
Where to find it in the PDF
- Safety Instructions p. 3, 4
- Assembly Instructions p. 6, 7, 8, 9
- Control Panel p. 18, 19, 20, 21
Table of contents
Manual images
Click an image to enlargeQuick guide from the manual
The VirtuFit Elite FDR 2.5i is a semi-pro crosstrainer designed for indoor use. This manual provides essential information for assembly, safe operation, and maintenance. Key safety requirements include a maximum user weight of 165 kg and maintaining at least 0.5 meters of free space around the device. The console offers various training modes, including manual, beginner, advance, sporty, cardio, and watt-based programs.
Safety instructions
- Weight Limit: The maximum user weight is 165 kg.
- Environment: Use the device on a solid, flat surface. Do not place on thick carpet. Use only indoors in an environment with an ambient temperature between 10°C and 35°C.
- Clearance: Maintain at least 0.5 meters of free space around the device.
- Usage: Designed for adult use only. Keep children and pets away.
- Maintenance: Regularly check that nuts and bolts are securely tightened.
Assembly instructions
The assembly process consists of 9 steps. Ensure all cables are carefully attached during assembly. If you receive an error message after mounting, check that the aluminum legs are straight.
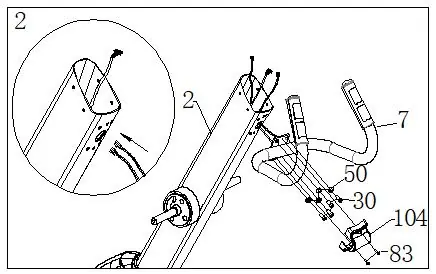
- Step 1: Connect the motor communication wire (61) with the upright post communication wire (76). Attach the upright post (2) to the main frame (1).
- Step 2: Attach the pulse circular tube (7) to the upright post (2).
- Step 3: Connect the console (87) communication wire and attach the console to the upright post.
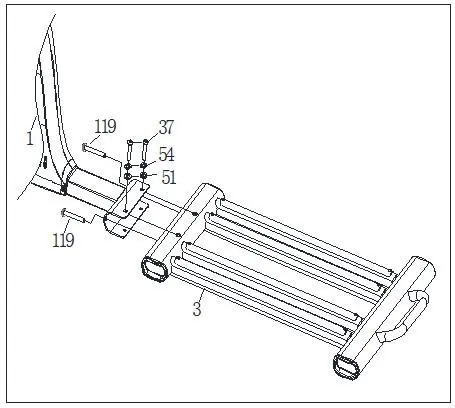
- Step 4: Assemble the sliding rail group (3) to the main frame (1).
- Step 5-6: Assemble the swing arms (8, 9, 10, 11) using the provided pedal axes and hardware. Apply lubricating oil to the axes.
- Step 7-9: Complete the assembly by attaching covers and the pulley limited sleeve.
Operation
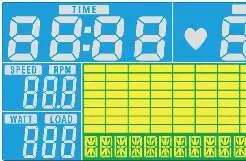
The console features several buttons and functions:
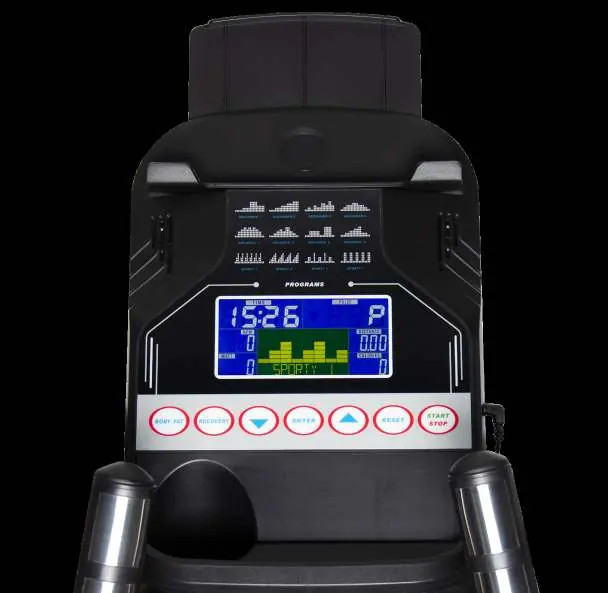
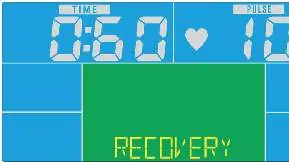
- Buttons: MODE/ENTER, UP/DOWN, RESET, START/STOP, RECOVERY, BODYFAT.
- Modes: Manual, Beginner (1-4), Advance (1-4), Sporty (1-4), Cardio, and Watt.
- Recovery: Measures heart rate recovery status (F1-F6) after exercise.
- Body Fat: Measures body fat and BMI.
- Power Saving: The console enters power saving mode after 4 minutes of inactivity.
Maintenance
- Daily: Clean and remove sweat after each use. Do not use aggressive cleaning agents. Ensure the device remains free of moisture. Check that the rail and wheels are free from dust and dirt.
- Semi-Annual: Inspect all bolts and nuts in connection with moving parts and tighten as required. Check the mobility of moving parts and apply silicone spray if necessary.
Troubleshooting
- Display shows no values: Check sensor cables and cables in the back of the display. Move the sensor slightly.
- Device beeps: Lubricate parts with silicone spray. Check that all nuts and bolts are tightened.
- No resistance: Check if the motor is running. If not, check the cable connection. If yes, the V-belt might be worn.
- Heart rate display not functioning: Check sensor cables or clean the sensors.
Manufacturer information
VirtuFit
Practical help
Common problems
Display shows no values
Check sensor cables and cables in the back of the display. Move the sensor slightly.
The device beeps
Lubricate parts with silicone spray. Check that all nuts and bolts are tightened.
No resistance
Check if the motor is running. If not, check the cable connection. If yes, the V-belt might be worn.
Heart rate display not functioning
Check sensor cables or clean the sensors.
Before use
- Check that nuts and bolts are securely tightened.
- Ensure the device is on a solid, flat surface.
- Ensure 0.5 meters of free space around the device.
- Wear suitable clothing.
- Check that the transport wheels are mounted on the front.
Specs in practice
- Max user weight
- 165 kg
- Ambient temperature
- Use between 10°C and 35°C; store between 5°C and 45°C.
Images and diagrams
- The exploded drawing (page 25) shows all components and their assembly positions.
- The parts list (pages 26-27) provides a detailed inventory of all screws, nuts, and components.
Model compatibility
- The console supports third-party fitness apps like Kinomap and iConsole+ via Bluetooth/QR code scanning.

Manual page author
Michael Turner
Technical manual editor
Reviews PDF manuals for structure, safety notes, and practical product details so readers can find the right information quickly.