Hvac / Air Conditioners
User Manual for Della 048-OPAC-9H Portable Air Conditioner
Quick guide for the Della 048-OPAC-9H portable air conditioner. Learn about installation, operation, Wi-Fi setup, drainage, cleaning, and troubleshooting.
Table of contents
Manual images
Jump to the sectionQuick guide from the manual
This document provides essential instructions for the Della 048-OPAC-9H portable air conditioner. Key safety requirements include ensuring the unit is used in a room larger than 4m², keeping it away from ignition sources, and ensuring proper ventilation. The unit uses R32 refrigerant, which is flammable; therefore, only qualified technicians should perform service on the refrigerant loop.
Product Overview
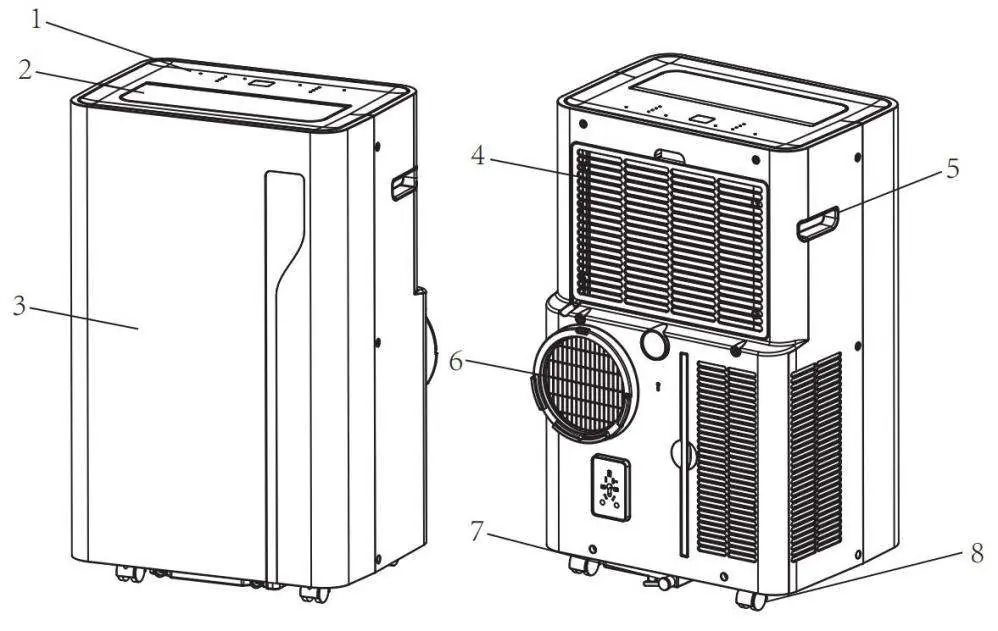
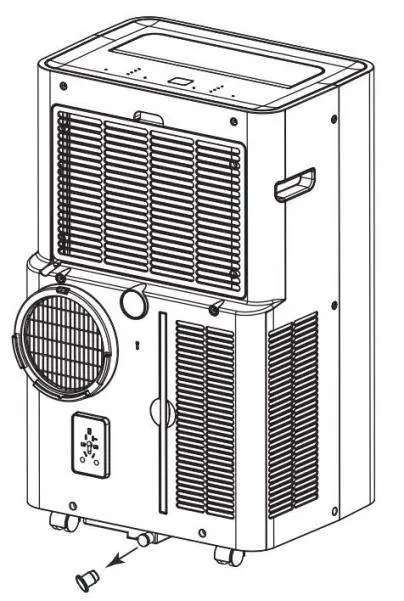
The unit features a control panel, adjustable air outlet louvers, air inlet with filter, and an air exhaust. It is equipped with casters for mobility and a drain opening for water removal.
Installation
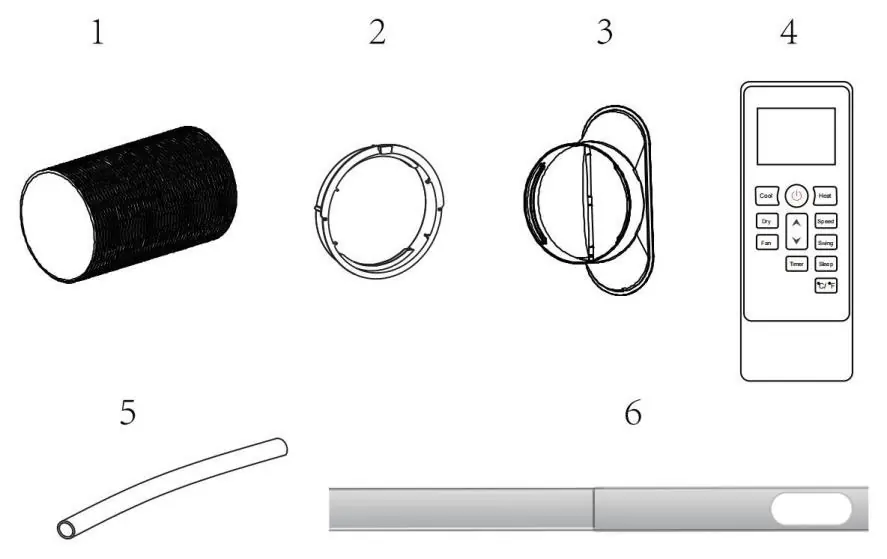
Unpacking: Remove the appliance and accessories from the carton. Check for any damage. Accessories include an exhaust hose, hose connector, window kit adapter, remote control, drainage pipe, and window kit.
Location: Place the unit on a firm, level surface with at least 50cm of free space around it. Do not operate near walls, curtains, or heat sources. If the unit was tipped more than 45°, let it stand upright for at least 24 hours before use.
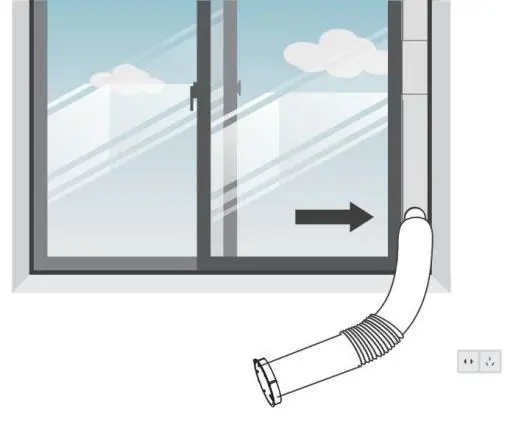
Exhaust Hose Setup: Connect the hose connector to one end of the exhaust hose and the window kit adapter to the other. Extend the window kit to fit your window, connect the hose, and secure the window. Attach the hose connector to the unit's exhaust outlet. Ensure the hose is not bent and the distance between the unit and the window is sufficient.
Operation
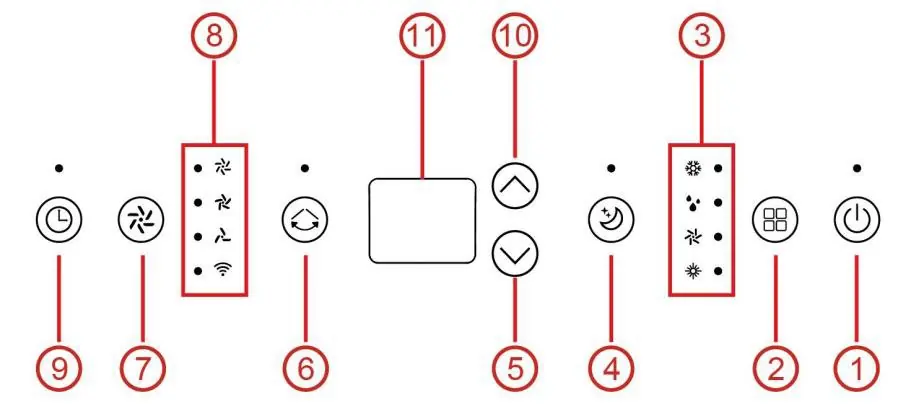
Control Panel: Use the control panel to power the unit on/off, select modes (Cool, Dry, Fan, Heat), adjust temperature, set the timer, and control fan speed. The digital display shows the current settings.
Modes: The unit offers cooling, heating (optional), ventilation, and drying modes. Sleep mode is available via the remote control.
App and Wi-Fi Setup
The unit can be operated via the "DELLA+" app. Install the app, activate Wi-Fi on the appliance, and follow the in-app instructions to connect the unit to your home network. You can connect via Bluetooth or by manually adding the device in the app.
Drainage
Manual Drainage: When the water tank is full, the machine will stop. Unplug the unit, place a container under the drain outlet, and remove the water plug to drain.
Continuous Drainage: For drying mode or high humidity, connect the drain hose to the unit and lead it to a drain or bucket. Ensure the hose is tilted downward (at least 20 degrees) and is not kinked.
Cleaning and Care
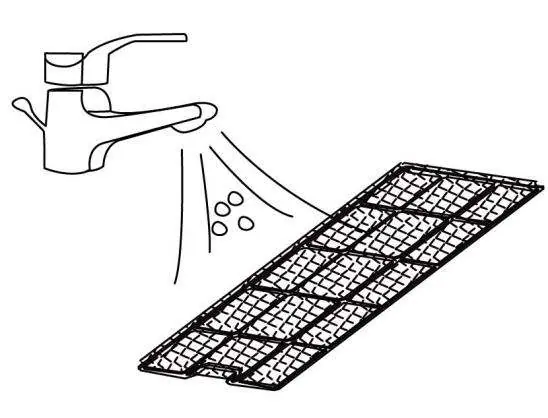
Clean the air filter every two weeks. Remove the filter, use a vacuum cleaner to remove dust, and rinse it under running water. Allow it to dry completely before reinstalling. Do not operate the unit without the filter.
Troubleshooting
If the unit is not operating, check the power connection and water level. If capacity is reduced, check the air filter and exhaust hose. Error codes like E1 or E2 indicate sensor failures, while Ft indicates a full water tank.
Manufacturer information
Della
Practical help
Common problems
Unit is not operating
Check power connection, ensure the water tank is not full, and verify the room temperature is within the 41°F-95°F range.
Reduced cooling/heating capacity
Clean the air filter, ensure the air duct is not blocked, keep doors and windows closed, and ensure the exhaust hose is securely attached.
Water leakage
Empty the water tank before moving the unit and ensure the drain hose is not kinked or bent.
Excessive noise
Ensure the unit is on a firm, level surface and tighten any loose parts.
Before use
- Check for any damage or scratches after unpacking.
- Ensure the unit is placed on a firm, level surface.
- Maintain at least 50cm of free space around the unit.
- Ensure the power outlet is grounded.
- Verify the exhaust hose is correctly installed and not bent.
- Check that the room size is suitable (minimum 4m²).
Specs in practice
- Cooling Capacity
- 14,000 BTU/h, suitable for cooling spaces.
- Heating Capacity
- 11,500 BTU/h (for models with heating function).
- Recommended Room Size
- Up to 550 sq. ft.
Images and diagrams
- The product diagram identifies the control panel, air outlet, front panel, air inlet/filter, handle, air exhaust, drain opening, and castors.
- The installation diagram shows the assembly of the exhaust hose, connector, and window kit.
- The control panel diagram illustrates the buttons for power, mode, speed, swing, timer, and temperature adjustment.
- The drainage diagram shows the location of the drain plug and how to connect a hose for continuous drainage.
Model compatibility
- Do not use extension cords or adapter plugs.
- The unit must be installed in accordance with national wiring regulations.
- Do not install in rooms smaller than 4m².
- Only use identical repair parts for maintenance.

Manual page author
Michael Turner
Technical manual editor
Reviews PDF manuals for structure, safety notes, and practical product details so readers can find the right information quickly.