Furniture / Beds & Mattresses
Assembly Instructions for Design Wooden Bed 140x200 cm ML-1843 / ML-1844
Comprehensive assembly guide for the Design 140x200 cm wooden bed (models ML-1843 and ML-1844). Includes hardware lists, step-by-step assembly procedures, and safety tips.
Table of contents
Manual images
Click an image to enlargeQuick guide from the manual
This manual provides assembly instructions for the 140x200 cm wooden bed (models ML-1843 and ML-1844). Please read all instructions carefully before beginning assembly to ensure a safe and correct setup.
Important Safety and Assembly Notes
- Never force accessories: If a part does not fit, check the alignment and the hardware type.
- Maintenance: Tighten all screws after the bed has been used for a period of time to ensure structural integrity.
- Preparation: Clear a large workspace and identify all components before starting.
Parts and Hardware
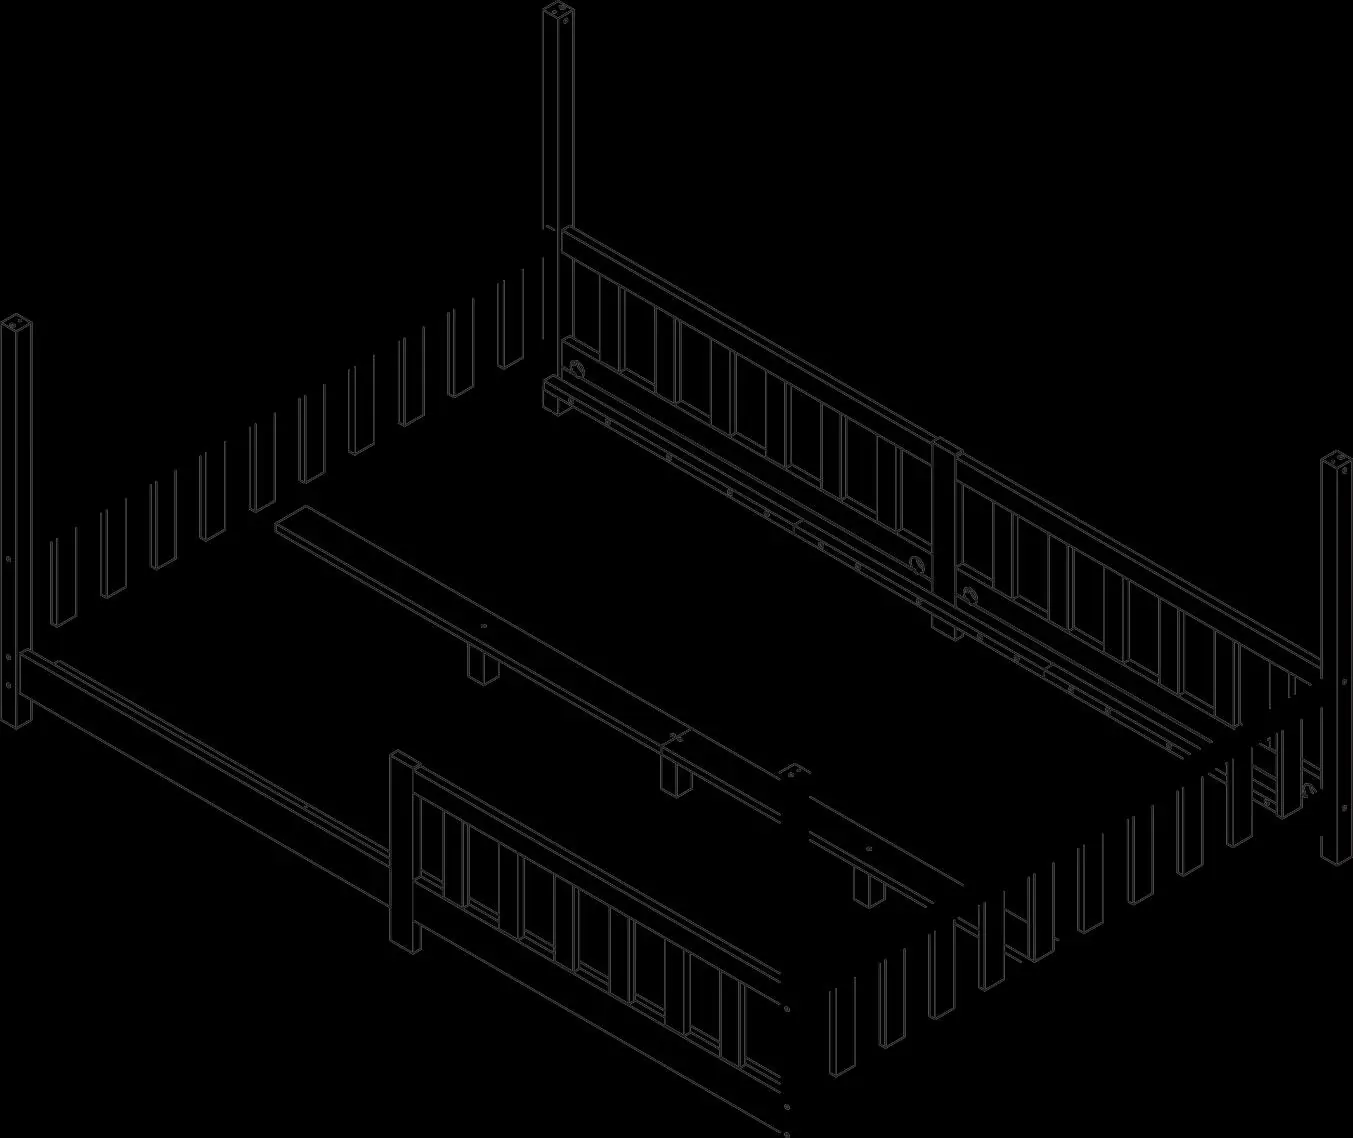
Before starting, identify all components using the exploded view on page 2 and the hardware list on page 3. Ensure you have all necessary tools and that all parts (numbered 1-28) and hardware (labeled A-R) are present.

Assembly Procedure
The assembly process involves connecting the wooden frame components using the provided hardware. Follow the steps 01 through 20 in the manual to build the bed frame:

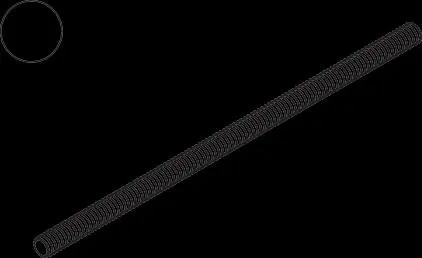
- Steps 01-02: Prepare the side rails and slats by inserting wooden dowels (A).
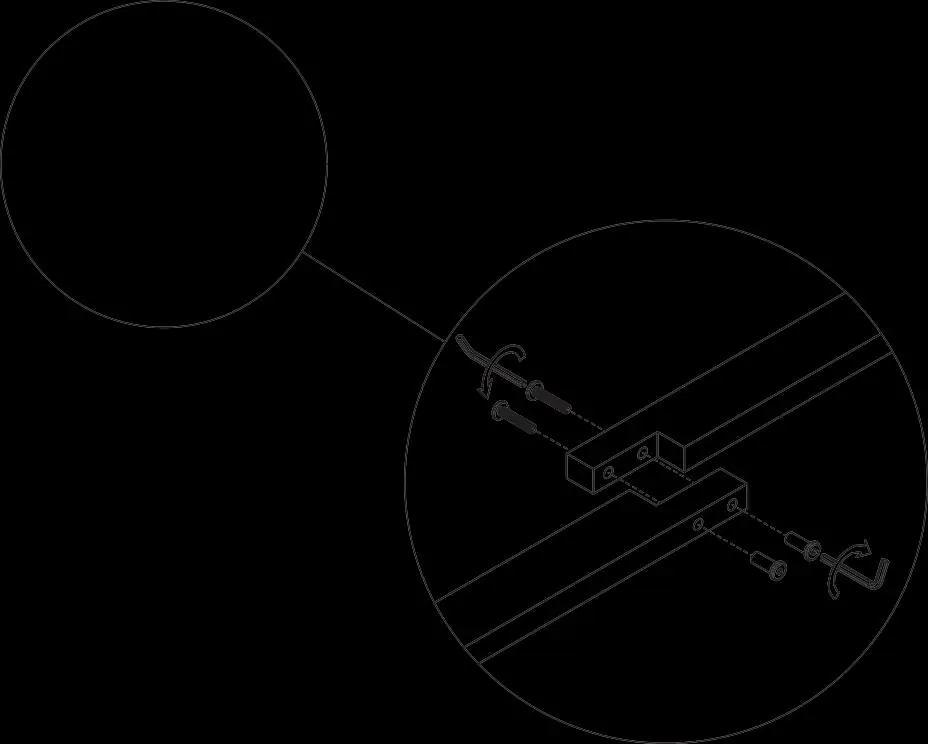
- Step 03: Connect the side rails using bolts (B) and barrel nuts (C).
- Steps 04-05: Assemble the headboard and footboard sections.
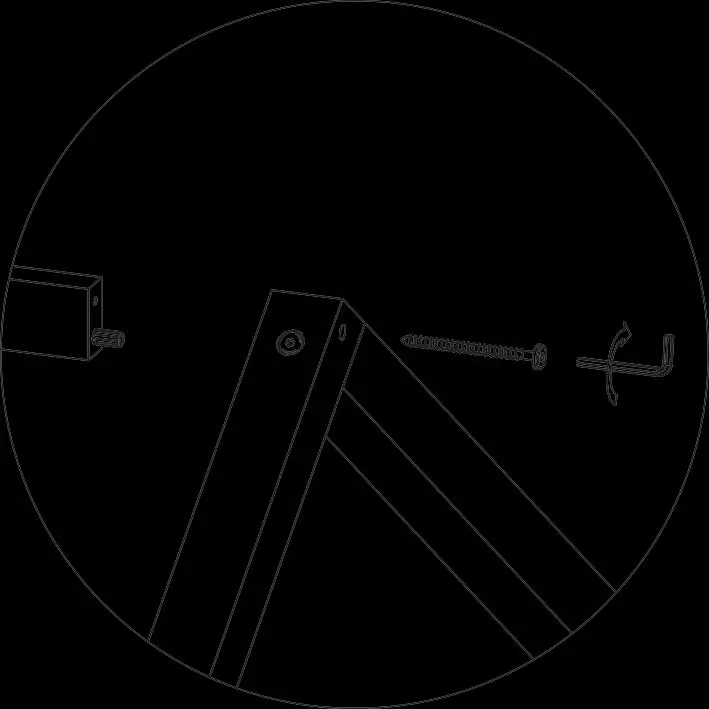
- Steps 06-07: Connect the side structures to the head/foot sections using bolts (H) and nuts (L).
- Steps 08-11: Assemble the roof frame components.
- Steps 12-14: Secure the bed slats and support beams using screws (G).
- Steps 15-20: Finalize the roof structure and ensure all connections are tightened.
Practical help
Common problems
Difficulty inserting wooden dowels
Ensure the hole is clear of debris and align carefully before gently tapping into place.
Bed feels unstable
Check that all screws (especially B, E, R) are tightened securely. Re-tighten after a few weeks of use.
Before use
- Clear a large, flat workspace.
- Identify all wooden parts using the exploded view on page 2.
- Sort all hardware (A-R) according to the list on page 3.
- Ensure you have the necessary tools (Allen key provided).
- Verify you have a 140x200 cm mattress.
Specs in practice
- M6*80 / M6*140
- Specific bolt sizes used for structural assembly; ensure the correct length is used in the correct step.
Images and diagrams
- Numbered circles (1-28) represent specific wooden components.
- Letters (A-R) represent specific hardware pieces.
- Arrows indicate the direction of assembly or connection points.
Model compatibility
- Designed specifically for 140x200 cm mattresses.

Manual page author
Michael Turner
Technical manual editor
Reviews PDF manuals for structure, safety notes, and practical product details so readers can find the right information quickly.