HVAC / Heaters & Fireplaces
User Manual for Belleze Oxford Queen Size Wall Mounted Headboard
Quick guide for assembling and installing the Belleze Oxford Queen Size Wall Mounted Headboard. Includes step-by-step mounting instructions, hardware list, and maintenance tips.
Table of contents
Manual images
Click an image to enlargeQuick guide from the manual
This guide provides instructions for the assembly and wall mounting of the Belleze Oxford Queen Size Headboard. Assembly requires 2 people and takes approximately 30 minutes. Ensure the product is fully assembled before use and keep small parts away from children and pets.
Package Contents
- 3 x Mounting Bracket
- 2 x Hanging Bar
- 4 x Hanging Strap
- 2 x Headboard
- Hardware: M3 x 35 mm screws (12x + 2x), Toggle wall anchors (12x + 2x), 2x C-brackets, 2x M8 nuts
Assembly Preparation
Assemble the furniture on an empty carton, carpet, or rug to prevent scratches. Ensure you have a screwdriver and a drill (not included) ready. Lay out all components on a flat surface to verify no parts are missing.
Installation Steps
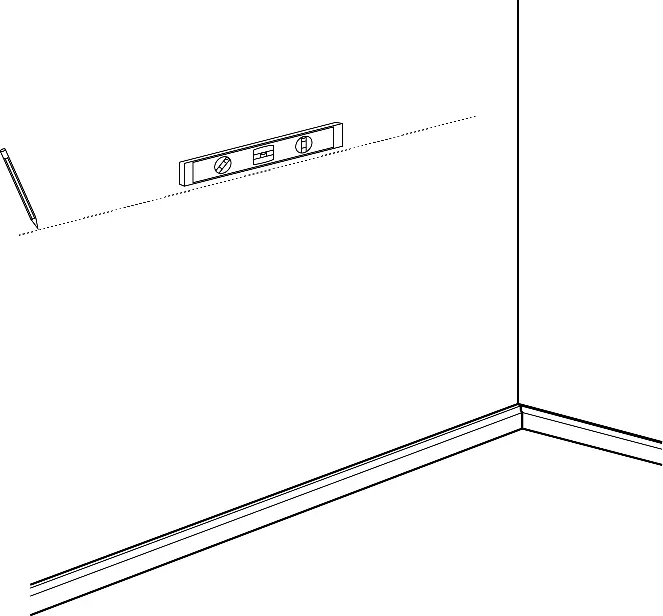
- Marking: Determine the installation location and draw a level reference line on the wall.
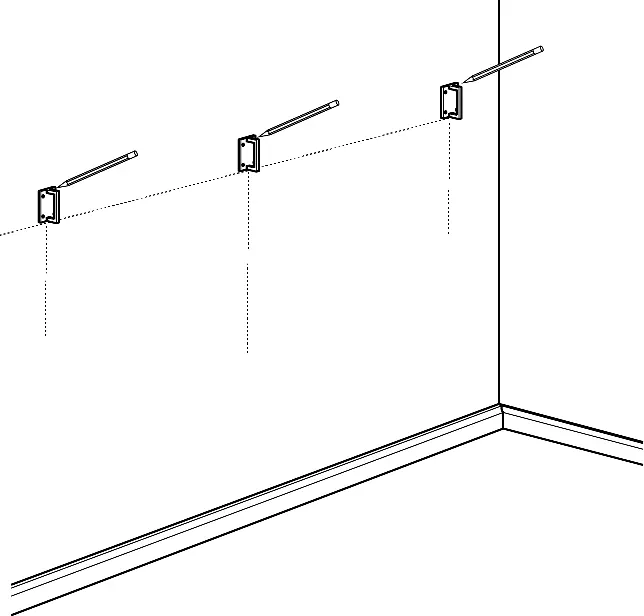
- Positioning: Lay the mounting brackets on the wall along the line and mark the drill hole positions. The brackets should be spaced 27.17 inches apart.
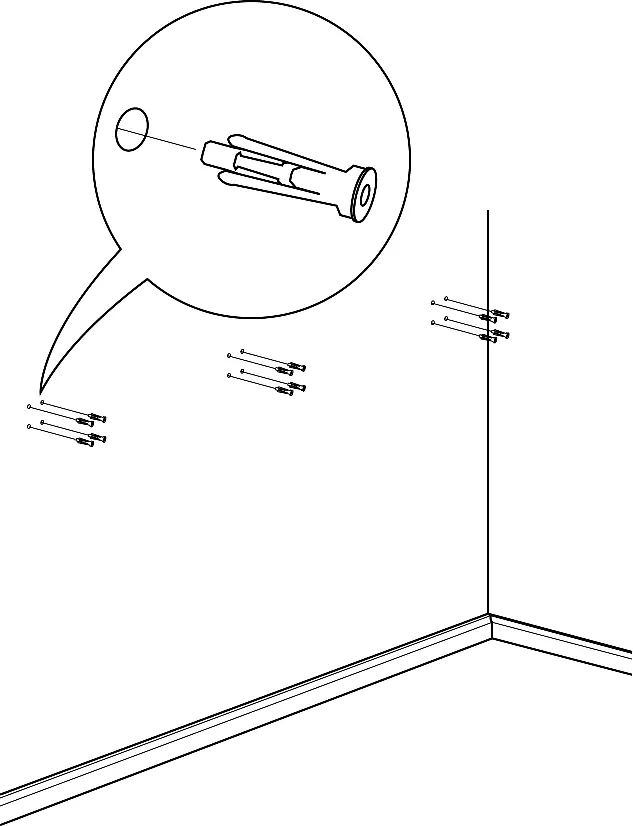
- Drilling: Drill holes on the wall. If installing directly into a wood stud, you may skip the anchor step.
- Anchoring: Insert the toggle wall anchors into the drilled holes.
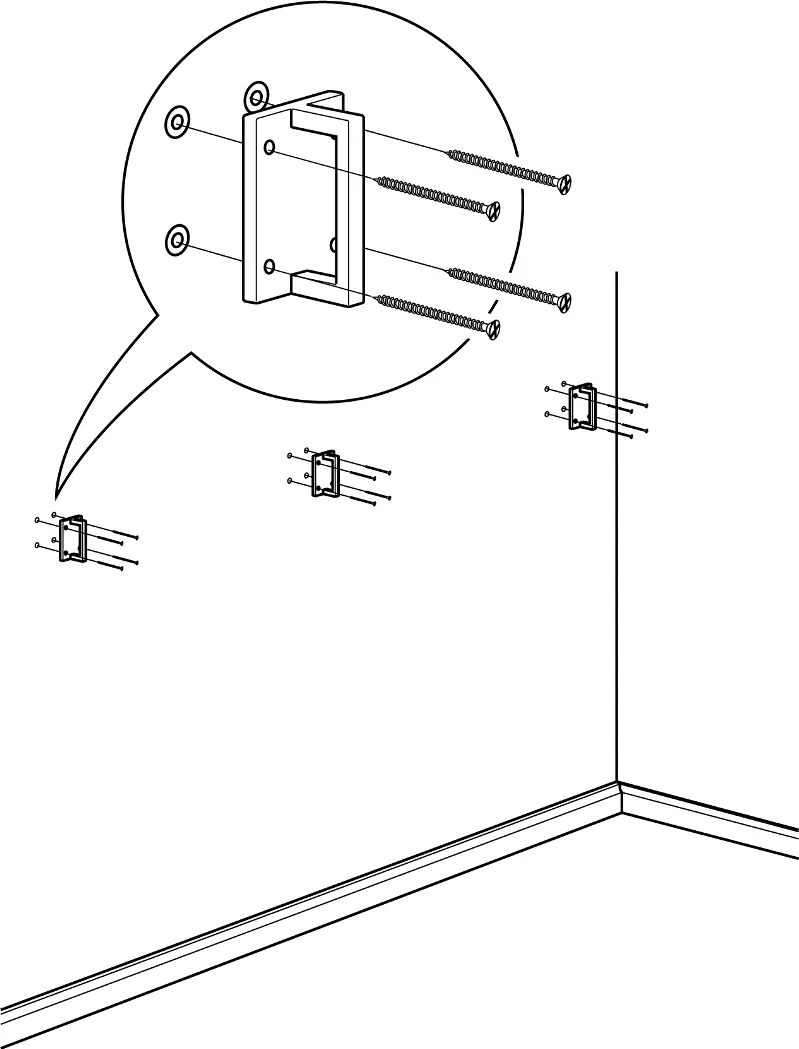
- Brackets: Affix the mounting brackets to the wall using the provided screws.
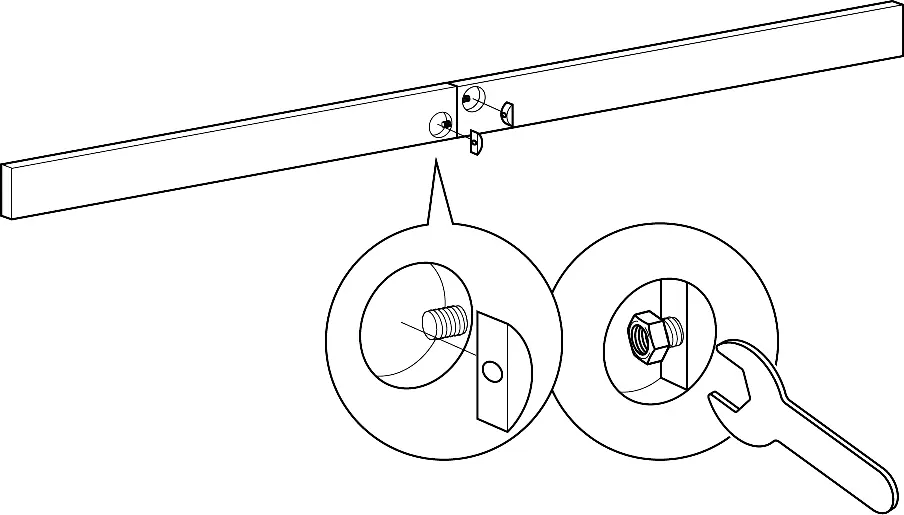
- Bars: Connect the hanging bars together.
- Securing: Secure the connected hanging bars using the provided hardware (C and D).
- Mounting: Slide the hanging bar into the mounting brackets and through the hanging straps.
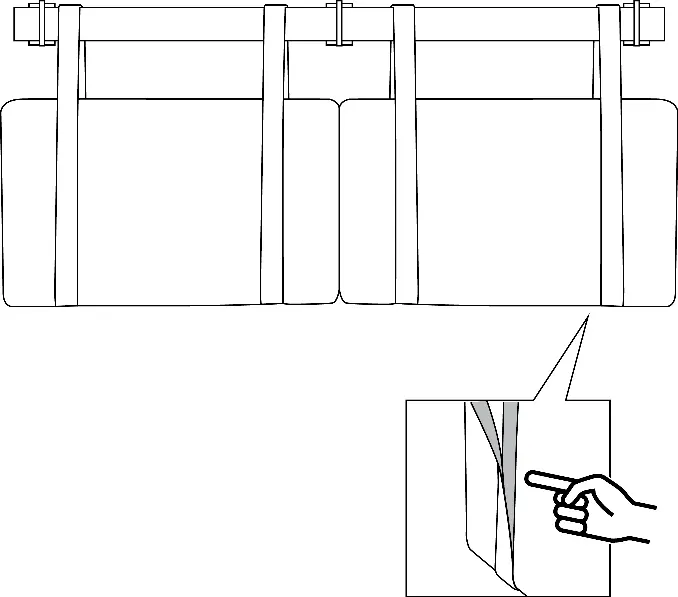
- Finalizing: Hook the headboards to the hanging straps using the velcro strips. Ensure the velcro is aligned properly.
Care and Maintenance
To ensure longevity, tighten all bolts and screws within the first 2 weeks of assembly. Check the tightness of all bolts every 2 months and tighten if necessary. Clean the surface with a lightly dampened cloth or soft brush. Regularly vacuum the cloth surface. Do not use bleach or alcohol for cleaning.
Safety Warnings
Never allow children to stand, climb, or hang on any parts of this furniture. Keep all plastic bags and packaging film away from children and pets to avoid suffocation or choking hazards.
Manufacturer information
Belleze Furniture
Practical help
Common problems
Missing parts or difficulties during assembly
Contact Belleze support at 1-800-682-6376 or email [email protected] for replacements.
Unstable headboard
Check the tightness of all bolts every 2 months and tighten if necessary.
Before use
- Ensure 2 people are available for assembly.
- Verify all components (brackets, bars, straps, headboards) are present.
- Prepare required tools: screwdriver and drill.
- Clear the assembly area of pets and children.
- Ensure the wall surface is suitable for mounting.
Specs in practice
- Drill hole diameter
- 0.374 inches
- Bracket spacing
- 27.17 inches between mounting points
- Estimated assembly time
- 30 minutes
Images and diagrams
- Step 2 illustrates the 27.17-inch spacing required between mounting brackets.
- Step 9 shows how to align the velcro strips on the straps with the back of the headboard.
Model compatibility
- Designed for Queen Size beds.
- Can be installed on wood studs (skip anchor step) or drywall (use provided anchors).

Manual page author
Michael Turner
Technical manual editor
Reviews PDF manuals for structure, safety notes, and practical product details so readers can find the right information quickly.