Electronics / Projector Screens
Installation and Operation Manual for Draper Nocturne+ E 220V Outdoor Electric Projection Screen
Comprehensive installation and operation guide for the Draper Nocturne+ E 220V outdoor electric projection screen. Includes detailed instructions for mounting, cable guide installation, electrical wiring, limit switch adjustments, and...
Quick answers from the manual
Quick answer
- The Nocturne+ E 220V is an outdoor electric projection screen. Installation requires mounting the case with a 1 3/4" gap between the endcap and bracket, installing cable guides for stability, and connecting to a 220V power supply. Limit switches can be adjusted using a 5/32" Allen wrench. p. 1, 2, 8
Key actions
- Mounting the case p. 3
- Installing cable guides p. 4, 5, 7
- Adjusting limit switches p. 8
First start
- Ensure all switches are off, verify mounting surface strength, and inspect the area for obstructions before testing. p. 2
Show 4 more answers Show less
Problems and fixes
Screen direction reversed
Switch red and black wires from motor to switch.
p. 9Maintenance and reset
- Replace roller assembly by removing bottom screws, cover, and quick release pin. p. 6
Technical specifications
| Parameter | Value | Meaning | Pages |
|---|---|---|---|
| Voltage | 220V AC | Operating voltage | p. 8 |
| Current | 0.55 Amp | Current draw | p. 8 |
| Duty Cycle | On 28s / Off 4m | Operating cycle | p. 8 |
Where to find it in the PDF
- Components Overview p. 1
- Installation Instructions p. 2, 3, 4, 5
- Electrical & Wiring p. 8, 9
- Dimensions p. 10, 11, 12
Table of contents
Manual images
Click an image to enlargeQuick guide from the manual
The Nocturne+ E 220V is an outdoor electric projection screen designed for wall or ceiling mounting. Installation requires at least two people and specific tools, including a power drill, level, and wire strippers. Important: Read all safety warnings before beginning. The unit must be installed on a surface strong enough to hold its weight. Do not wire motors in parallel without written permission from Draper, Inc.
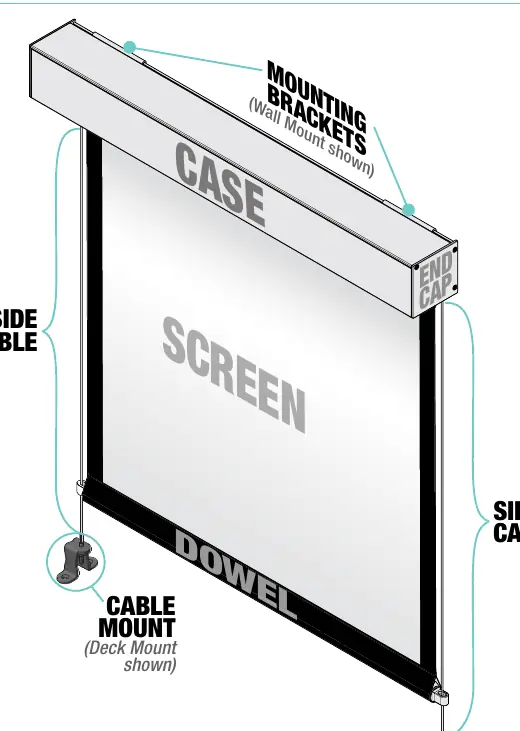
Installation
The installation process involves mounting the case and installing the cable guides to ensure the screen remains stable outdoors.
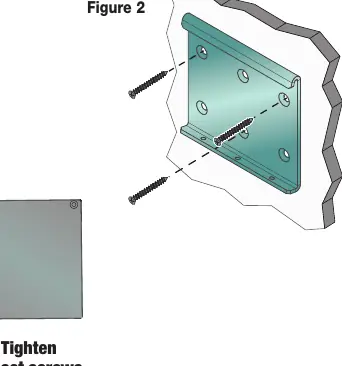

- Mounting Case: Attach mounting brackets to the case as a spacer between the case and the wall. Leave a 1 3/4" (44mm) gap between the endcap and the mounting bracket. Secure the case to the wall or ceiling using appropriate fasteners.
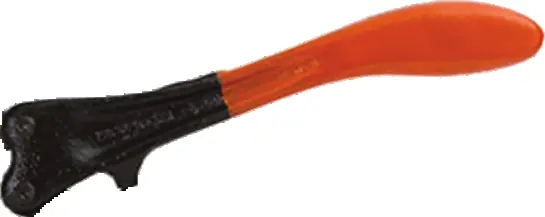
- Installing Cable Guides: Install the mounting bracket for the cable guide. Pull the cable through the mounting bracket and the cable mounting hole on the endcap. Mark the cable, strip it, thread the barrels onto the cable, and crimp them approximately 1/8" (3mm) above the mark. Secure the cable to the bottom bracket and tighten until the desired tension is reached.
Electrical Connections
The screen operates on 220V AC, 50/60 Hz, 0.55 Amp. The junction box is located inside the left endcap. Ensure all operating switches are in the "off" position before connecting power. The screen must be installed in accordance with local building codes and the National Electric Code (NEC). Do not wire motors in parallel.
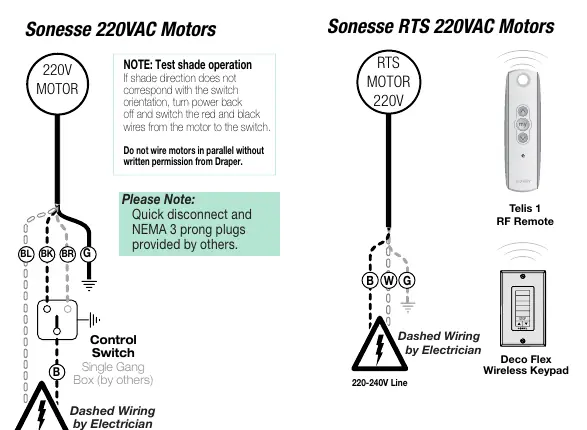
Limit Adjustments
Screen limits are factory set. If adjustments are necessary, use a 5/32" (4mm) Allen wrench.
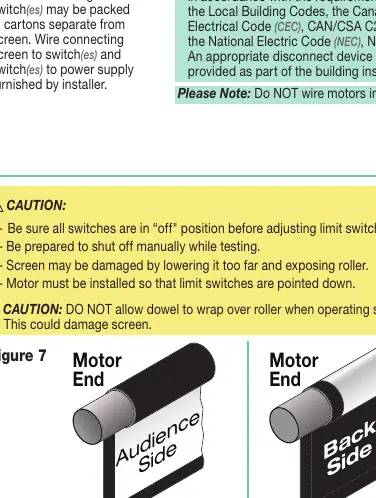
- Down Limit: To reduce drop, raise the screen, turn the DOWN (I) limit screw clockwise. To increase drop, lower the screen and turn the screw counterclockwise.
- Up Limit: To prevent the screen from raising too high, lower the screen, turn the UP (II) limit screw clockwise. To raise higher, turn the screw counterclockwise.
Caution: Be sure all switches are in the "off" position before adjusting. Screen may be damaged by lowering it too far and exposing the roller.
Maintenance
If the roller assembly needs replacement, remove the screws from the bottom of the case, remove the cover, remove the quick release pin from the idler end, and remove the roller assembly. Reverse these steps to install the new assembly.
Manufacturer information
Draper Tools
Practical help
Common problems
Screen direction does not correspond with switch orientation
Turn power off and switch the red and black wires from the motor to the switch.
Screen raises too high or does not drop enough
Adjust the limit switches using a 5/32" (4mm) Allen wrench as described in the Limit Adjustments section.
Dowel wrapping over roller
Do not allow the dowel to wrap over the roller when operating the screen; this can damage the screen.
Before use
- Verify the mounting surface is strong enough to hold the unit.
- Ensure all hardware is installed level and square.
- Confirm all switches are in the 'off' position before connecting power.
- Inspect the area underneath the unit to ensure no persons or objects are present.
- Ensure the motor is installed so that limit switches are pointed down.
Show more Show less
Specs in practice
- Power Requirements
- 220V AC, 50/60 Hz, 0.55 Amp.
- Mounting Gap
- 1 3/4" (44mm) gap required between Endcap and Mounting Bracket.
Images and diagrams
- Figure 1: Mounting bracket installation showing the 1 3/4" gap.
- Figure 6: Standard vs Reverse roll motor wiring orientation.
- Figure 7: Limit switch adjustment screw locations.
Model compatibility
- Screen must be installed in accordance with local building codes, Canadian Electrical Code (CEC), and National Electric Code (NEC).
- Do not wire motors in parallel without written permission from Draper, Inc.

Manual page author
Michael Turner
Technical manual editor