Home Appliances / Space Heaters
User Manual for Ecostrad iQ Glass Electric Panel Heater 2000W
Quick guide for the Ecostrad iQ Glass Electric Panel Heater 2000W (GH-20F-APP). Learn how to install, operate, connect to WiFi, and use smart features.
Quick answers from the manual
Quick answer
- The Ecostrad iQ Glass Electric Panel Heater is a 2000W heater with WiFi control. It supports both freestanding and wall-mounted installation and can be controlled via the Smart Life app. p. 1, 3, 4, 7
Key actions
- To connect to WiFi, download the Smart Life app, put the heater in WiFi connection mode (flashing icon), and add the device in the app. p. 7, 8
First start
- Turn on the side switch, ensure the heater is in standby mode, and follow the app instructions for WiFi setup. p. 6, 7
Problems and fixes
Heater fails to connect to WiFi
Try the secondary connection mode by holding the power button for 3 seconds.
p. 8Technical specifications
| Parameter | Value | Meaning | Pages |
|---|---|---|---|
| Power | 2000W | Maximum power output | p. 13 |
Where to find it in the PDF
- Safety Instructions p. 2, 3
- Installation p. 3, 4
- Using the Heater p. 5, 6
- WiFi Connection p. 7, 8
- Smart Features p. 11, 12
Table of contents
Manual images
Click an image to enlargeQuick guide from the manual
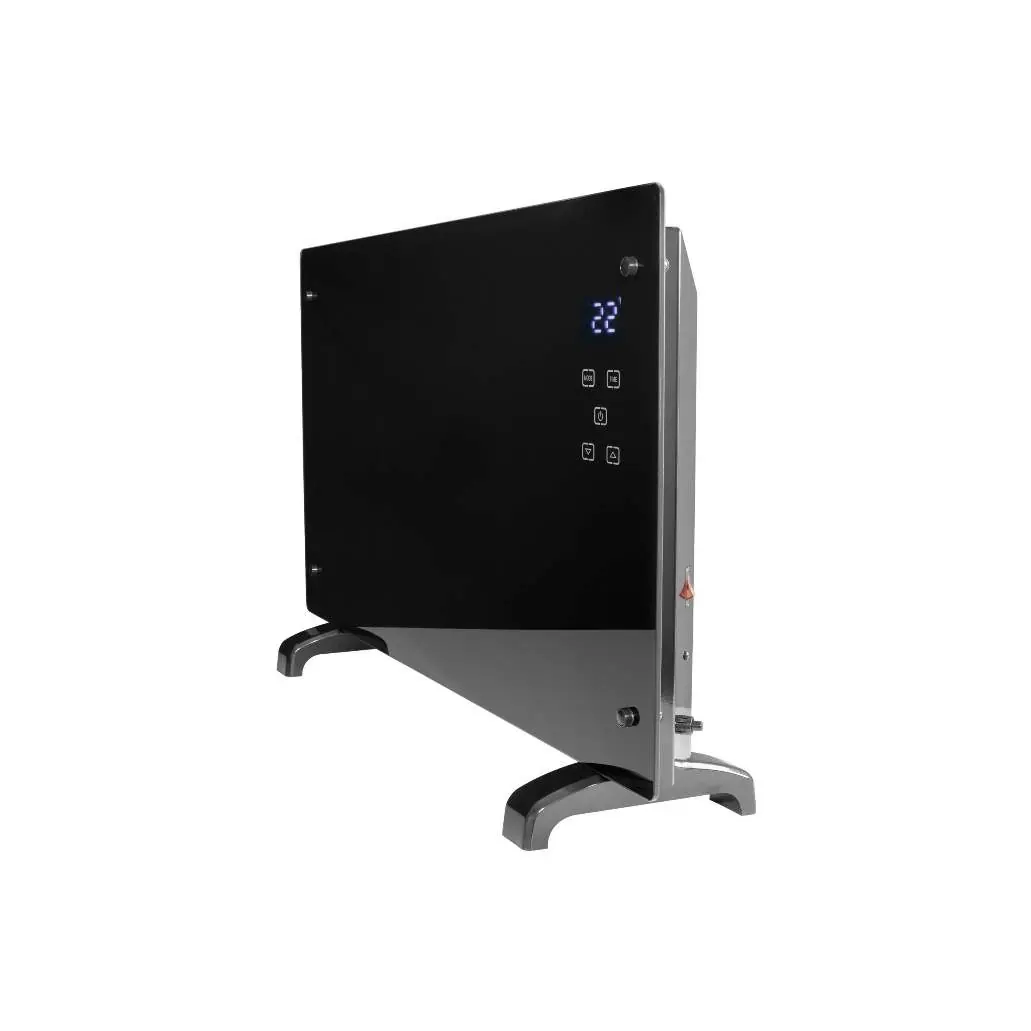
The Ecostrad iQ Glass Electric Panel Heater is a 2000W heating device with integrated WiFi control. This manual covers safety, installation (freestanding or wall-mounted), operation via the control panel, and smart features using the Smart Life app.
Safety instructions
- Indoor use only: Do not use outdoors or in bathrooms/laundry areas where moisture is present.
- Placement: Do not locate immediately below an electrical socket-outlet.
- Supervision: Keep children under 3 years away unless supervised. Children aged 3-8 should only switch the appliance on/off under supervision.
- Operation: Never cover the heater to avoid overheating and fire risk. Do not use extension cords.
- Maintenance: Unplug before moving or cleaning. Do not touch the metal housing while in use to avoid burns.
Installation
Freestanding installation
- Place the product upside down on a soft cloth or carpet.
- Fix the feet to the base using the provided screws.
- Ensure the heater is mounted on a level, stable, and clean surface.
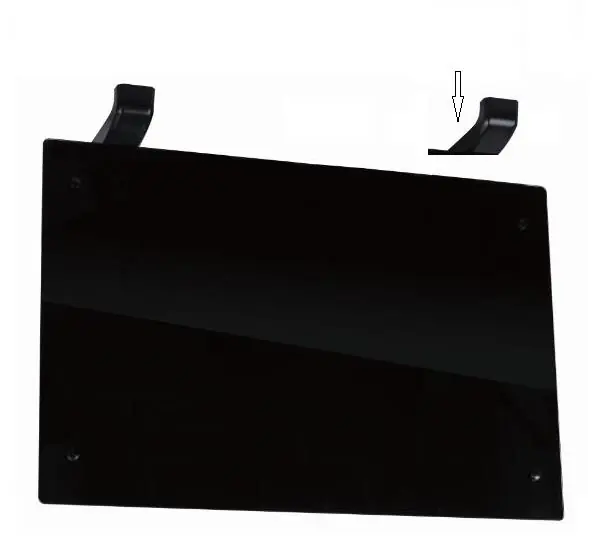
Wall mounted installation
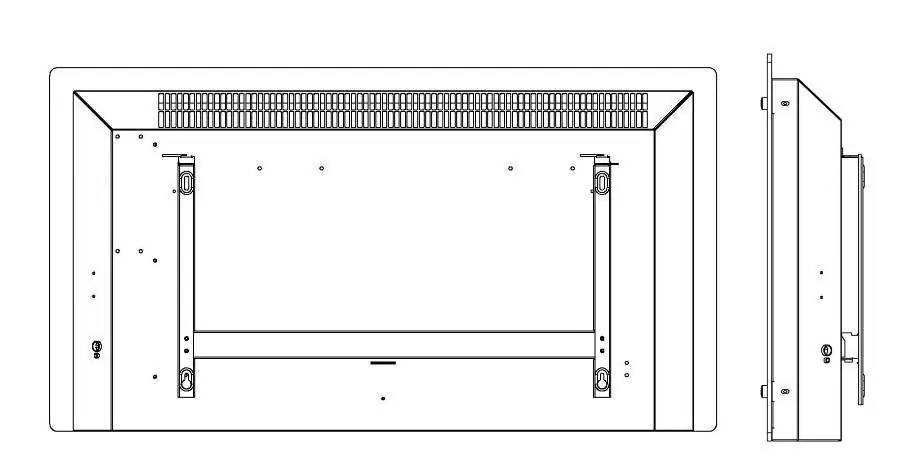
- Fix the wall brackets to the wall using the expansion screws provided.
- Slot the hooks and tongues of the brackets into the notches at the back of the heater.
- Secure the heater by fixing the wall bracket lock piece on the top of the right bracket.
Using the heater
The heater features a control pad and display screen. Use the side switch to turn the unit on. The display shows the current temperature, WiFi status, and heating mode.
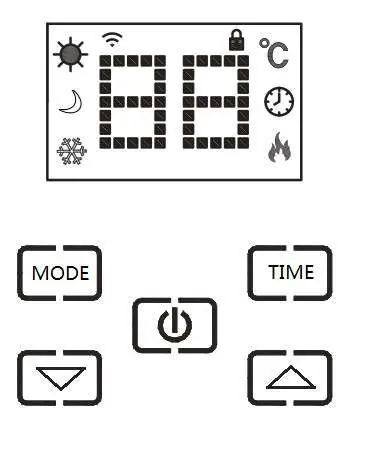

- Heating modes: Cycle through low power (1kW), full power (2kW), and anti-frost mode (8°C) using the MODE button.
- Temperature adjustment: Set the temperature between 15-50°C using the up/down buttons.
- Timer: Set a working time (1-24 hours) or a delay to switch on later (1-24 hours) using the TIME button.
- Child lock: Press and hold the up and down buttons to lock the panel.
Connecting to WiFi
- Download the Smart Life app.
- Put the heater in WiFi connection mode (flashing WiFi icon). If not flashing, hold the power button for 3 seconds.
- In the app, select Add a Device (Small Appliances > Heater) and follow the prompts to enter your 2.4GHz WiFi password.
- If connection fails, hold the power button for 3 seconds to switch to the secondary connection mode (slow flash).
Smart features
The Smart Life app allows for:
- Scenarios: Customisable commands to trigger multiple actions (e.g., Heat Boost).
- Automation: Actions triggered by external events like weather or location.
- Voice integration: Compatible with Amazon Alexa and Google Home.
Technical data
- Type: GHE-20P
- Voltage: 230V, 50/60Hz
- Power: 2000W
Warranty information
The manufacturer provides a warranty in accordance with the legislation of the customer's country of residence (minimum 1 year, UK 2 years). The warranty covers defects in material or workmanship and requires the original bill of purchase for claims.
Practical help
Common problems
Heater fails to connect to WiFi
Ensure you are using a 2.4GHz network. If it fails, hold the power button for 3 seconds to switch to the secondary connection mode (slow flash).
Heater is not heating
Check if the heating icon is displayed on the screen. Ensure the device is not in standby mode.
Before use
- Check that the heater and accessories are complete and intact.
- Ensure the heater is installed on a level, stable surface.
- Verify the power socket meets AC 230V, 50/60Hz requirements.
- Do not use in bathrooms or areas with moisture.
Images and diagrams
- The control panel shows icons for WiFi, child lock, timer, and heating status.
- Wall mounting requires fixing brackets to the wall and slotting the heater into place.
Model compatibility
- Compatible with Amazon Alexa and Google Home.
- Requires 2.4GHz WiFi network.

Manual page author
Emily Carter
User documentation editor
Prepares concise manual descriptions and highlights the most useful setup, operation, and maintenance information for readers.