Power / EV Chargers
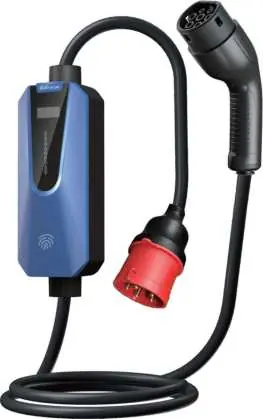
User Manual for EV Charger 22kW AC Portable Charger (Type 2)
Quick guide for the 22kW AC Portable EV Charger (Type 2). Includes installation safety, charging steps, display settings, and troubleshooting fault codes.
Quick answers from the manual
Quick answer
- This is a 22kW AC Portable EV Charger (Type 2). It features adjustable current, scheduling, and safety protections. Charging is initiated by plugging into the power source and then the vehicle. p. 1, 6, 8
Key actions
- Adjusting Current p. 11
- Setting Grounding p. 11
- Scheduling Charging p. 12
First start
- Insert the plug into the power supply, then insert the charging gun into the vehicle plug. p. 8
Show 5 more answers Show less
Problems and fixes
Red Light Flash 1 Time (E01)
Input voltage above 265V. Check that the input voltage is in the normal range.
p. 13, 14
Red Light Flash 2 Times (E02)
Input voltage below 85V. Check that the input voltage is in the normal range.
p. 13, 14Error codes
| Code | Meaning | Action | Pages |
|---|---|---|---|
| E01 | Overvoltage Protection | Check input voltage. | p. 13, 14 |
| E08 | Leakage Protection | Disconnect front-stage circuit breaker and reapply power after 5 seconds. | p. 13, 14 |
Maintenance and reset
- Turn off the RCBO before cleaning. p. 4
Technical specifications
| Parameter | Value | Meaning | Pages |
|---|---|---|---|
| Operating Voltage | 400Vac ±15% | Input voltage range | p. 7 |
| Output Current | 32A | Max output current | p. 7 |
Where to find it in the PDF
- Safety Precautions p. 4, 5
- Charging Steps p. 8
- Troubleshooting p. 14, 15
Table of contents
Manual images
Click an image to enlargeQuick Guide from the Manual
This manual provides instructions for the 22kW AC Portable EV Charger (Type 2). It covers safety precautions, installation, operation, and troubleshooting. Always ensure the RCBO is turned off before installation or cleaning. The device is designed for electric vehicle charging and should not be used with private generators.
Safety Precautions
- Installation: Do not install in strong magnetic fields, near wireless transmitting equipment, or in flammable/explosive environments. Avoid direct sunlight and bad weather.
- Operation: Do not submerge the charging gun in water. Do not use additional cords, adapters, or adaptors. Do not disassemble, repair, or modify the unit.
- Medical Devices: Radio waves may affect implanted medical devices like pacemakers. Consult manufacturers if you use such devices.
- Maintenance: Turn off the RCBO before cleaning. Do not use if the unit is cracked or defective.
Charging Steps

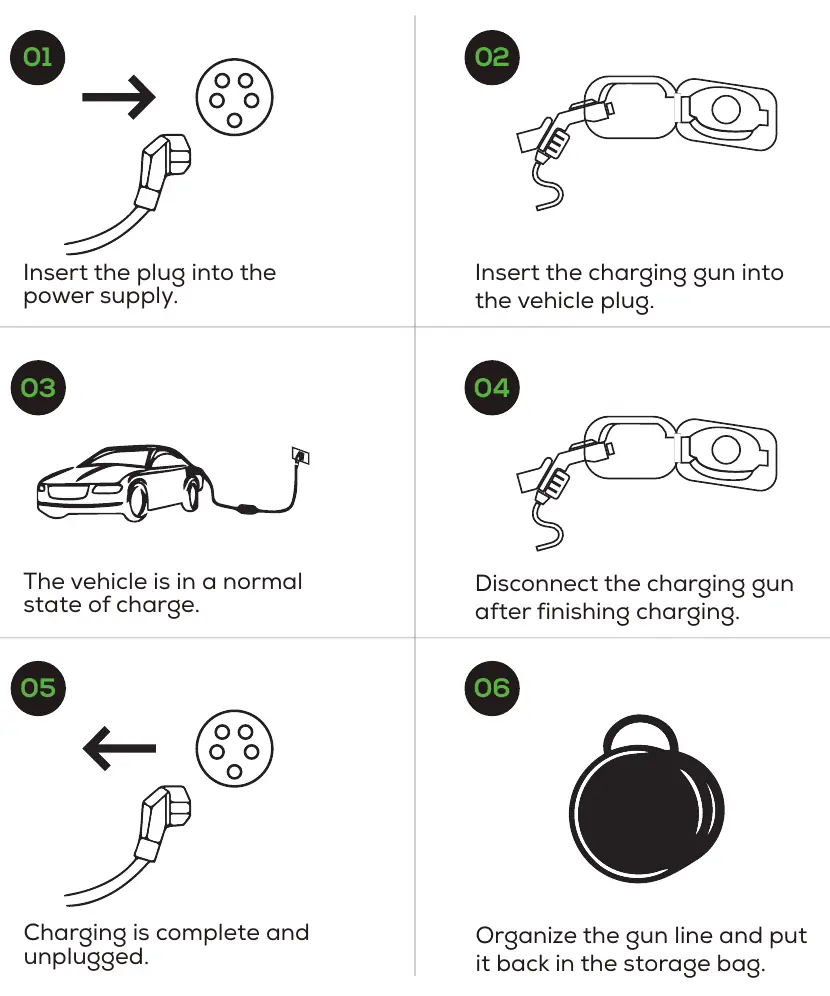
- Insert the plug into the power supply.
- Insert the charging gun into the vehicle plug.
- The vehicle will enter a normal state of charge.
- Disconnect the charging gun after finishing charging.
- Unplug the power supply.
- Organize the cable and store it in the bag.
Display and Settings
The charger features an LCD display showing real-time current, voltage, power, and charging status. You can adjust settings via the button interface:
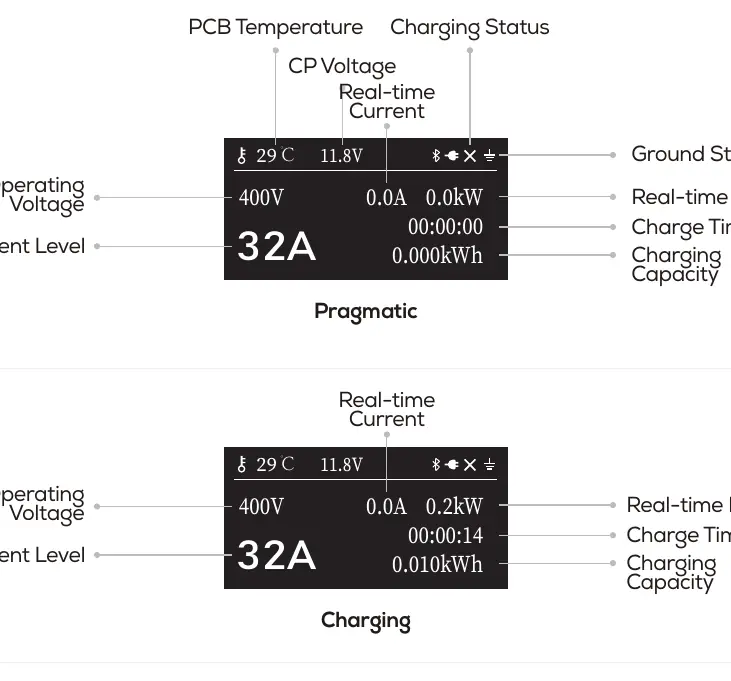
- Selecting Current Level: Long press the button in Standby Mode to enter the Menu. Select [POWER] to adjust the charging current.
- Grounding Settings: Select [GND] in the menu to toggle between Grounded and Ground-free modes.
- Appointment Time: Select [Appointment Time] in the menu to schedule charging up to 10 hours in advance.
Troubleshooting
The charger uses LED flash codes to indicate faults. If the indicator light does not come on, check the front-end power supply and AC cable. For specific fault codes (E01-E14), refer to the troubleshooting table in the manual. Common issues like over-temperature or over-current protection require stopping the charge or reducing the power.
Technical Specifications
- Operating Voltage: 400Vac ±15%
- Output Current: 32A
- Operating Frequency: 50/60Hz
- Operating Temperature: -25°C to +50°C
- Waterproof Rating: IP65
- Display: 1.3 Inch
Practical help
Common problems
Indicator light does not come on
Check front-end input power supply, inspect AC cable for damage, or contact technical support.
Red Light Flash 3 Times (E03)
Output current exceeds set upper limit. Reduce the vehicle charging current or adjust the charging post current.
Red Light Flash 4 Times (E04)
PCB motherboard over-temperature protection. Stop charging or reduce the power.
Red Light Flash 8 Times (E08)
Leakage protection triggered. Disconnect the front-stage circuit breaker and reapply power after 5 seconds.
Before use
- Ensure the RCBO is turned off before installation or cleaning.
- Check that the outlet is properly grounded.
- Ensure the charging gun is not covered and free from heat sources.
- Verify the charging gun connector is free of foreign objects.
- Do not use in bad weather or direct sunlight.
Show more Show less
Specs in practice
- Operating Voltage
- 400Vac ±15% input requirement.
- Output Current
- Maximum 32A charging current.
- Operating Temperature
- Safe operating range is -25°C to +50°C.
Images and diagrams
- Charging Steps: 1. Power plug, 2. Vehicle gun, 3. Charging, 4. Disconnect, 5. Unplug, 6. Store.
Model compatibility
- Type 2 connector.
- Not for use with private generators.
- Compatible with electric and hybrid vehicles.

Manual page author
Michael Turner
Technical manual editor