Garden / Brushcutters & Trimmers
User Manual for Fieldmann FZS 2050-E Electric Grass Trimmer
Quick guide for the Fieldmann FZS 2050-E electric grass trimmer. Includes assembly instructions, safety warnings, operation tips, maintenance, and technical specifications.
Quick answers from the manual
Quick answer
- The Fieldmann FZS 2050-E is an electric grass trimmer with a 1400W motor and 42cm cutting width. It uses a semi-automatic nylon line head or a metal blade. p. 1, 16
Key actions
- Assemble the shaft p. 8
- Install the trimmer head or blade p. 8, 10
- Start the trimmer p. 11
First start
- Check all screws, ensure the guard is installed, wear protective gear, and ensure no one is within 15m before starting. p. 10, 11
Problems and fixes
Excessive vibration
Stop the motor immediately and check if the blade or head is mounted correctly.
p. 10Maintenance and reset
- Clean with a damp cloth, do not submerge. Sharpen the line cutter with a file. p. 13
Technical specifications
| Parameter | Value | Meaning | Pages |
|---|---|---|---|
| Power | 1400 W | Motor power | p. 16 |
| Cutting width | 42 cm | Cutting path | p. 16 |
Where to find it in the PDF
- Assembly p. 8, 9, 10
- Operation p. 11, 12
Table of contents
Manual images
Click an image to enlargeQuick guide from the manual
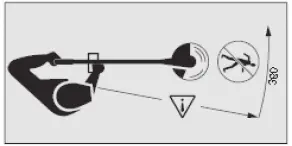
The Fieldmann FZS 2050-E is an electric grass trimmer designed for garden maintenance. Before use, ensure all screws are tightened, the protective guard is installed, and you are wearing appropriate protective gear (eye, ear, and face protection). Maintain a 15-meter safety distance from other people and animals. Do not use in wet conditions or rain.
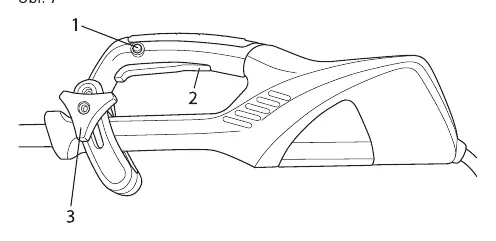
Description of the device
The trimmer consists of a motor unit with a main switch and safety lock, an adjustable handle, a split shaft, a protective guard, and a cutting head (either a semi-automatic nylon line head or a metal blade).
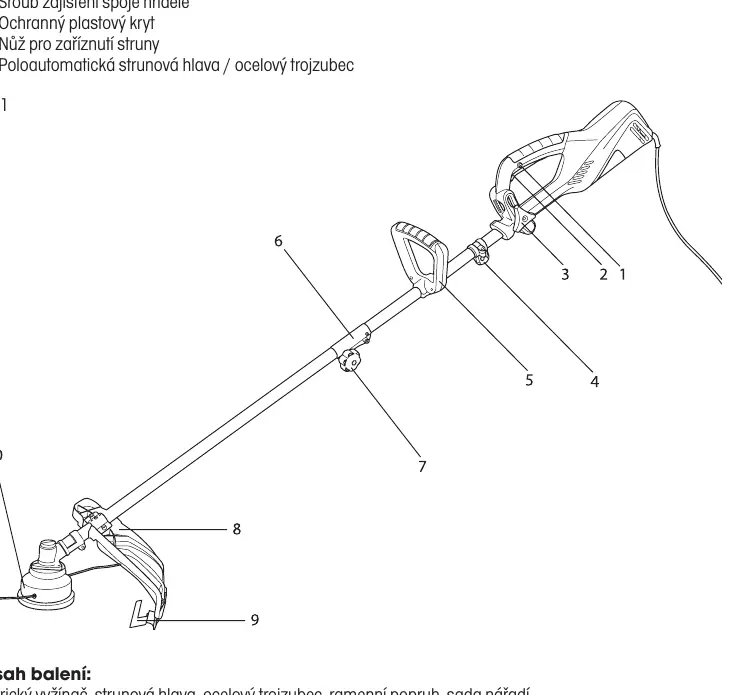
Assembly
- Shaft: Insert the lower shaft into the upper shaft until the locking pin clicks into the hole. Secure by tightening the screw.
- Guard: Attach the protective plastic guard to the shaft using the provided screws.
- Handle: Mount the handle on the shaft and adjust to your preferred position before tightening.
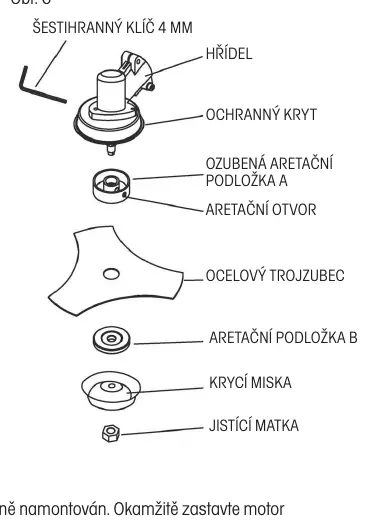
- Trimmer Head/Blade: Lock the shaft using the provided hex key. Install the locking washer, then the trimmer head or metal blade. Secure with the locking nut (note: reverse thread).
Operation
To start the trimmer, press the safety lock on the handle, then press the main switch. The trimmer will operate at maximum speed. To stop, release the main switch. When using the nylon line head, tap the head gently on the ground while running to feed more line automatically.
Maintenance
- Clean the device with a damp cloth and mild soap. Do not submerge in water or use a hose.
- Regularly check the trimmer head and blade for damage.
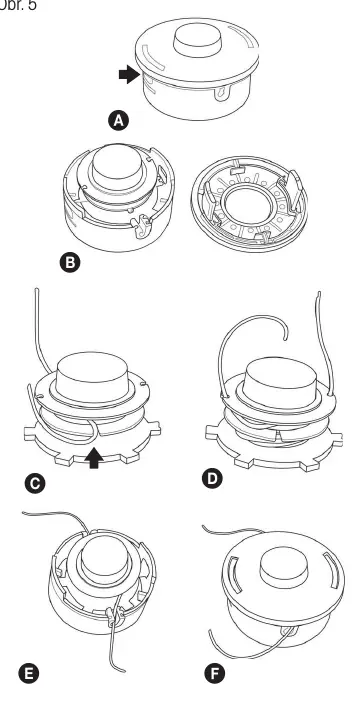
- If the nylon line runs out, wind new 1.6mm line onto the spool in a clockwise direction.
- Sharpen the line cutter on the guard periodically with a file.
Technical Data
- Power: 1400 W
- Voltage: 230-240V / 50Hz
- Cutting width: 42 cm
- Line diameter: 1.6 mm
- Weight: 6.0 kg
Manufacturer information
Fieldmann
Practical help
Common problems
Excessive vibration
Stop the motor immediately. Check if the blade or trimmer head is mounted correctly and securely.
Line not feeding
Tap the trimmer head gently on the ground while the motor is running to trigger the semi-automatic feed.
Before use
- Check all screws, nuts, and mounting elements are tight.
- Ensure the plastic guard is properly installed.
- Check for damage to the blade or trimmer head.
- Wear eye, ear, and face protection.
- Ensure no people or animals are within a 15-meter radius.
- Ensure the cutting head moves freely.
Specs in practice
- Cutting width
- 42 cm path width per pass.
- Line diameter
- 1.6 mm nylon line required.
Images and diagrams
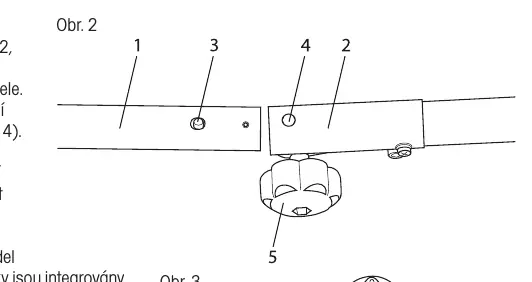
- Shaft assembly (Obr 2)
- Guard installation (Obr 3)
- Trimmer head/blade installation (Obr 4, 6)
- Line winding instructions (Obr 5)
Model compatibility
- Use only original trimmer head.
- Use only 1.6mm nylon line.
- Do not use wire or wire-reinforced line.

Manual page author
David Miller
Documentation analyst
Organizes user manual content into clear summaries, with attention to model details, product context, and everyday usability.