Toys / RC Models & Drones
User Manual for FMS 1220mm Ranger V2 RC Airplane
Comprehensive user manual for the FMS 1220mm Ranger V2 RC airplane. Includes assembly instructions, pre-flight checks, transmitter setup, center of gravity balancing, and a detailed guide for the included brushless speed controller.
Table of contents
Manual images
Click an image to enlargeQuick Guide for FMS 1220mm Ranger V2
The FMS 1220mm Ranger V2 is a high-wing RC airplane designed for stability and ease of assembly. This manual provides essential instructions for assembly, setup, and safe operation. Always perform a range check before the first flight and ensure the center of gravity is correctly balanced.
Model Assembly
The assembly process involves several key steps to prepare the airframe for flight:

- Rear Fuselage: Thread the extension wire through the front fuselage, align the rear fuselage, and secure it with the included HKM3.0*10mm screws.
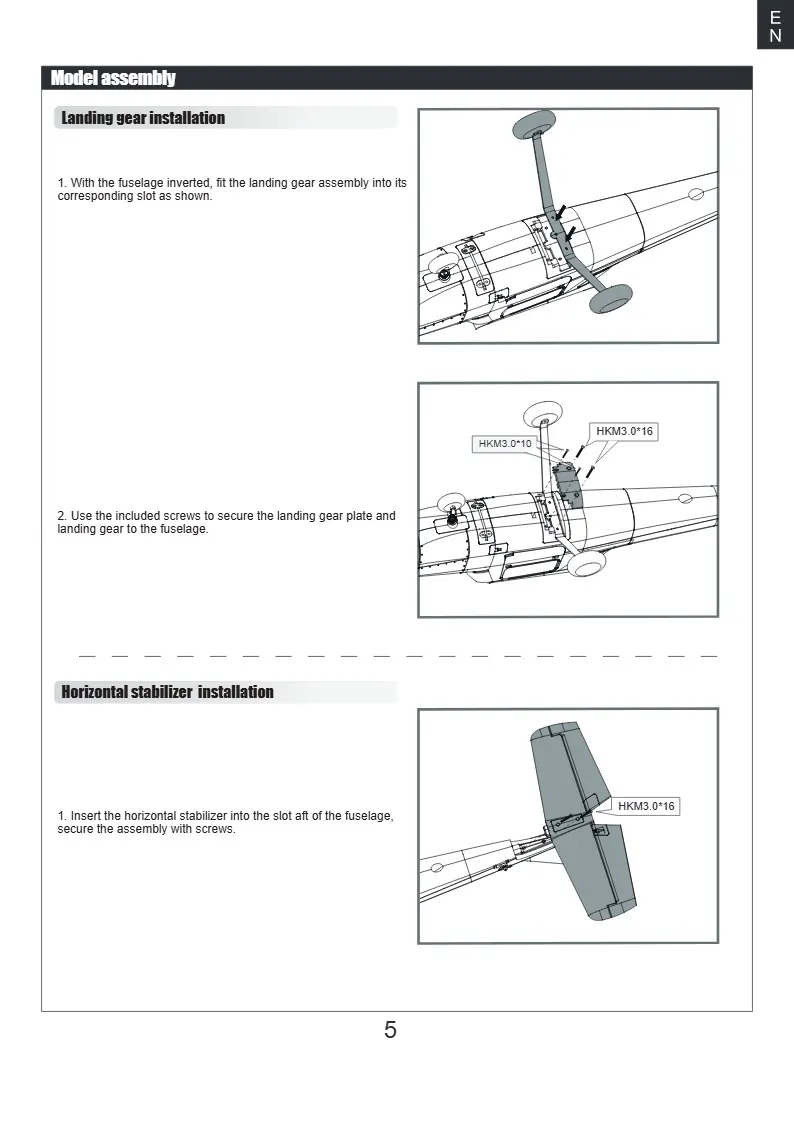
- Landing Gear: With the fuselage inverted, fit the landing gear into the slot and secure it with the provided screws.
- Horizontal Stabilizer: Insert the stabilizer into the slot at the rear of the fuselage and secure it with screws.
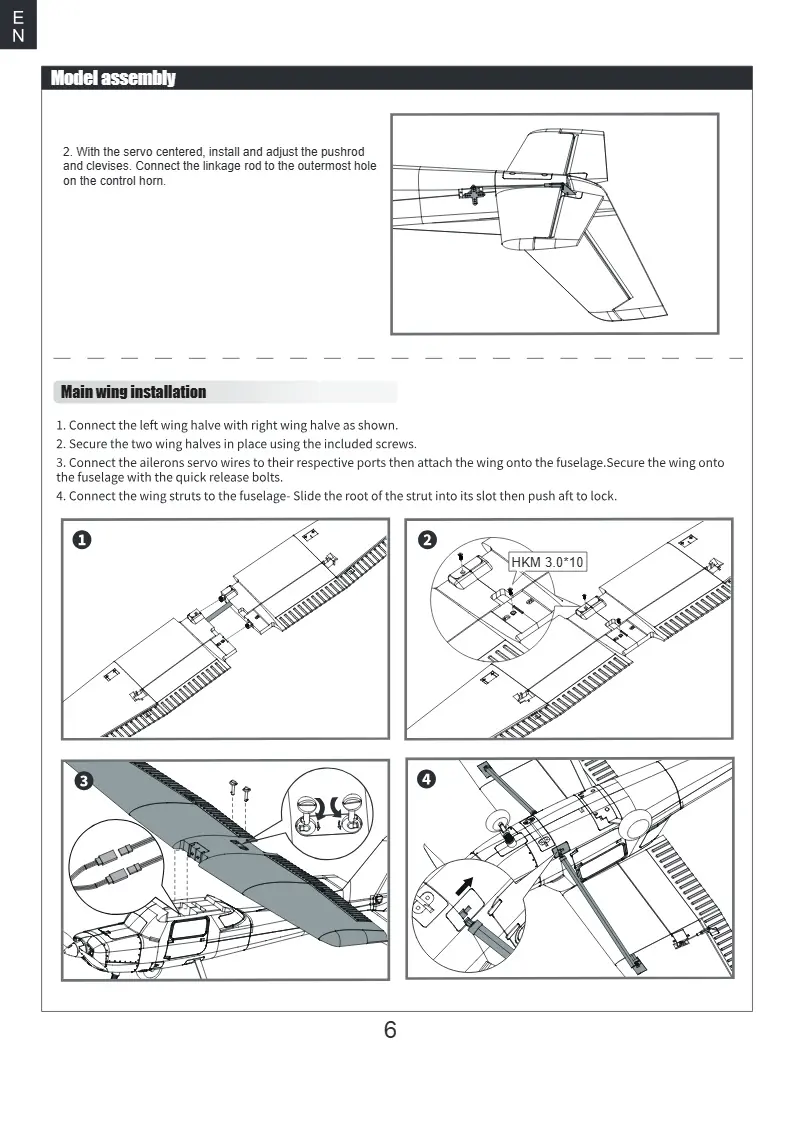
- Main Wing: Connect the left and right wing halves, secure them with screws, attach the wing to the fuselage using quick-release bolts, and connect the wing struts.
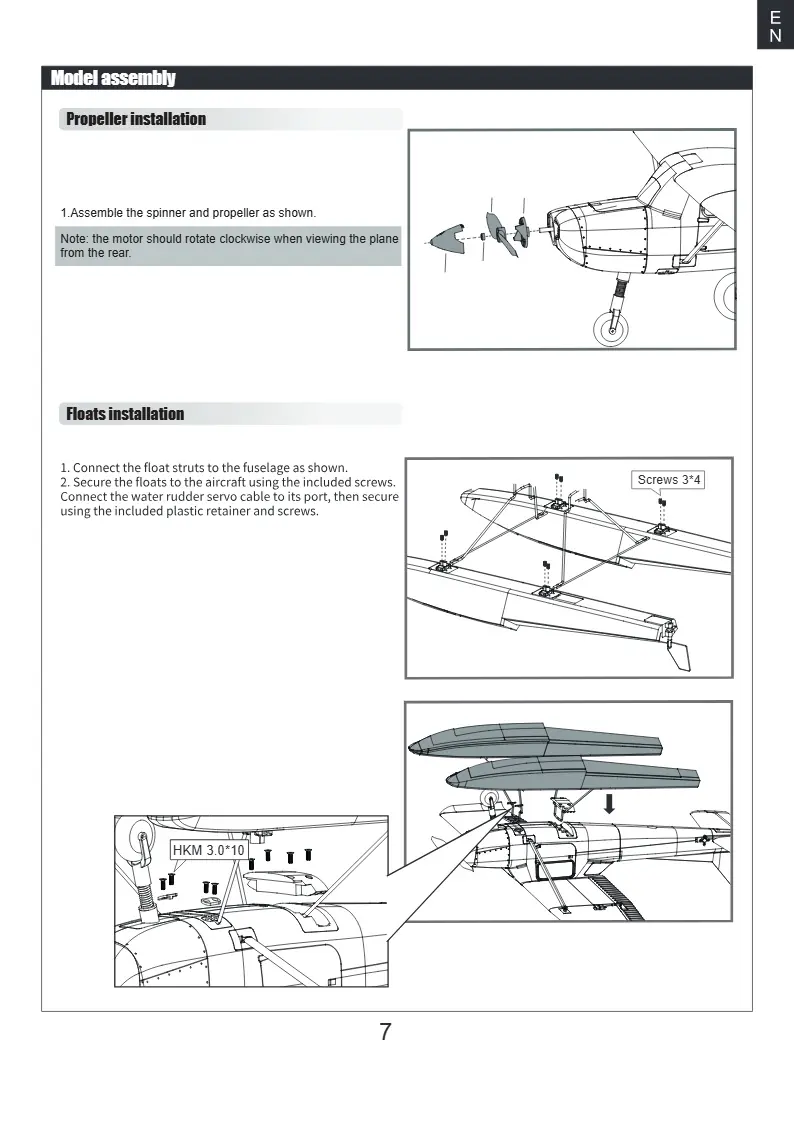
- Propeller: Assemble the spinner and propeller onto the motor shaft.
- Floats (Optional): Connect the float struts to the fuselage and secure them with the provided screws and plastic retainer.
Transmitter and Model Setup
Proper setup is critical for safe flight:
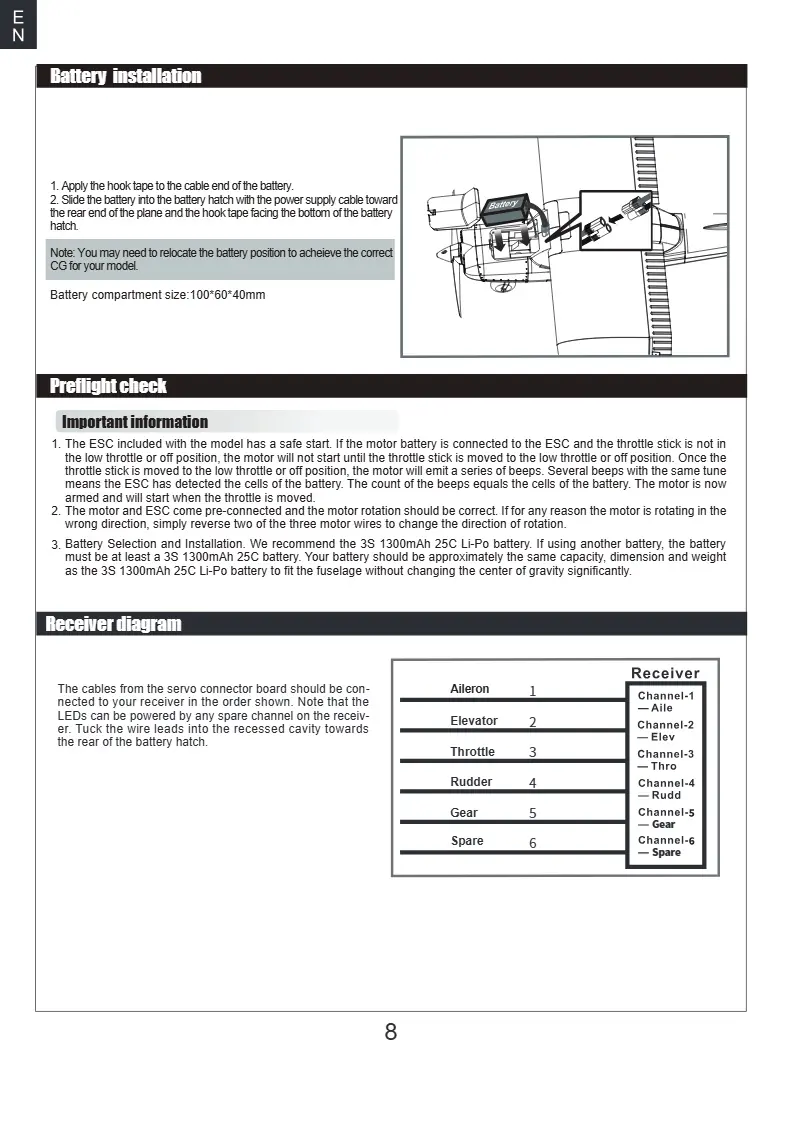
- Battery Installation: Apply hook tape to the battery and slide it into the battery hatch. Ensure the power cable faces the rear.
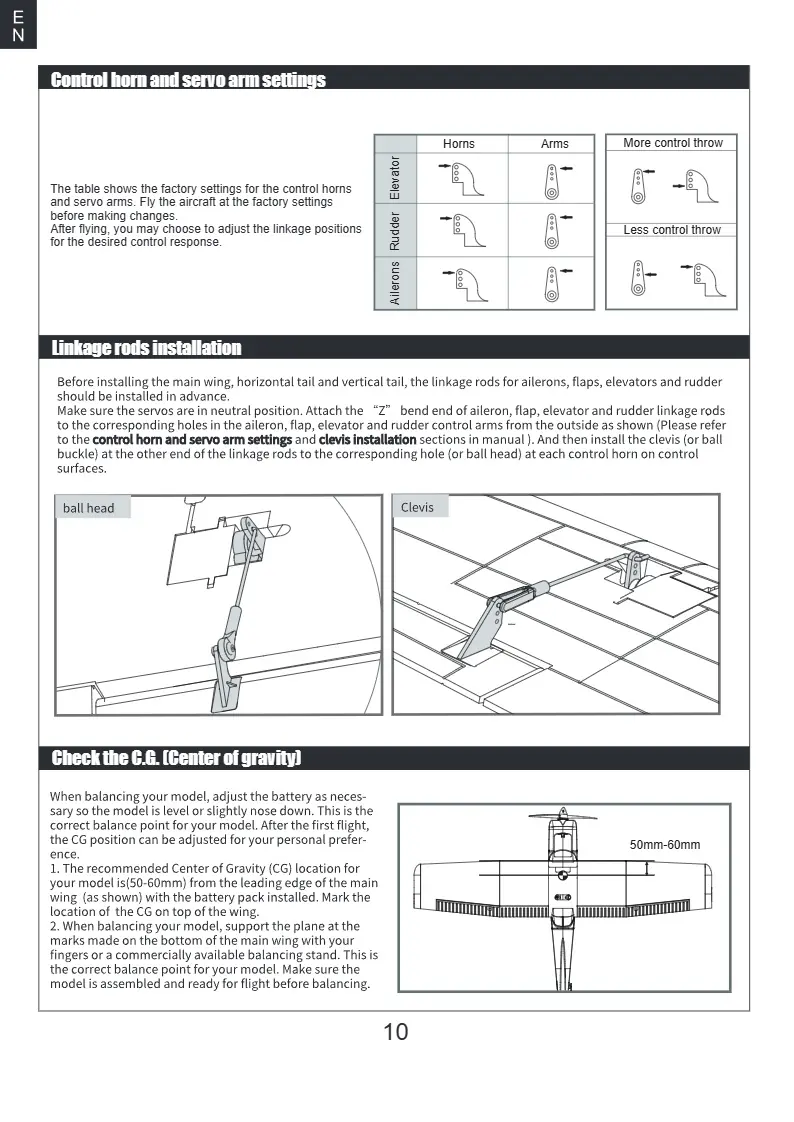
- Center of Gravity (CG): The recommended CG is 50-60mm from the leading edge of the main wing. Adjust the battery position to achieve this balance.
- Control Throws: For the first flight, use low rates. High rates are intended for extreme maneuvering.
- Linkage Rods: Ensure servos are in the neutral position before installing linkage rods and clevises.
Flying the Model
Follow these guidelines for a successful flight:
- Flying Site: Choose a wide-open space clear of buildings, trees, and power lines.
- Range Check: Always perform a ground range test before the first flight of each session.
- Flight Time: Use a timer to monitor flight duration. Land immediately when the battery voltage drops or the timer sounds.
- Take Off: Apply power slowly to keep the model straight and accelerate quickly.
Brushless Speed Controller (ESC)
The included ESC is pre-programmed but can be adjusted using your transmitter:
- Calibration: Calibrate the throttle range before the first flight.
- Programming: Enter program mode by moving the throttle stick to the top position, connecting the battery, and waiting for the specific tones. You can adjust settings like brake, battery type, cutoff mode, and timing.
Troubleshooting
If you encounter issues, check the following:
- Motor not responding: Ensure the ESC is armed and the throttle channel is not reversed.
- Extra vibration: Check for damaged propeller, spinner, or loose motor mount.
- Reduced flight time: Recharge the flight battery or check for damage.
- Controls reversed: Reverse the channel settings on your transmitter.
Manufacturer information
FMS Model
Practical help
Common problems
Motor will not start
Ensure the ESC is armed, the throttle stick is in the lowest position, and the battery is connected correctly.
Controls are reversed
Check the channel settings on your transmitter and reverse the direction if necessary.
Extra propeller noise or vibration
Inspect the spinner, propeller, and motor mount for damage. Tighten all parts and ensure the propeller is installed correctly.
Reduced flight time or underpowered
Check if the flight battery is fully charged or if the battery is damaged.
Before use
- Ensure all screws on the aircraft are tightened.
- Verify the battery is fully charged.
- Perform a ground range check.
- Confirm all control surfaces move in the correct direction.
- Check that the Center of Gravity (CG) is 50-60mm from the leading edge of the main wing.
Specs in practice
- Flying weight
- ~1000g
Images and diagrams
- Receiver diagram: Shows the correct channel connections for Aileron (1), Elevator (2), Throttle (3), Rudder (4), Gear (5), and Spare (6).
- Control throws table: Provides recommended high and low rate settings for Elevator, Aileron, and Rudder.
Model compatibility
- Recommended battery: 3S 1300mAh 25C Li-Po.

Manual page author
Michael Turner
Technical manual editor
Reviews PDF manuals for structure, safety notes, and practical product details so readers can find the right information quickly.