Electronics / Networking
User Guide for Fortinet FortiAP 231FL Wireless Access Point
Quick start guide for the Fortinet FortiAP 231FL wireless access point. Includes setup instructions, default login credentials, mounting procedures, and technical specifications.
Quick answers from the manual
Quick answer
- The FortiAP 231FL is a wireless access point. It can be powered via PoE (802.3af/at) or a 12V DC 2.5A adapter. Default local login is 192.168.1.2 (admin/blank). p. 3, 4, 6
Key actions
- Register device p. 2, 3
- Mounting p. 5
First start
- Connect the device to a network via LAN1 (PoE) or power it via 12V adapter. Access the web interface at 192.168.1.2 or configure via FortiAP Cloud. p. 4
Show 4 more answers Show less
Problems and fixes
Device not connecting
Check network cables and ensure the device is authorized on the FortiGate or configured in FortiAP Cloud.
p. 4Maintenance and reset
- Use the reset button to reset the device. p. 6
Technical specifications
| Parameter | Value | Meaning | Pages |
|---|---|---|---|
| Operating Temperature | 0°C to 45°C | Ambient operating temperature range | p. 7 |
| Power | 802.3af/at PoE or 12V DC 2.5A | Power input requirements | p. 4, 6 |
Where to find it in the PDF
- Setup Options p. 4
- Bracket Installation p. 5
- Interfaces p. 6
Table of contents
Manual images
Click an image to enlargeQuick guide from the manual
The FortiAP 231FL is a wireless access point designed for professional network environments. This guide covers the initial setup, mounting, and basic configuration of the device.
Package Contents
Ensure your package contains the following items:
- FortiAP 231FL Device
- QuickStart Guide
- 9/16" Ceiling Mounting Bracket
- 15/16" Ceiling Mounting Bracket
- 8x Mounting Screws with 8x Anchors
Setup Options
The device can be powered using an 802.3af/at PoE injector, a FortiGate PoE port, or an optional 12V DC 2.5A power adapter.
FortiAP Cloud
To use FortiAP Cloud:
- Connect the FortiAP LAN port to your network.
- Log in to your FortiCloud account.
- Click Inventory, select Import AP Key, and enter the Cloud Key found on the device sticker.
Direct Connection
To connect directly to a FortiGate:
- Connect the FortiAP LAN port to the FortiGate Ethernet port.
- Preauthorize the FortiAP on your FortiGate, or wait for the device to appear on the Managed FortiAP page in FortiOS.
Network Connection
To configure via web interface:
- Connect to the FortiAP using the default IP 192.168.1.2.
- Use username admin and a blank password.
- Specify the FortiGate IP using the command: cfg -a AC_IPADDR=0.0.0.0 followed by cfg -c.
Bracket Installation
The device mounts on a ceiling using the provided T-rail brackets.
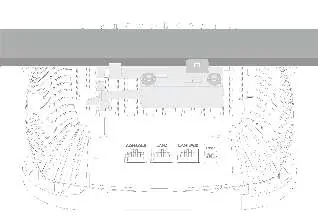
- Select the bracket matching your T-rail size: 1.43cm (9/16in) or 2.38cm (15/16in).
- With the ports facing you, slide the bracket onto the device from left to right.
- Hold the device against the ceiling T-rail and push until it snaps into place.
Interfaces and LED Indicators
The device features several ports and status indicators:
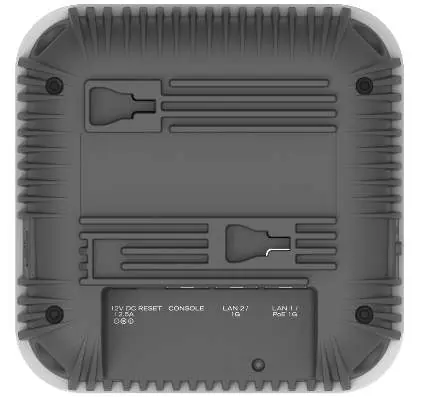
- LAN 1 (PoE): 1 Gbps 802.3at PoE Ethernet interface.
- LAN 2: 1 Gbps Ethernet interface.
- Console: RJ-45 CLI management interface.
- USB 3.0: Software-enabled power (9A/5V).
- Reset: Resets the device.
- LEDs: Provide status for Power, LAN 1, LAN 2, WiFi (2.4GHz/5GHz), and Scanning.
Safety and Regulatory
This equipment is intended for indoor use only. It must be operated in a Network Environment 0 per IECTR 62101. Ensure a minimum distance of 20cm between the radiator and your body during operation. Operating temperature is 0°C to 45°C.
Manufacturer information
Fortinet, Inc.
Practical help
Common problems
Device does not power on
Ensure you are using a compatible 802.3af/at PoE injector or a 12V DC 2.5A power adapter.
Cannot access web interface
Ensure your computer is on the same network segment and use the default IP 192.168.1.2 with username 'admin' and a blank password.
Before use
- Register the device at support.fortinet.com
- Verify all package contents are present
- Ensure a PoE injector or 12V power supply is available
- Identify the correct T-rail size (9/16" or 15/16") for ceiling mounting
Show more Show less
Specs in practice
- Operating Temperature
- 0°C to 45°C
Images and diagrams
- Bracket installation: Select the bracket size, slide it onto the device, and snap onto the ceiling T-rail.
Model compatibility
- Indoor use only.
- Requires 802.3af/at PoE or 12V DC 2.5A power source.

Manual page author
Emily Carter
User documentation editor