Electronics / Networking
User Manual for Fortinet FortiSwitch 148F Series
Quick start guide for the Fortinet FortiSwitch 148F series. Includes installation instructions, port configuration, setup via GUI/CLI, and technical specifications for FS-148F, FS-148F-PoE, and FS-148F-FPoE models.
Table of contents
Manual images
Click an image to enlargeQuick guide from the manual
This guide provides essential setup and installation information for the Fortinet FortiSwitch 148F series, including the FS-148F, FS-148F-PoE, and FS-148F-FPoE models. The default management IP address is 192.168.1.99, and the default login credentials are username admin with no password.
Installation
The device can be installed in a standard 19-inch rack or placed on a desktop.
Rack Installation
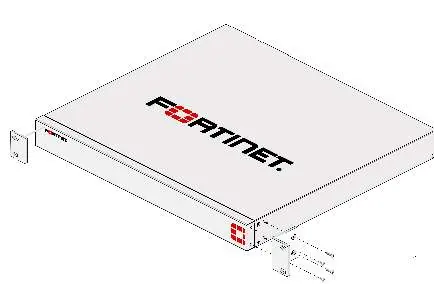
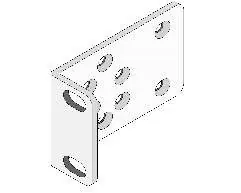
- Attach the provided rack-mount brackets to the device using the included screws.
- Position the device in the rack and slide it into place.
- Fasten the rack screws to secure the device.
- Ensure there is at least 1.5 inches of clearance above and below the device for proper airflow.
Desktop Option
Place the unit on a flat, clean, and stable surface. Ensure at least 1.5 inches of clearance around the device for adequate airflow.
Basic Connections
Connect the device to a power outlet using the provided power cable. It is recommended to connect the switch to an uninterruptible power supply (UPS) to protect against power outages.
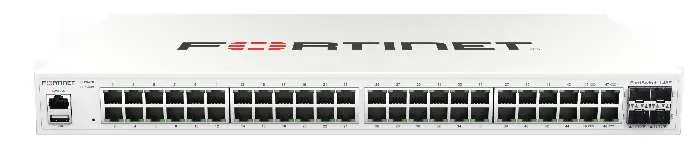
Ports and Interfaces
- Console (RJ45): Used for client management.
- USB (2.0): Reserved for future use.
- Ports 1-48 (RJ45): GE network connections.
- Ports 49-52 (SFP+): 10Gbps SFP connections.
- FortiLink Ports: 45-52 (RJ45 & SFP+) for FortiLink interface connections.
Setup Options
You can configure the device using one of the following methods:
- GUI: Connect a management computer to port 1. Set the computer's IP to 192.168.1.1 (subnet 255.255.255.0) and visit https://192.168.1.99 in a web browser.
- CLI: Connect a console cable to the console port. Use a terminal program with settings: Baud rate 115200, Data bits 8, Parity None, Stop bits 1, Flow control None.
- FortiLink: Connect the FortiLink port to a FortiGate unit and authorize the device via the FortiGate interface.
- FortiCloud: Register the device at support.fortinet.com and manage it via fortilan.forticloud.com.
Technical Specifications
- FS-148F: 100-240V AC, 1.5A Max, 50/60Hz.
- FS-148F-PoE: 100-240V AC, 7A Max, 50/60Hz, PoE Max 370W.
- FS-148F-FPoE: 100-240V AC, 12A Max, 50/60Hz, PoE Max 740W.
- Operating Temperature: 0°C to 45°C.
Official resources from the manual
Manufacturer information
Fortinet, Inc.
Practical help
Common problems
Cannot access the GUI
Ensure your management computer is configured with a static IP address in the 192.168.1.x range (e.g., 192.168.1.1) and subnet mask 255.255.255.0.
No link established on ports
Check that the Ethernet cable is securely connected and that the port LEDs indicate activity. Verify the device is powered on.
PoE not providing power
Verify that the total power draw of connected devices does not exceed the PoE Max budget (370W for PoE model, 740W for FPoE model).
Before use
- Verify the power source matches the requirements (100-240V AC).
- Ensure you have a 19-inch rack or a stable, flat surface for installation.
- Have an Ethernet cable ready for management connection.
- Have a console cable (DB9 to RJ45) available if using CLI configuration.
- Ensure at least 1.5 inches of clearance around the device for airflow.
Specs in practice
- Console Port
- An RJ45 port used for direct command-line interface (CLI) management of the switch.
Images and diagrams
- Front panel LEDs provide status for Power, Alarm, and individual port speed/activity.
- Rear panel contains the power supply input.
Model compatibility
- Requires a standard 19-inch rack for rack-mount installation.
- GUI is compatible with most standard web browsers.
- PoE models support 802.3af/at standards.

Manual page author
David Miller
Documentation analyst
Organizes user manual content into clear summaries, with attention to model details, product context, and everyday usability.