Sports / Fitness
User Manual for Fortis 10KG Flywheel Spin Bike
Get started with your Fortis 10KG Flywheel Spin Bike. This guide covers step-by-step assembly, safe operation, display usage, resistance adjustments, and maintenance tips to ensure a safe and effective workout.
Quick answers from the manual
Quick answer
- This manual provides assembly instructions, operation guidelines, and troubleshooting steps for the Fortis 10KG Flywheel Spin Bike. p. 1, 6, 9, 13
Key actions
- Assemble the bike using the provided components and steps. p. 6, 7, 8
- Adjust resistance using the tension knob. p. 9
- Adjust seat and handlebar height. p. 10
First start
- Check all components are included before assembly. p. 4
- Tighten all bolts and nuts before beginning your workout. p. 3
Problems and fixes
Display not working correctly.
Check that the lower sensor wire is connected to the upper sensor wire and the upper sensor wire is plugged into the display. Ensure the batteries are installed correctly.
p. 13
No resistance.
Inspect the upper tension cable connection, turn the tension knob to its lowest level, and adjust the tension strap on the flywheel.
p. 13Maintenance and reset
- Reset display mode to 0. p. 9
- Regularly maintain bolts, nuts, and chain guards. p. 3, 13
Technical specifications
| Parameter | Value | Meaning | Pages |
|---|---|---|---|
| Maximum user weight | 120kg | The maximum weight capacity for the user. | p. 3 |
| Batteries | 2x AA | Battery type required for the display screen. | p. 9 |
Where to find it in the PDF
- Safety & Warnings p. 3
- Components List p. 4, 5
- Assembly Instructions p. 6, 7, 8
- Operation & Adjustments p. 9, 10
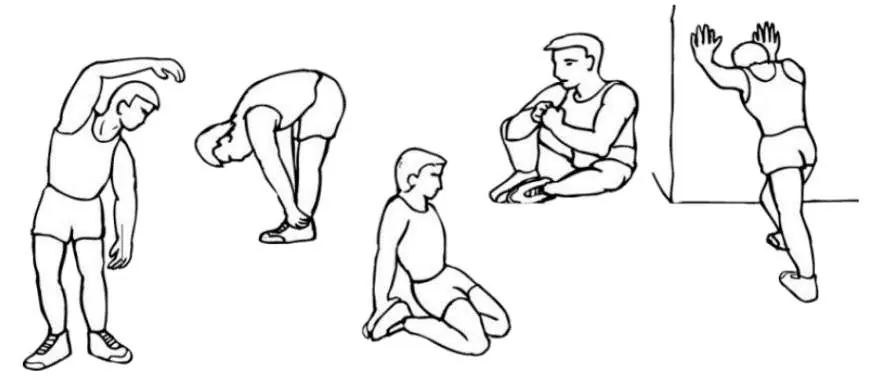
- Exercise Guide p. 11, 12
- Troubleshooting & Maintenance p. 13
Table of contents
Manual images
Click an image to enlargeQuick Start Guide
The Fortis 10KG Flywheel Spin Bike is designed for home fitness. Before beginning any exercise program, consult your doctor, especially if you have pre-existing health conditions. Ensure the bike is placed on a solid, level surface with at least 0.5 meters of free space around it. The maximum user weight for this equipment is 120kg.
Safety Information
- Regular Maintenance: Inspect chain guards and safety devices before each use.
- Tighten Hardware: Ensure all bolts and nuts are tightened before starting your workout.
- Health Precautions: Stop exercising immediately if you experience pain, chest tightness, irregular heartbeat, shortness of breath, or dizziness.
- Environment: Keep children and pets away from the equipment.
- Clothing: Wear suitable clothing; avoid loose items that could get caught in the mechanism.
Assembly Instructions
Before assembly, verify all components are present. Some small parts may be pre-fitted.
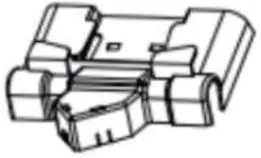
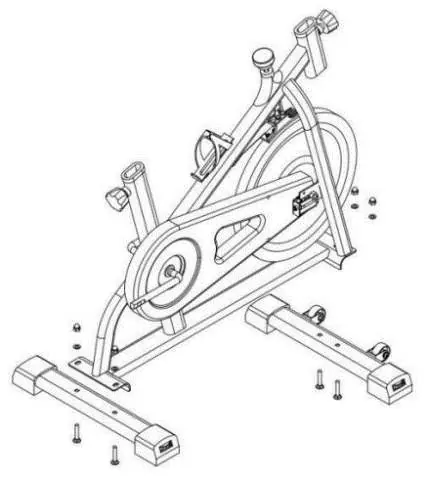
- Step 1: Stabiliser Assembly: Secure the front and rear stabilisers to the main body using the provided T1 Allen bolts, washers, and nuts.
- Step 2: Pedal Assembly: Attach the left and right pedals to their respective cranks.
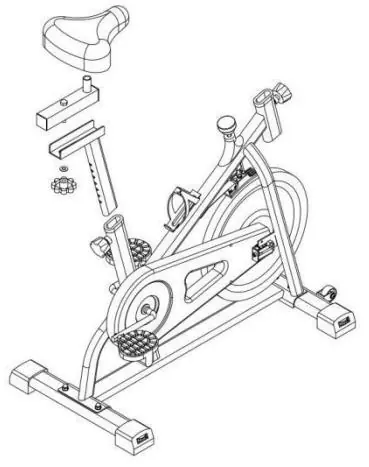
- Step 3: Seat Assembly: Remove the M1 lock knob, insert the seat post into the main body, secure it, and attach the seat to the adjustment frame.
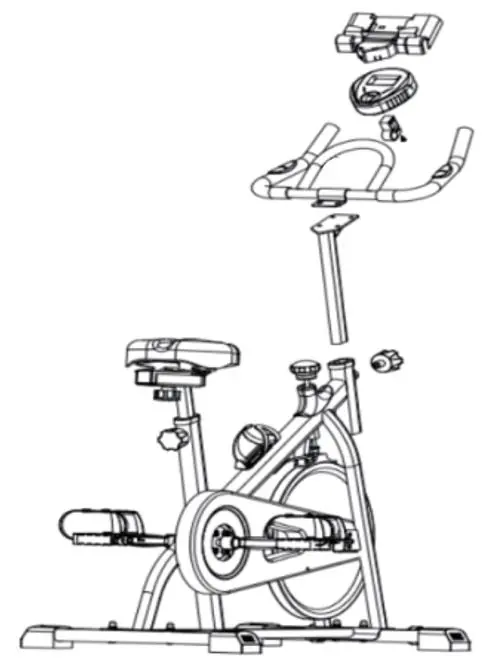
- Step 4: Handlebars & Display: Insert the handlebar post into the main body, secure the handlebars, attach the display holder and screen, connect sensor wires, and install the phone holder.
Operation and Adjustments
Display Screen: The display tracks Time, Speed, Distance, and Calories. It features a Scan function that cycles through these metrics every 4 seconds. The screen turns off automatically after 4-5 minutes of inactivity. If the display does not light up, replace the 2x AA batteries.
Resistance Adjustment: Use the tension knob located under the handlebar. Turn it clockwise to increase resistance and anti-clockwise to reduce it. Pressing the knob acts as an emergency brake.
Adjustments: The seat and handlebars can be adjusted for height and position to ensure a comfortable, ergonomic fit. Ensure all knobs are tightened after adjustment.
Maintenance and Troubleshooting
Maintenance: Regularly check that all bolts and nuts are fully tightened. Dispose of used batteries as hazardous waste.
Troubleshooting:
- Display not working: Check that the lower sensor wire is connected to the upper sensor wire and that the upper wire is plugged into the display. Verify batteries are installed correctly.
- No resistance: Inspect the upper tension cable connection. Turn the tension knob anti-clockwise to its lowest level. Loosen the tension strap on the flywheel, pull it through the buckle until resistance is felt, and lock it back.
Manufacturer information
Fortis
Practical help
Common problems
Display not working
Check that the lower sensor wire is connected to the upper sensor wire and that the upper wire is plugged into the display. Ensure batteries are installed correctly.
No resistance
Inspect the upper tension cable connection. Turn the tension knob anti-clockwise to its lowest level. Loosen the tension strap on the flywheel, pull it through the buckle until resistance is felt, and lock it back.
Before use
- Ensure all bolts and nuts are fully tightened.
- Check that chain guards are fitted correctly.
- Place the bike on a solid, level surface.
- Ensure at least 0.5 meters of free space around the bike.
- Verify user weight is under 120kg.
- Check that the sensor wire is connected.
Specs in practice
- Max User Weight
- 120kg
- Display Functions
- Time, Speed, Distance, Calories, and Scan mode.
Images and diagrams
- Assembly diagrams illustrate the connection of stabilizers, pedals, seat post, and handlebar assembly.
- The display screen section shows how to access the battery compartment.
Model compatibility
- Designed for adult use only.
- Not suitable for therapeutic use.

Manual page author
Emily Carter
User documentation editor
Prepares concise manual descriptions and highlights the most useful setup, operation, and maintenance information for readers.